Getting started with Display-o-Tron 3000
Introduction
Display-o-Tron is the king of style when it comes to LCD display add-ons. We found a super slimline, 3-line, 16 character display and created our own custom, three LED, RGB backlight and diffuser assembly for it. These LEDs are driven by the same easy-to-drive chip we use in the PiGlow. With plenty of LED channels left over we had room to add a 9 LED bargraph display, which you can use as a CPU meter, volume level indicator or whatever else you can imagine. Finally, it's armed with a 4 direction joystick with a pressable button so you can take control of your projects.
We've also created a whole wealth of software and examples for people of all levels, so you can go from writing text to the display with just 2 lines of Python, right the way to building interactive menus, games and more! The Dot3k menu framework, included in the Python module, will take care of displaying text menus, scrolling long text and handling input- it also supports plugins so you can expand its functionality.
If all this sounds daunting, don't worry, you can write text to the Display-o-Tron with two lines of Python:
from dot3k import lcd
lcd.write("Hello World")
Or set the backlight:
from dot3k import backlight
backlight.rgb(255,0,255)
Display-o-Tron uses both i2c and SPI, making it a little tricky to get up and running. This guide addresses all the steps to get it going, and all the gotchas we've encountered thus far. Below you'll learn how to:
- Make sure Raspbian is up-to-date to avoid any problems
- Install the dot3k Python modules
- Download the dot3k examples from GitHub
- Run some simple example code from the dot3k examples
Before we begin
If you're looking at your Pi command-line ( a black screen with white text ) then you're good to go. Otherwise, locate the LXTerminal icon on your desktop and double-click it. All of the set-up steps will be done at the command-line.
You'll also need an internet connection for most of these steps, so make sure a network cable is plugged in, or you've got WiFi set up!
Make sure Raspbian is up-to-date
The version of Linux running on your Pi is called Raspbian, and it's always good practise to keep it up-to-date for the latest fixes. If you have a problem with Display-o-Tron then these are likely to be the first debug steps we ask you to undertake, it's sensible to get them out of the way before we start.
If you're familiar with updating your Pi, go right ahead, otherwise you can read our guide to "Keeping your Pi Up-to-date".
Setting up Display-o-Tron
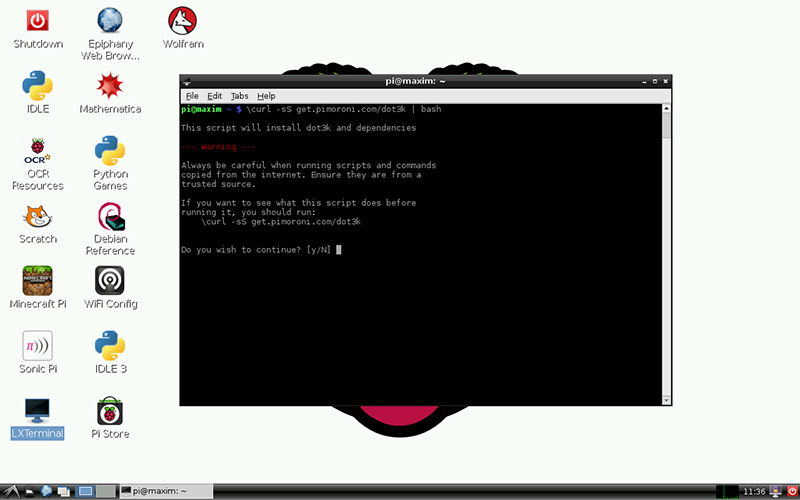
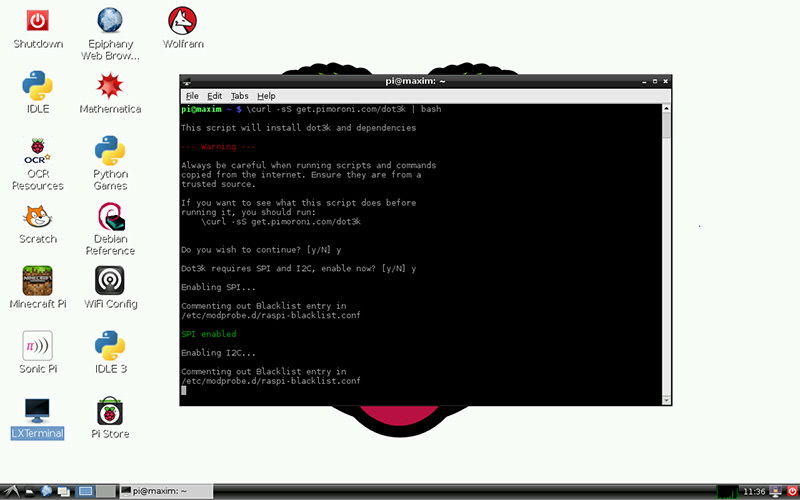
Display-o-Tron needs both i2c and SPI to work. We've created a one-liner ( that's one line of text you enter at the Terminal ) to get everything installed.
First, make sure you've powered off your Pi, connected your Display-o-Tron 3000 and powered back on. You don't strictly need it plugged in to install the software, but you're going to need it to verify everything has installed correctly.
With Step 2 above in mind, and making absolutely sure you've got an internet connection on your Pi, fire up the Terminal and enter the following command:
curl https://get.pimoroni.com/displayotron | bash

This install script will guide you throught the setup process for Display-o-Tron 3000. As part of this process it will ask if you want to set up SPI and I2c, make sure you answer yes.

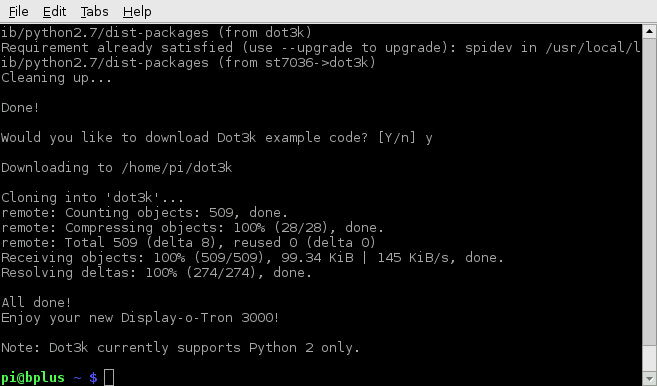
After this, it'll update you software, install the dot3k modules and ask if you want to download the example code. Say yes again, and wait for it to finish.

Testing Display-o-Tron
Once the example code has finished downloading the script will exit and you'll be able to type commands again.

At this point may see "Install Complete" on your Display-o-Tron with a green background. If so, great! this means the software has installed correctly.
To see your Dot3k in action, navigate into the dot3k examples folder like so:
cd ~/Pimoroni/displayotron/examples/basic
Now, let's test everything at once, run:
sudo ./joystick.py
And press the Display-o-Tron joystick in all 4 directions, then press it down. You should see text appear on the LCD and the backlight should change to a different colour for each joystick direction.c
Troubleshooting
The setup command doesn't do anything!
If the setup command just exits out immediatelly to a new prompt it's likely you've not got an internet connection on your Pi. Verify your connectivity by typing:
ping google.com
If you've not got a connection then one line will show up, and nothing much else will happen until you press Ctrl+C to exit. Check your WiFi connection or Ethernet Cable and try again.
You see an error like "no module named dot3k.joystick"
This usually means the dot3k library is not installed properly. Make sure you're not running Python 3, and double-check you don't have a file named dot3k.py in the same folder as the script you're running. You install the library by running:
sudo pip install dot3k
You see: IOError: No such file or directory
This likely means your SPI isn't set up correctly. Make absolutely sure your Pi is up-to-date, reboot and try again, you can follow our guide to "Keeping your Pi Up-to-date" to help you with this.
Search above to find more great tutorials and guides.