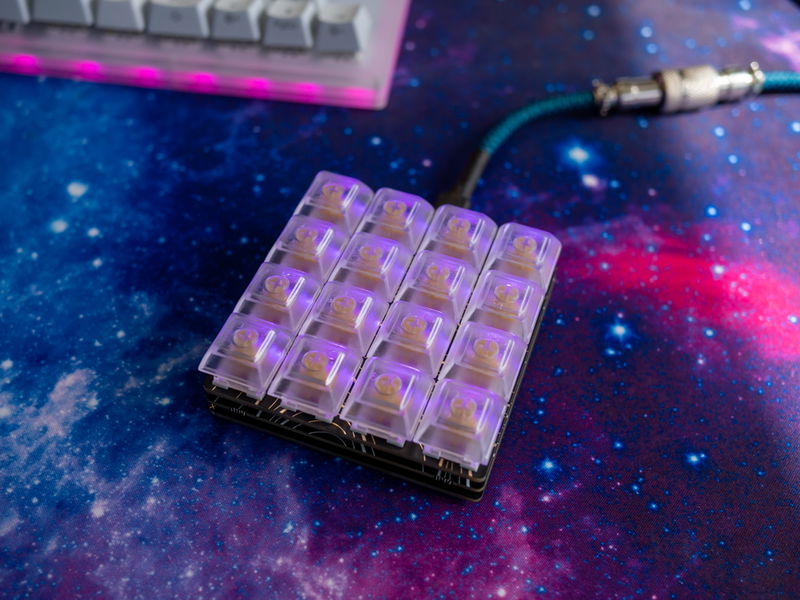
Assembling Keybow 2040
In this tutorial, you'll learn how to assemble your Keybow 2040 mini mechanical keyboard. Because the RP2040 chip on our latest Keybow is stowed safely aboard the middle layer of PCB, assembly is super simple and should take less than 15 minutes.
This tutorial is for assembling the 16-key, RP2040 based Keybow, if you've got one of those read on! If you have a Keybow with a Raspberry Pi Zero in it, you'll need to follow the 3-key or 12-key tutorial instead.
What you'll need
- A Keybow 2040 kit.
- A data capable USB-C cable.
- A small (PH1) Phillips screwdriver.
- If you opted for the bare version of the Keybow, you'll also need keycaps and switches.
What's included
Here's a list of everything you should have in the box. If you're missing anything, drop us an email at support@pimoroni.com and we'll get it sorted.
- Keybow PCB base layer (gold and black, reversible, four small round holes).
- Keybow PCB middle layer (white and black, houses the RP2040, the Kailh hot swap switch sockets, the LEDs and all the other electronic gubbins).
- Keybow PCB top layer/switch plate (gold and black, reversible, sixteen big square holes).
- Bag containing tiny standoffs and screws - you'll need eight screws and four standoffs.
- 16 Kailh gold (clicky), silver (quiet) or copper (tactile) switches.
- 16 transparent, low profile keycaps.
- 4 rubber feet

Attaching the feet and standoffs to the base layer
Before you start, you have some stylistic decisions to make! The two black and gold layers (that's the top and bottom layers) can be fitted either way up, so take a look at both sides and decide which artwork you would like to be on the outside (we'll be using the sides with topographic contours as the outside surfaces of our Keybow). Flip the base plate over, so that the outside is facing towards you. Unpeel the little rubber feet from their backing and stick them in the corners of the base plate.

Then poke the screws through the holes in the baseplate from the side with the feet on, and screw the standoffs onto the other side.

Attaching the middle layer
Place the middle layer on top of the standoffs, with the side with the buttons and the RP2040 facing downwards and the LEDs facing upwards. Use the four remaining screws to fasten the middle layer to the standoffs.

That's the bottom half of your Keybow assembled, you can set this aside for a bit.
Attaching the switches to the top layer / switch plate
Grab the top plate with the sixteen square holes in, and your switches.
The switches push tightly into the PCB switch plate, and then the whole plate with switches mounted pushes down onto the middle layer, with the pins on the switches being gripped in the hot-swap sockets.
It's important that you orient the switches the right way round when pushing them into the plate. If you look carefully at the switches, you'll see they have a little cavity underneath on one edge - the LEDs on the Keybow need to be lined up with this channel so they should all be pointing towards the top edge of your switch plate.
Push each switch into the plate, so that they sit flush. They're quite a tight fit, but they should click in when they're properly fitted.

Next, we'll mount the key caps. It doesn't matter which way round they go, as they're completely symmetrical. Push them all the way down onto the stems on the switches.

Flip the switch plate with switches and key caps mounted and take a look at all of the pins on the switches. Sometimes, they can get bent slightly in transit, but they all need to be straight to fit correctly into the hot-swap sockets. You can gently bend them back into position if you need to.
Joining the two halves together

Line up the bottom and top sections of your Keybow 2040 with each other, and sit the switch plate and switches in the correct location with the pins on the switches in the sockets on the PCB. Once you're happy that all the pins and sockets are aligned, you can gently push the switches down into the sockets. It's best to hold the whole assembly at both sides and apply even pressure, so that they all go in straight. The top and bottom sections should go together easily, so if you feel resistance stop and double check that everything's correctly lined up - it's possible to damage the PCB and/or hot swap sockets if you try and force it!
Once you're done, the bottoms of all of the switches should sit flush with the middle layer.

That's it for assembly!

Next steps
Connect your Keybow to your computer with the USB-C cable - it should show up as a drive called CIRCUITPY (if it doesn't, double check that you're using a USB cable that's capable of sending data). We've preinstalled CircuitPython and the libraries required to run our examples and it will start up running hid-keys-simple - this example sets your Keybow up as a simple numeric keypad.
You can find more examples in the examples folder on the CIRCUITPY drive - to run them, open up code.py in a text editor and replace the contents with the copy and pasted code from the example (or you can copy the example file to the CIRCUITPY drive and rename it to code.py if that's easier).
You can find more documentation on how to use the PMK library to customise your Keybow on Github. We'd love to see what custom layouts you come up with - drop us a line on Twitter and let us know!
Search above to find more great tutorials and guides.