 Easy
Easy
Build a Monster Meter
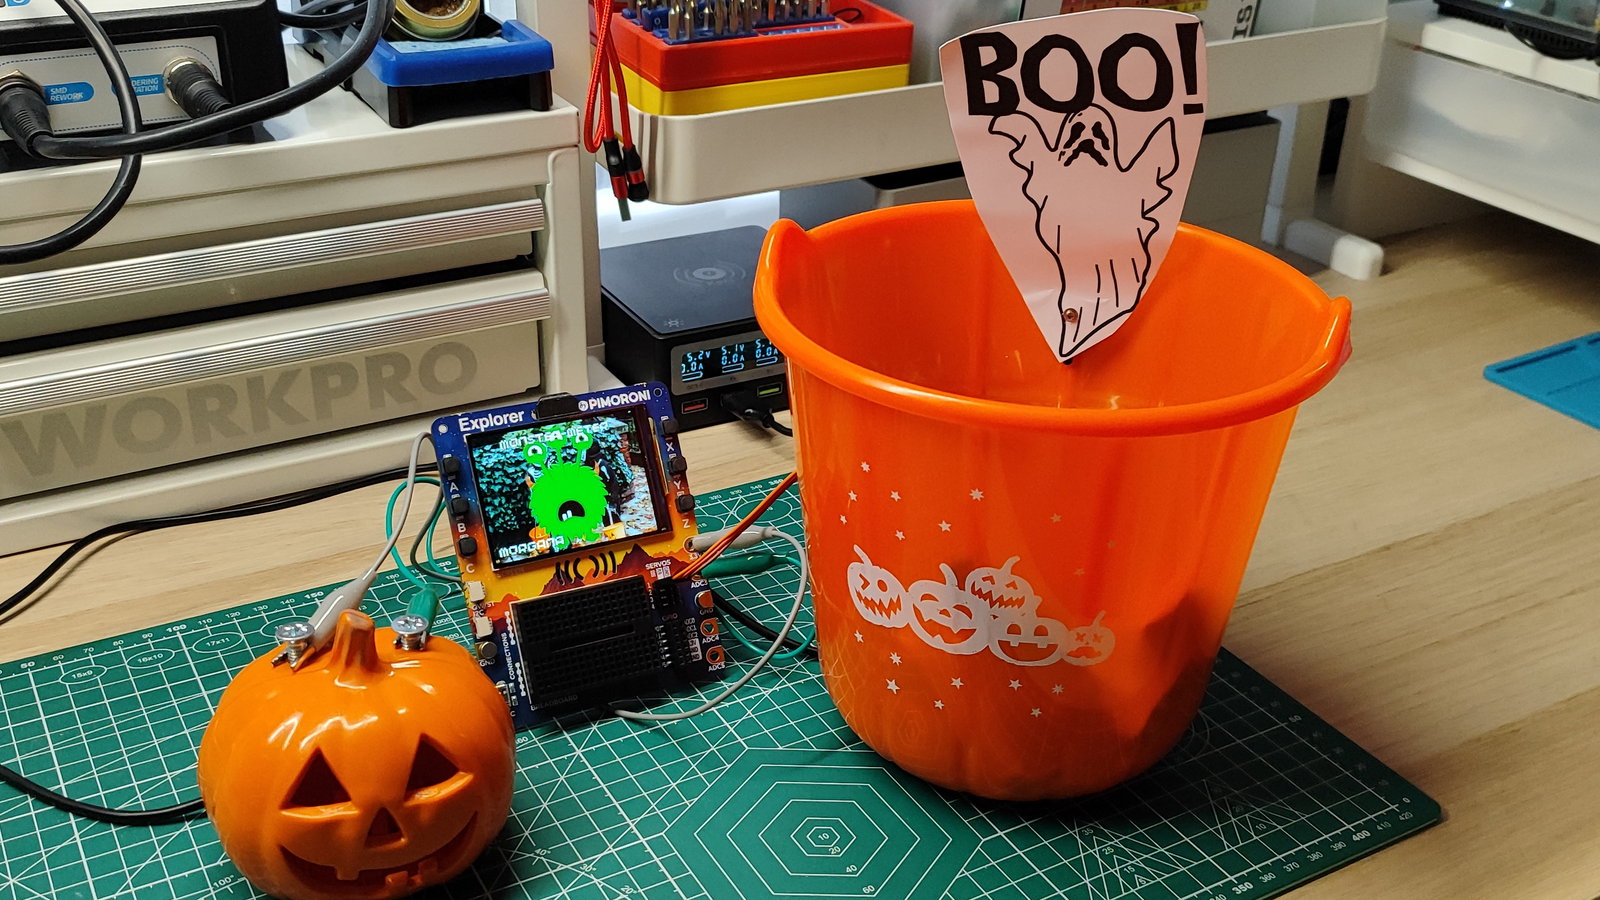
Touch the sensors to discover your monster type and trigger a ghost popup! Learn capacitive touch with this fun Explorer project.
Scary season is here, and this project uses our not-so scary Pimoroni Explorer to build a "Monster-Meter" that detects what type of monster you are.
The project is really a capacitive touch input sensor which measures changes in capacitance. When we touch the sensor (a screw in this case) we change the capacitance and the code uses this to assign us a monster name. If we press both screws then we pass 3.3 Volts and we are named as a "HEL-FIRE" monster!
This is a fun project to protect your candy / sweets and learn how to get started with Pimoroni Explorer.
The monster images used in this project were created using Monster Generator from Jeremy Wood. This app uses sliders and menus to create cute, colourful and unique monsters that can be saved as PNG or JPG images.
What You'll Need
- Pimoroni Explorer Starter Kit. This contains a servo motor and DuPont cables that we will use.
- Crocodile Clips.
- Halloween bucket.
- Halloween pumpkin or another prop toy.
- 2 x Screws.
- Tools to make holes in Halloween props.
- Hot glue gun and Pritt-Stick / Elmers glue.
The Hardware Setup
The electronics are broken down into two areas.
- The Input: A capacitive touch input that uses the crocodile clips and screws to connect to the dedicated pins on Explorer.
- The Output: A continuous servo connected to the dedicated servo pins.
- In your prop pumpkin, carefully make two holes that are large enough for your screws. Using a drill with a small bit, start pilot holes. Work your way up to the diameter of your screws. Take your time, and ask for help if you are unsure / unsteady.
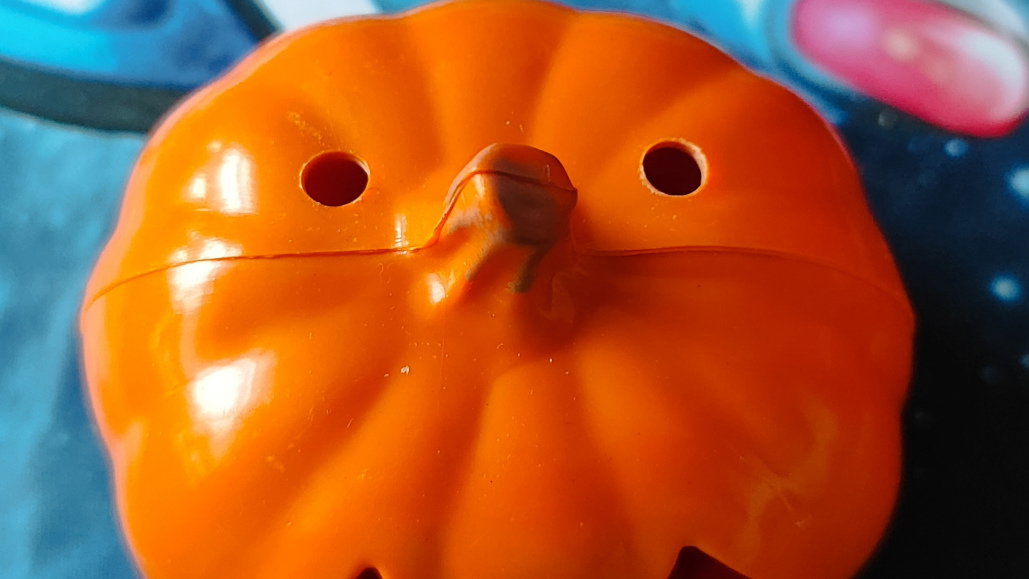
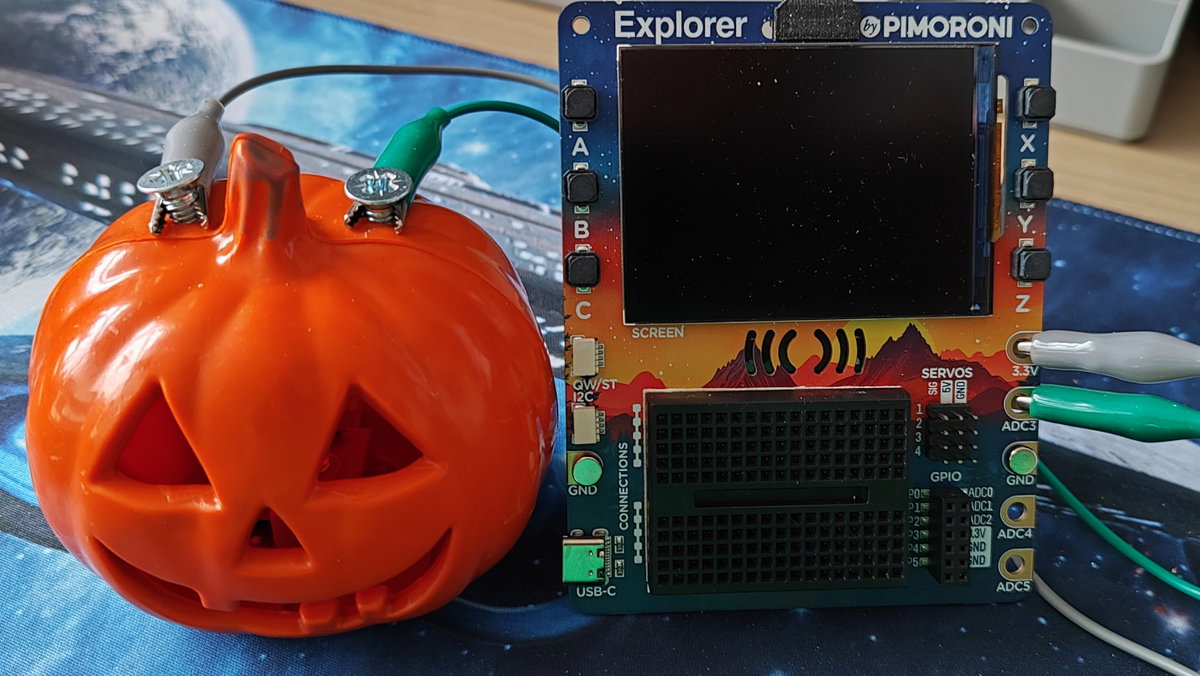
- Insert the screws and connect one croc clip to a screw and to ADC3. Connect the other croc clip to the screw and 3.3V. ADC is an analog input pin which we will use to read the voltage a person safely passes.
- On your prop bucket, mark a point that will enable the servo to poke through, then drill a small pilot hole, and work your way up to the final size. You will need a file to elongate the hole as the servo motor has a "keyhole" shape to it.
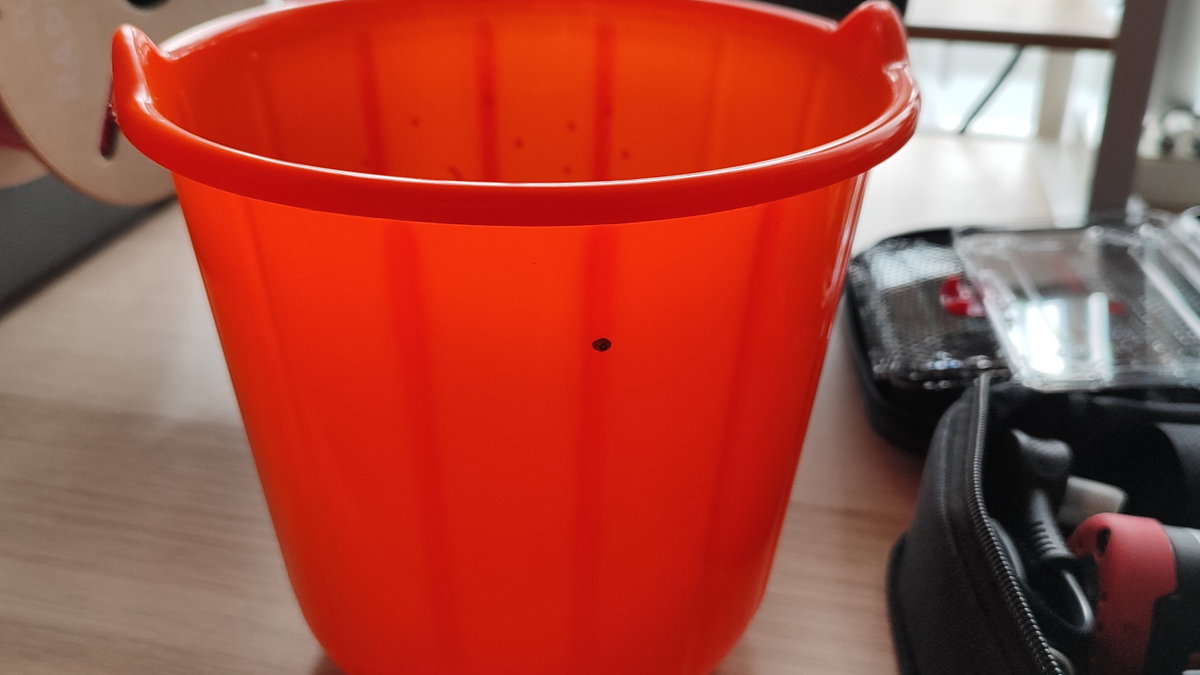
- Add two more pilot holes for two M2 screws (approximately 2mm in diameter) to poke through and secure through the servo motor. This adds mechanical strength to the motor in case the prop ghost is caught on some sweets.

- Connect the servo motor to
SERVOS 1on Explorer. The yellow wire goes to SIG, red to 5V and black to GND. The connector has been designed especially for this type of connection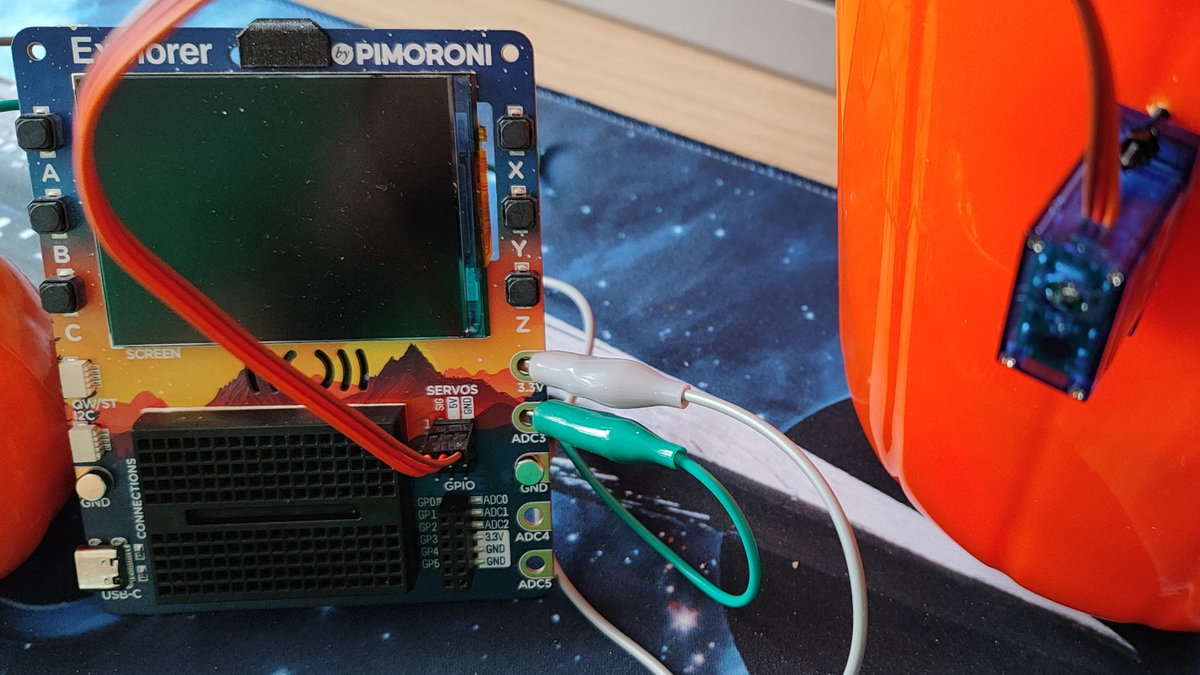
- Print off a Halloween picture and glue it to a sheet of thicker paper. Cut it out and then secure it to the servo motor using hot glue and the small screw included in the kit. We found that using a M2 6mm screw and washer gave a much firmer grip of the ghost, these parts can be easily sourced online.
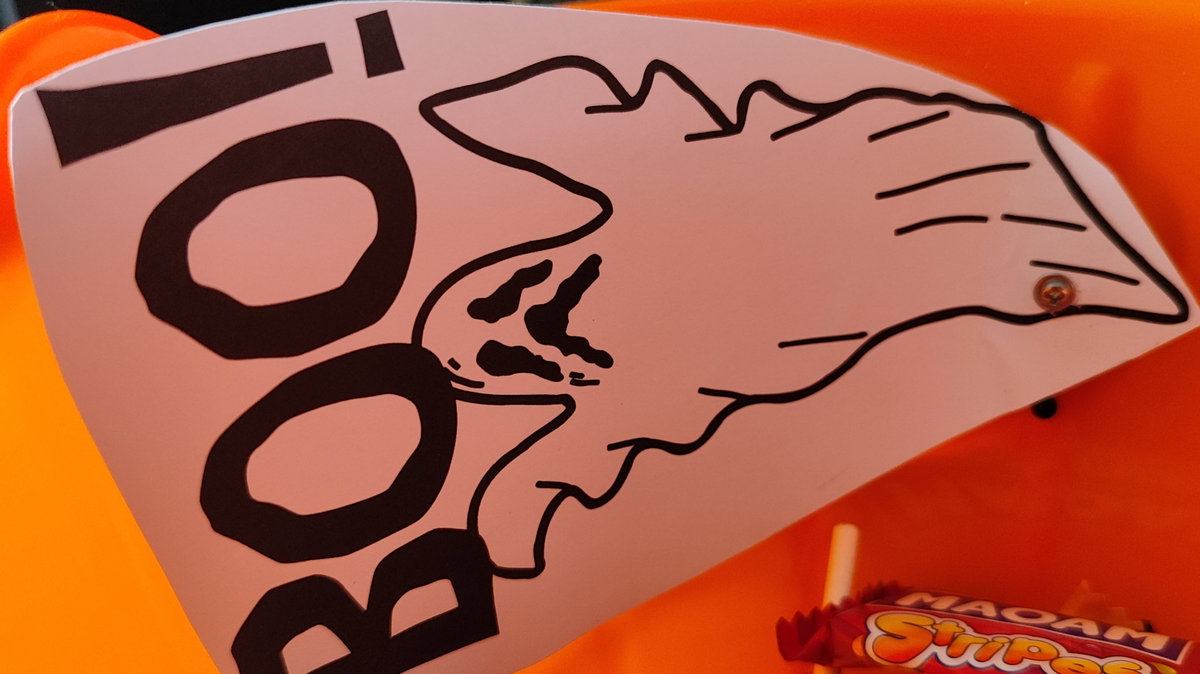
- Fill up the Halloween bucket with sweet, but make sure the ghost isn't buried too deeply. It is highly likely that the treat bucket will need refilling before Halloween!
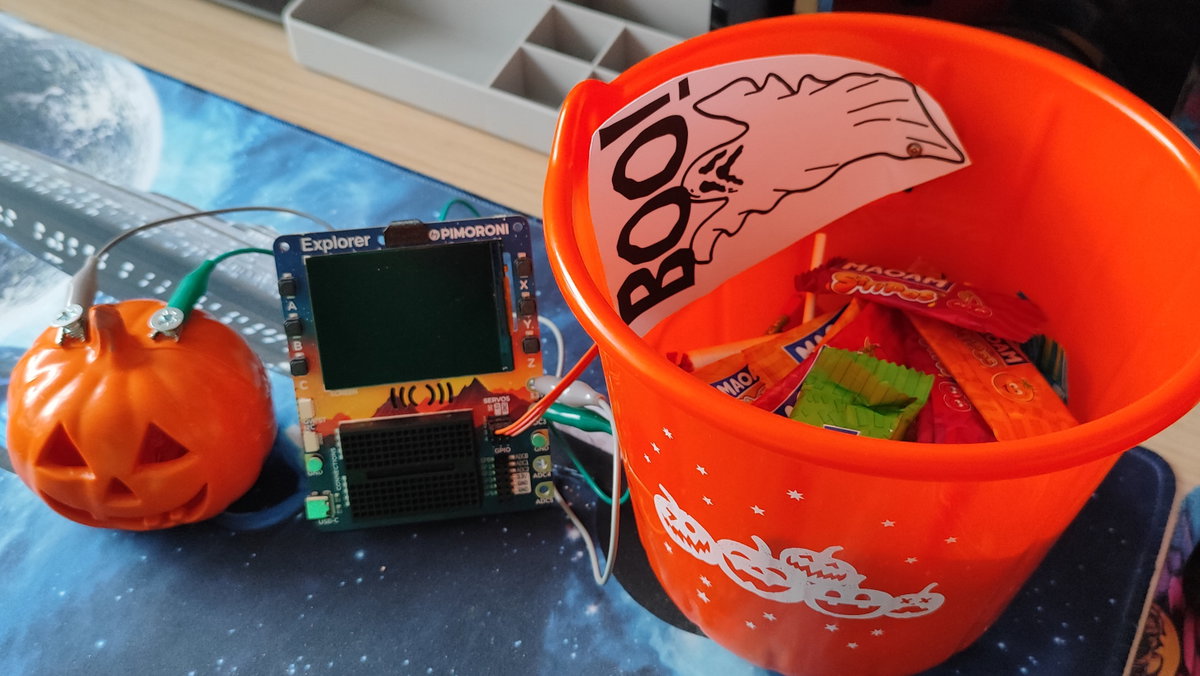
Writing The Code
The code is broken down into functions to:
- Read the voltage at ADC3 by taking multiple samples and averaging them out.
- Compare the returned input against a series of "monster" levels.
- Draw a background on Explorer's screen.
- Trigger the servo to action when the "HEL-FIRE" level is triggered.
Using the included USB C lead, connect Explorer to your computer, and then open Thonny.
Click on
Tools >> Optionsand then in the new dialog click onInterpreterand then change the interpreter toRaspberry Pi Picoand set the port toAutoor the COM port of your Explorer. Linux uses/dev/ttyACMxor/dev/ttyUSBxand Windows usesCOMxto identify ports where devices can be found. The x refers to a number, starting from 0.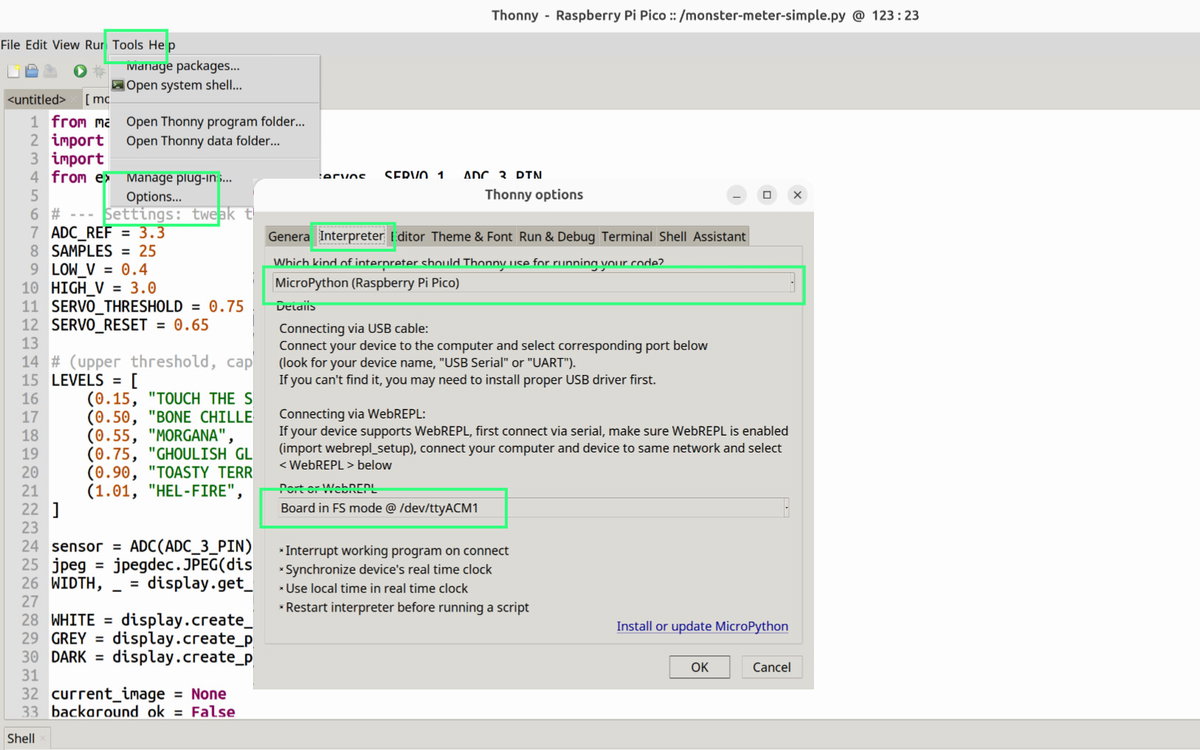
Import a series of modules (pre-written MicroPython code):
- ADC: Used to read analog pins.
- time: To control the pace that the code runs at.
- jpegdec: A JPEG image decoder used to help display images on the screen.
- explorer: The Pimoroni Explorer custom module which we use to control the display, servo motors and the location of the ADC that we are connected to.
from machine import ADC
import time
import jpegdec
from explorer import display, servos, SERVO_1, ADC_3_PIN
Create a series of constants. Constants are Python data storage objects that do not change. We set them once and later use them in the code. In this case the constants are for the ADC reference voltage, how many ADC samples are read, what voltage will trigger the servo to trigger, and the voltage to reset the servo. We also drop the app title here, which makes it easy to find, should we wish to customise the app.
ADC_REF = 3.3           # ADC reference voltage
SAMPLES = 25            # readings averaged per update
SERVO_ON_V = 2.35       # voltage that fires the servo
SERVO_RESET_V = 2.1     # must drop below this to re-arm
TITLE = "MONSTER-METER"
Using a list of tuples, create the "monster" levels to set the type of monster. Essentially these are the voltage ranges, monster names, bar meter colours, and images of the monsters.
LEVELS = [
   (0.8,  "TOUCH THE SENSORS!", "monster_level_0.jpg"),
   (1.7,  "BONE CHILLER",       "monster_level_1.jpg"),
   (1.85, "MORGANA",            "monster_level_2.jpg"),
   (2.35, "GHOULISH GLORIA",    "monster_level_3.jpg"),
   (2.75, "TOASTY TERRY",       "monster_level_4.jpg"),
   (99,   "HEL-FIRE",           "monster_level_5.jpg"),
]
Create variables for
sensor,jpeg,WIDTHandHEIGHT. Thesensorvariable is used to reference the ADC pin that one of croc clips is connected to. Thejpegvariable makes it easier to open JPEG images, andWIDTH, HEIGHTwill store the screen dimensions for later use.sensor = ADC(ADC_3_PIN) jpeg = jpegdec.JPEG(display) WIDTH, HEIGHT = display.get_bounds()Next, we create three colours that will be used in the app. They will make it easier to change colours without repeatedly entering the RGB colour values.
WHITE = display.create_pen(255, 255, 255) DARK = display.create_pen(10, 10, 20)Using a function,
read_voltageread a number of samples on the ADC pin and then average them out and convert the data into a voltage that we can compare against the monster level triggers. The raw values returned from reading the pin are between 0 and 65535 and they relate to voltages between 0 and 3.3V. By doing a little maths on the values we can convert them to a voltage.def read_voltage(): total = 0 for _ in range(SAMPLES): total += sensor.read_u16() time.sleep_ms(2) return total / SAMPLES * ADC_REF / 65536Create a function,
level_forwhich will check the detected voltage and use it to choose your monster. Essentially this looks at the voltage and checks for the nearest monster. It then returns the voltage limit, name and the image filename for that monster.def level_for(voltage): return next((lvl for lvl in LEVELS if voltage <= lvl[0]), LEVELS[-1])This function will show the selected monster on the display by opening and decoding the JPEG image, then writing the name of the monster in the bottom left of the display. The image file and monster name is returned from the
level_forfunction. The filename is used to open the corresponding JPEG image which is decoded and placed at0,0which are X and Y coordinates for the top left of the screen. Finally, it is essential to calldisplay.update()to see the changes to the display. Writing text to the display requires us to set the pen colour before we write. We measure the screen width and the width of the title text to ensure that it is placed in the top, centre of the screen. The monster name is placed in the bottom left, slightly in from the edge.
def show_monster(name, image):
try:
jpeg.open_file(image)
jpeg.decode(0, 0)
except (OSError, RuntimeError) as e:
print("Background not loaded:", image, e)
display.set_pen(DARK)
display.clear()
display.set_pen(WHITE)
title_w = display.measure_text(TITLE, scale=3)
display.text(TITLE, (WIDTH - title_w) // 2, 10, scale=3)
display.text(name, 10, HEIGHT - 30, scale=3)
display.update()
- Create a function,
trigger_servowhich is called when the monster levelHEL-FIREis selected. This function handles popping the ghost out of the bucket using the servo. Theservo.to_minwill make the ghost jump out, and the 0.18 seconds delay gives us a fixed distance that it can travel before we stop the servo usingservo.disable(). To return to the origin we set theservo.to_maxand use the same delay.
def trigger_servo():
servo = servos[SERVO_1]
servo.enable()
servo.to_min()
time.sleep(0.18)
servo.disable()
time.sleep(2)
servo.to_max()
time.sleep(0.18)
servo.disable()
- In the main loop, create two variables for the
last_imageandservo_armed. These control the current monster image, and arming the servo ready to deploy the scary ghost!
last_image = None
servo_armed = True
- In a
while Trueloop, call theread_voltage()function and save the output to the variablevoltage.
while True:
voltage = read_voltage()
- Calling the
level_forfunction, passing thevoltageas an argument, we store the output in three variables. The first,_is a throwaway variable that discards the voltage limit because we do not need it. Next,namerefers to the monster's name, andimageis the filename for the image.
_, name, image = level_for(voltage)
- Print the voltage and name details to the Python Shell. This is only visible when Pimoroni Explorer is connected to a computer, so use it for debug purposes.
print(f"{voltage:.2f}V -> {name}")
- Next, use an
ifconditional to check if the monster image needs to change, if not, it stays the same.
if image != last_image:
show_monster(name, image)
last_image = image
- Another
ifconditional test to check that thevoltageis greater than or equal to theSERVO_ON_Vvoltage (2.35V) and that the servo is armed. This triggers the servo to pop up the ghost, resetting ready for the next scare opportunity.
if voltage >= SERVO_ON_V and servo_armed:
trigger_servo()
servo_armed = False
elif voltage < SERVO_RESET_V:
servo_armed = True
- Finally, pause the code for 150ms before the main loop repeats.
time.sleep_ms(150)
Save the code to Explorer as
main.pyby clicking onFile >> Save. There will already be a file calledmain.pyon Explorer, and saving will overwrite this file.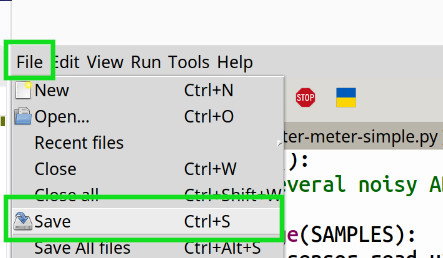
On Explorer, press RESET to start the code. Then touch the screw connected to ADC3 and watch the monsters appear. Using another finger, touch the other screw to trigger "HEL-FIRE" which will cause the ghost to pop out of the bucket.
Complete Code Listing
from machine import ADC
import time
import jpegdec
from explorer import display, servos, SERVO_1, ADC_3_PIN
ADC_REF = 3.3
SAMPLES = 25
SERVO_ON_V = 2.35
SERVO_RESET_V = 2.1
TITLE = "MONSTER-METER"
LEVELS = [
(0.8, "TOUCH THE SENSORS!", "monster_level_0.jpg"),
(1.7, "BONE CHILLER", "monster_level_1.jpg"),
(1.85, "MORGANA", "monster_level_2.jpg"),
(2.35, "GHOULISH GLORIA", "monster_level_3.jpg"),
(2.75, "TOASTY TERRY", "monster_level_4.jpg"),
(99, "HEL-FIRE", "monster_level_5.jpg"),
]
sensor = ADC(ADC_3_PIN)
jpeg = jpegdec.JPEG(display)
WIDTH, HEIGHT = display.get_bounds()
WHITE = display.create_pen(255, 255, 255)
DARK = display.create_pen(10, 10, 20)
def read_voltage():
    total = 0
    for _ in range(SAMPLES):
        total += sensor.read_u16()
        time.sleep_ms(2)
    return total / SAMPLES * ADC_REF / 65536
def level_for(voltage):
    return next((lvl for lvl in LEVELS if voltage <= lvl[0]), LEVELS[-1])
def show_monster(name, image):
    try:
        jpeg.open_file(image)
        jpeg.decode(0, 0)
    except (OSError, RuntimeError) as e:
        print("Background not loaded:", image, e)
        display.set_pen(DARK)
        display.clear()
    display.set_pen(WHITE)
    title_w = display.measure_text(TITLE, scale=3)
    display.text(TITLE, (WIDTH - title_w) // 2, 10, scale=3)
    display.text(name, 10, HEIGHT - 30, scale=3)
    display.update()
def trigger_servo():
    servo = servos[SERVO_1]
    servo.enable()
    servo.to_min()
    time.sleep(0.18)
    servo.disable()
    time.sleep(2)
    servo.to_max()
    time.sleep(0.18)
    servo.disable()
last_image = None
servo_armed = True
while True:
    voltage = read_voltage()
_, name, image = level_for(voltage)
print(f"{voltage:.2f}V -> {name}")
    if image != last_image:
        show_monster(name, image)
        last_image = image
    if voltage >= SERVO_ON_V and servo_armed:
        trigger_servo()
        servo_armed = False
    elif voltage < SERVO_RESET_V:
        servo_armed = True
time.sleep_ms(150)
What Have We Learnt?
- How to use a servo.
- How to read analog inputs.
- How to show images on Explorer's display.
- How to write text to Explorer's display.