Getting Started with Pirate Audio
Pirate Audio is a range of digital audio boards for Raspberry Pi, with integrated album art display, tactile buttons for playback control, and a choice of audio outputs.
We'll go through the following in this tutorial:
- What's on the boards?
- Which Pirate Audio board should you pick?
- Connecting the boards
- Installing and setting up the Pirate Audio software
- Scanning local media
- Using Spotify
- Taking it further
Revision history
05/25 - updated to accommodate changes brought in with Raspberry Pi OS Bookworm.
What's on the boards?
Each Pirate Audio board has a high-quality DAC (digital to audio converter) and optional amp (on the Headphone Amp, 3W Stereo Amp, and Small Speaker). The DACs use the I2S audio interface on the Raspberry Pi to output crispy 24-bit / 192KHz digital audio. Using the I2S audio interface gives you significantly better audio quality than you'd get from the Pi's 3.5mm stereo jack which uses relatively low-quality PWM audio.
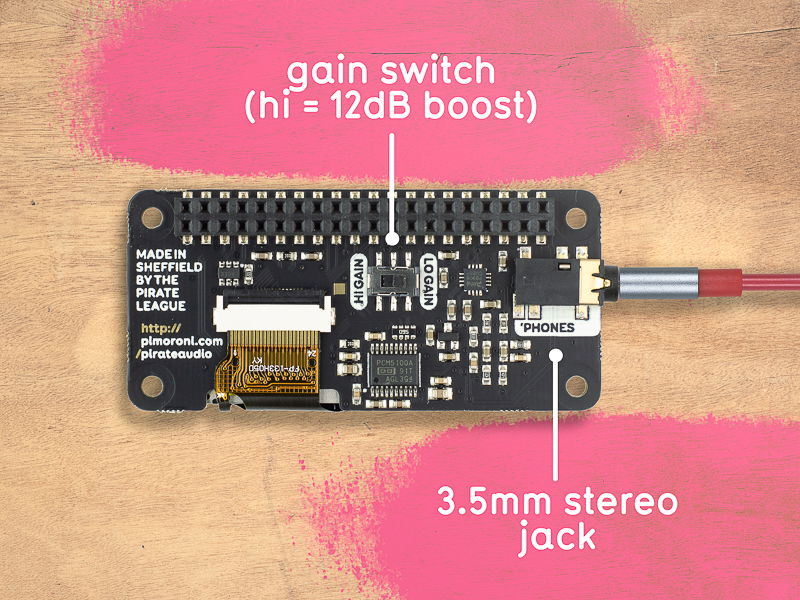
Both the Line-out and Headphone Amp boards have 3.5mm stereo jacks on the underside of the boards to which you can connect an audio output: either a hi-fi amp or powered speakers for the Line-out, or a pair of headphones for the Headphone Amp. The 3W Stereo Amp has push-fit stereo speaker terminals, to which you can connect a pair of 8 Ohm speakers with tinned wires; there's also a switch to toggle between stereo and mono output. The Small Speaker has its audio output onboard: a tiny, mono, 1W speaker on the underside of the board.
All four boards have gorgeously crisp and bright, full-colour LCDs for displaying album art and track information. The 240x240 pixel resolution on such a small display means that text and images look sharp and accurate. The display is driven using the Pi's SPI interface, which is ideal for high-speed stuff like sending image data to a display at a decent refresh rate. Because it's an IPS display, it has great viewing angles and will look equally good from any angle.
Last, but not least, there are four tactile buttons around the displays on all four boards. In our setup, we use these to control playback and volume but, because they're just buttons tied straight to GPIO pins, you can use them for whatever you wish.
The boards have pre-soldered, 2x20-pin socket headers to plug onto your Pi's GPIO pin header.
Note that you'll need a header soldered onto your Raspberry Pi Zero W if it doesn't already have one!

Which Pirate Audio board should you pick?
Let's start with the most straightforward one, the Headphone Amp. The clue's in the name with this one... If you want to make yourself a high-quality digital music player to listen to music with (wired) headphones, then this is the one to use. It should drive in-ear headphones pretty well but to fully appreciate the sound quality you'll probably want a larger set of headphones with decent drivers. Depending on the headphones, you might want to use the gain switch on the board to switch between low and high gain to get the best level for your particular setup.
The Line-out provides unamplified, line-level audio. This means that you'll need to connect either a hi-fi amp and speakers, or a set of powered speakers via the 3.5mm stereo jack on the Line-out board to get decent volume levels. If you want a really simple way to turn a pair of powered desktop speakers or old hi-fi equipment into an internet-connected music player, then Line-out is the one you want!
The 3W Stereo Amp gives you a pair of speaker terminals to which you can connect either one or two 8 Ohm (and at least 3W) speakers. If you only have a single speaker, then you can use the little mono/stereo switch on the underside of the board to toggle into mixed-down mono output. This board is ideal for building your own custom music boxes, or to upgrade old radios to be internet-connected music players with built-in buttons and album art display.
Finally, the Small Speaker is an all-in-one solution, with attached 1W mini speaker. If you want something compact to play music, but don't need a lot of volume or super-high-quality sound, then the Small Speaker's perfect. It's good for things like building a little sound effect box or a tiny desktop radio or music player.
Connecting the boards
All of the Pirate Audio boards will work with any 40-pin version of the Raspberry Pi including the larger versions of the Raspberry Pi like the Raspberry Pi 5, as well as the smaller Raspberry Pi Zero 2 W. If you're using a Raspberry Pi Zero W, then you'll need a 40-pin header soldered onto it to plug your Pirate Audio board onto.
If you're using a Pibow Coupe case with your Raspberry Pi, then you'll need to use a booster header to lift your Pirate Audio board up a little so that the 3.5mm stereo jack, speaker terminals, or speaker doesn't hit against the Coupe's top layer, and so that it fits down onto the pins adequately.
Line-out and Headphone Amp
The Line-out and Headphone Amp boards will need a 3.5mm stereo cable to connect to your speakers or headphones. If you're using a hi-fi amp, then you could also use a 3.5mm stereo to dual-phono cable. If you don't already have one, then we have a couple of audio cable options in our Pirate Audio range.

3W Stereo Amp
The 3W Stereo Amp requires a little more expertise to connect speakers up. The speaker terminals are push-fit, so the ends of your wires will need to be tinned so that they're stiff enough to push in. Tinning is the process of adding a little solder to the end of a stranded wire to make it stiffer and more robust. All of the speaker options that we sell as part of our Pirate Audio range have pre-tinned wire ends.
The left and right channels are labelled on both the top and bottom of the board. To fit a wire in, push down gently on the little dimple on the clip and push your wire in; it should be gripped in place. Do this for each wire in turn, red to + and black to -. To remove the wires (if you need to), press the clip down gently and pull it back out.

Installing and setting up the Pirate Audio software
How the software is structured
Our Pirate Audio software is a collection of a few different parts, all running on Raspberry Pi OS, the stock OS for the Raspberry Pi.
At its heart, it uses Mopidy, an extended version of MPD (Music Player Daemon). Mopidy's structure, with plugins for extended functionality, makes it ideal for Pirate Audio. We use plugins for i) handling the display and displaying album art, and ii) handling the button presses and linking them to core functions in Mopidy for playback control and volume.
The Pirate Audio installer handles installation of Mopidy, the necessary plugins and dependencies, configuring the I2S audio, and setting most of the necessary changes to the Mopidy config file (other than adding your Spotify credentials).
Our Mopidy-PiDi plugin itself has plugin functionality (yo dawg, I heard you like plugins...) to display album art and track information on different types of display. In the case of the Pirate Audio boards, this is displaying it on the 240x240 pixel ST7789 LCD. Mopidy-PiDi pulls metadata straight from Spotify (if you're using Spotify) and then handles drawing the text to the display, automatically resizing and reflowing it. Album art is blurred out and slightly dimmed to give the text better contrast.
As well as the Mopidy-PiDi plugin that handles the UI on the on-board Pirate Audio display, we install Mopidy-Iris, a web UI that gives a really nice interface to browse and control your music remotely. It's also where we'll do the final parts of the configuration.
The final part is the Mopidy-Raspberry-GPIO plugin that handles the button presses and links them to core Mopidy functions like playback and volume control. We suggest a default setting of playback and track skip on the top pair of buttons and volume control on the bottom ones, but this can be customised in the ~/.config/mopidy/mopidy.conf file (in the [raspberry-gpio] section).
Installing the software
We recommend setting up a fresh micro-SD card with Raspberry Pi OS (Legacy/Bookworm) with recommended software. The easiest way to copy Pi OS to your SD card is with Raspberry Pi Imager, which is available for Windows, Mac or Linux.
The next parts are easiest if you have a display attached to your Raspberry Pi.
You'll need to connect to Wi-Fi, or to connect to your local network with an ethernet cable if your Pi has ethernet. Assuming that you've set up a fresh micro-SD card, then the first time that you boot it up you'll be guided through connecting to a Wi-Fi network. Otherwise, you can click on the little network icon at the top right hand corner of the desktop to connect to a new Wi-Fi network, or type sudo raspi-config in the terminal and set it up that way.
Once your Raspberry Pi is booted up and has an internet connection, open a terminal, and then type the following to start the installation of the software:
git clone https://github.com/pimoroni/pirate-audio
cd pirate-audio/mopidy
./install.sh
Once the installation is complete, reboot your Raspberry Pi either by typing sudo reboot in the terminal or by closing the terminal and then restarting through the Raspberry Pi menu. Don't disconnect the display from your Raspberry Pi just yet though...
Once rebooted, you should see a little message on the display of your Pirate Audio board telling you to go to an URL (with the IP address of your Raspberry Pi) in a browser on your computer, laptop, tablet, or whatnot. This is the address through which you'll be able to access and control your music remotely with the Iris web interface.
❗ I don't see the IP address!
If you don't see the IP address on screen (or if you only see it after logging in via SSH) it might be that the Mopidy service is not starting automatically on boot. Try running the following command: sudo loginctl enable-linger - this will make the service start on boot rather than on user login.
Scanning local media
Open that URL that's on the Pirate Audio display in a browser now. It should be something like http://192.168.0.100:6680. On this page, under "Web clients", click "iris". Iris is the main way that you'll control and configure Mopidy.
The two main sources of music that we'll cover in this tutorial are "local" files like MP3s, and streaming music from Spotify.
Our installer will automatically set /home/$USER/Music as your media folder, where $USER is the username you use to log in to your Pi. If you want to change this to include other folders, you can edit this in the Mopidy config file (sudo nano ~/.config/mopidy/mopidy.conf).
You can add your MP3 music files into the /home/$USER/Music folder. It's best to organise them sensibly in folders with artists at the topmost level, and then folders for each album by an artist inside their respective artist folder.
To scan the local files and add them to Mopidy, we'll first need to activate our virtual environment. In the terminal on your Raspberry Pi, type:
source ~/.virtualenvs/mopidy/bin/activate
then:
mopidy local scan
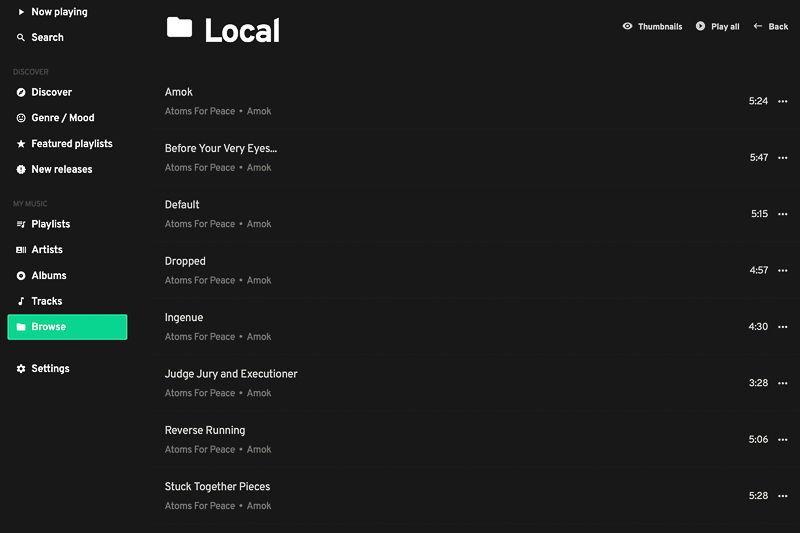
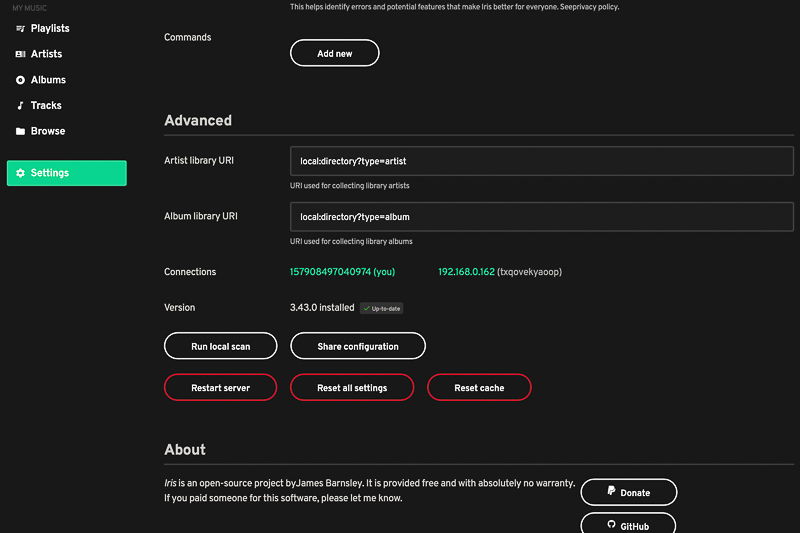
In the Iris web interface you should now be able to see your MP3 music files if you click on the "Browse" link at the left hand side. If you can't see them, you may have to go to the "Settings" page and then click "Restart server".


Using Spotify
🚀 Note from the future! Spotify disabled their libspotify API in May 2022 which means integrating Mopidy with Spotify is not as straightforward as when Sandy wrote this guide. At the time of writing (May 2025), it is still possible to get playback working but you will need to install the mopidy-spotify plugin manually, before following the instructions below.
Spotify is a really convenient way to stream music on your Pirate Audio board. For this, you'll need a Spotify premium subscription. We'll need to make another change to the Mopidy config file to add all of your Spotify credentials, and then do a final authorisation step through the Iris web interface. Before that, head to the URL below and click "Authenticate Mopidy with Spotify" under the "Authentication" heading:
https://mopidy.com/ext/spotify/#authentication
Click "Agree" at the bottom of the window, and take a note or a photo of the client_id and client_secret that are now on the page, as you'll need to add these to the Mopidy config file. You'll also need to have your Spotify username and password handy.

Back on your Raspberry Pi, in the terminal, type sudo nano ~/.config/mopidy/mopidy.conf to edit the Mopidy config file. Edit the section titled [spotify], changing enabled = false to enabled = true, and adding the client ID and secret that you took a note or photo of.
[spotify]
enabled = true
client_id = 0123456789abcdef
client_secret = 0123456789abcdef
Type control-x, then y, then enter to save and close the file.
Back in the Iris web interface, head to the "Settings" page and then click the "Log in" button under the Spotify section (if you're using the newest version of Iris, you might have to click on the Spotify icon to get the "Log in" button to appear). This is a final authorisation step, and you'll have to agree to the T&Cs on the little window that pops up.


Last of all, and still on the "Settings" page, click on "Restart server" to allow all the configuration changes to take effect.
You should now be able to use all of the tabs down the left hand side to explore and play music on Spotify.

Taking it further
There are dozens of extensions for Mopidy, to do all sorts of things like: adding additional music sources like Google Music, Soundcloud, Tunein Radio, and more, to set up multi-room audio with Snapcast, to integrate with networked AV receivers, and much more...
You can browse some of them at the link below, or search on GitHub for "mopidy" to find loads more.
Search above to find more great tutorials and guides.