VL53L5CX Time of Flight (ToF) breakout and MicroPython
This super quick guide will show you how to use our new VL53L5CX distance sensor breakout with a Raspberry Pi Pico (or other RP2040 board) using pirate brand MicroPython.
About VL53L5CX
VL53L5CX is a fancy new Time of Flight (ToF) distance sensor from STMicroelectronics. It can do fast and accurate multizone ranging - find out more about its vital statistics on the shop page!
The firmware for this sensor is rather large, so we've not included it into our MicroPython build as standard - you'll need to download it separately and copy it across using Thonny. We'll show you how to do that here, but If you're brand new to Pico/RP2040 microcontrollers you might also find our beginner friendly Getting Started with Raspberry Pi Pico guide useful.
Installing MicroPython
Download the most recent MicroPython .uf2 for your board from the Releases page of our pimoroni-pico Github repository (you'll need v1.18.8 or later).
Hold down the BOOT button of your microcontroller, and then plug in the USB cable (or tap the RESET button if you have one). This will put it into bootloader mode, and it should appear as a drive on your computer called RPI-RP2.
Copy the .uf2 file to the RPI-RP2 drive and your microcontroller will reboot running MicroPython. From now on, it won't show up as a drive, you'll need to use an interpreter (Thonny) to program it.
Installing Thonny
- Download and install Thonny. It's available for Windows, Mac and Linux.
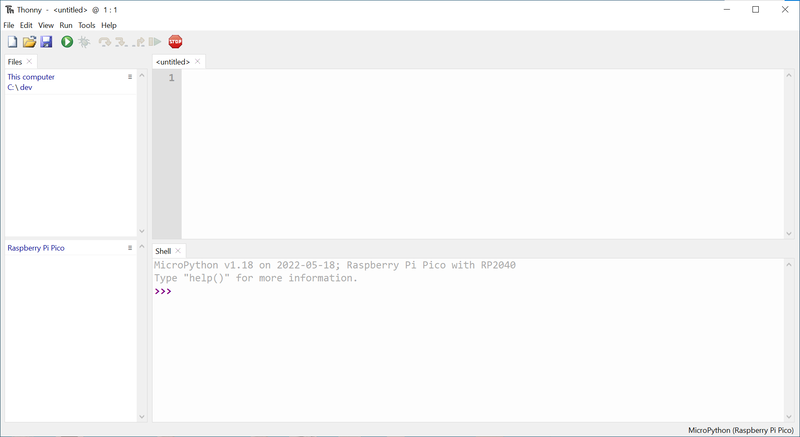
- Open up Thonny. Make sure the interpreter (shown in the box on the bottom right corner) is set to 'MicroPython (Raspberry Pi Pico)' and that the 'Files' window is visible (if not, it's under 'View > Files'). If set up correctly, it should look something like this:

⚠ If you don't see the MicroPython prompt in the 'Shell' box, try pressing the 'stop' button to interrupt whatever your microcontroller is doing.
Installing VL53L5CX firmware
- Download the VL53L5CX firmware.
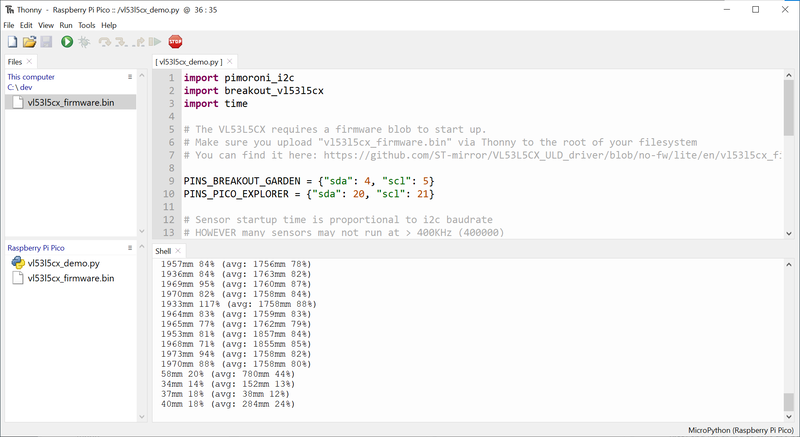
- Navigate to the .bin file using the top 'Files' box in Thonny. Right click on it and select 'Upload to /' to save it to your Pico.

⚠ Note that the .bin firmware file must be named 'vl53l5cx_firmware.bin' and it must be in the root directory of your microcontroller's filesystem.
Running the examples
- You can find the MicroPython VL53L5CX examples here. Copy and paste one into Thonny, and press the green 'run' button to run it on your Pico (you'll be prompted to give it a filename if you haven't run it before).
- Wiggle your fingers in front of the sensor to check that it's working!

Using alternate I2C pins
Most boards use GP4 and GP5 as the I2C pins for their Breakout Garden slots and Qw/ST connectors so our examples will assume you're using those pins by default. However, the Breakout Garden slots on Pico Explorer Base (and the Qw/ST connectors on some of our more crowded RP2040 boards, like Interstate 75, Plasma 2040 and Servo 2040) use alternate I2C pins - GP20 and GP21.
If you have a board that uses the alternate pins you'll need find this line in your code:
i2c = pimoroni_i2c.PimoroniI2C(**PINS_BREAKOUT_GARDEN, baudrate=2_000_000)
and change it to:
i2c = pimoroni_i2c.PimoroniI2C(**PINS_PICO_EXPLORER, baudrate=2_000_000)
Next steps
We mounted one of these breakouts on the front of a tiny Raspberry Pi Pico-powered robot we made using our new Motor SHIM for Pico, and adapted the object tracking example to get it to follow a business card on a stick. Here is BusinessBot in action!
Search above to find more great tutorials and guides.