MicroPython on the ESP IoT pHAT
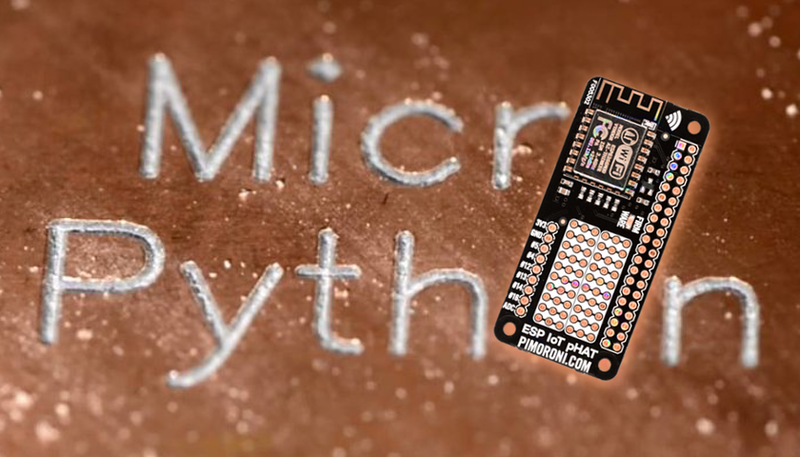
MicroPython is a nifty Python interpreter that can run on embedded systems. Borrowing its syntax from its bigger brother, MicroPython brings a lot of familiarity to the table for Raspberry Pi users, and is a perfect fit for an ESP8266 breakout boosting a wealth of I/O such as our ESP IoT pHAT.
In this tutorial we'll show you how to flash the ESP IoT pHAT with the MicroPython firmware, and then how to access it over the network. Now we're talking!
For this tutorial, you'll need:
- A Raspberry Pi
- An ESP IoT pHAT
- Analog sensors, relays or LEDs (optional)
While it's not strictly necessary for you to follow the ESP IoT pHAT tutorial series in order, it might be a good idea to check out the first installment - here - and go through it to make sure your hardware is in order before flashing a new firmware onto it.
Installing the software
As usual it's a good idea to start with a fresh install of Raspbian, but if you are following on from the first installment in the series then you're all set. Still, we recommend you run the installer below again, especially if it's been a while you have used your ESP IoT pHAT.
Open a new terminal, and type the following:
curl https://get.pimoroni.com/iotphat | bash
You'll be prompted to reboot your Pi, do so then read on.
Flashing the MicroPython firmware
Our one-line installer should have installed a number of ready-made scripts in your home folder:
cd ~/Pimoroni/espiotphat/firmware/
./flash-mp-firmware.sh
This shell script will download and flash the latest ESP8266 MicroPython firmware. After a minute or so, the process should be complete.
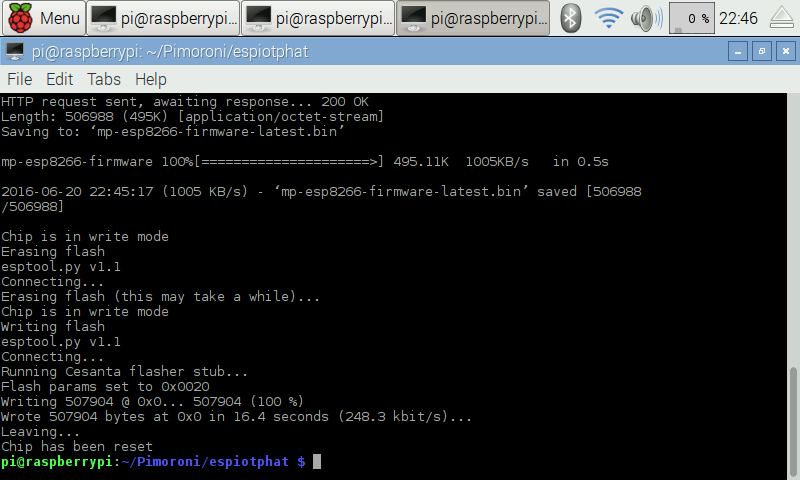
Note that if for whatever reason you wanted to reflash the AT firmware that the ESP IoT pHAT ships with, you can do so by calling the flash-at-firmware.sh script:
./flash-at-firmware.sh
First steps with the REPL interface
Let's fire up minicom to check that everything worked as expected:
minicom -b 115200 -o -D /dev/ttyAMA0
Press enter a couple of times to access the so-called Read–Eval–Print-Loop, otherwise referred to as REPL, the interactive shell provided by the MicroPython firmware.
If you've used the Python interpreter in the past you'll be right at home, as you'll interact with the MicroPython REPL in essentially the same manner. It supports flexible line editing, tab completion, line auto-indent and even (limited) input history - quite a step up from the AT firmware!
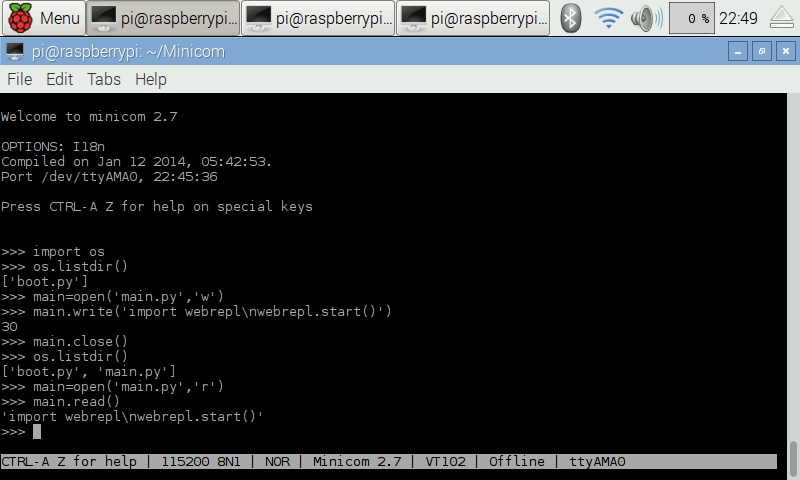
On first boot, MicroPython will create a filesystem that you may use to store and execute scripts from. Let's check what's already there by typing the following at the REPL prompt:
>>> import os
>>> os.listdir()
... which should return the following (with possible additional file entries):
['boot.py']
The boot.py file, as you'd expect, is what the ESP8266 will use to tailor its boot process. It will then go on to execute the main.py script, if it exists. Although impractical for complex programs, you can create simple routines and save them right from the shell prompt, like so:
>>> main=open('main.py','w')
>>> main.write('import webrepl\nwebrepl.start()')
>>> main.close()
This particular example would ensure the webREPL service we'll be introducing later on is started automatically in the future. Typically, you would place such an initialisation process in the boot.py file, and it's likely it will be enabled by default once MicroPython has fully matured, but for illustrative purposes it will be easier and safer to populate main.py on this occasion.
Let's verify that the file was created with the intended content:
>>> os.listdir()
>>> main=open('main.py','r')
>>> main.read()
Don't worry too much about the details for now, it's just a gentle introduction to the filesystem and boot process that we thought you might find useful. If you made an error, or otherwise wish to delete the newly created main.py script (or any other file), you can do that very easily and start again:
>>> os.remove('main.py')
Joining your local network
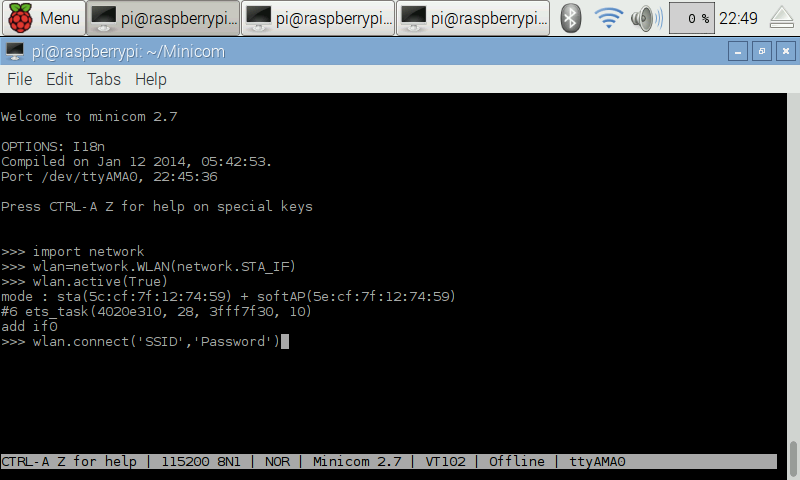
Let's move on to more exciting things, and join the local network! Type the following:
>>> import network
>>> wlan=network.WLAN(network.STA_IF)
>>> wlan.active(True)
>>> wlan.connect('SSID','Password')
Of course, you should replace 'SSID' and 'Password' with your own.
After a few seconds, the ESP8266 should join your WiFi network, as confirmed by the output of the REPL.
If you'd like, you may check the network configuration, like so:
>>> wlan.isconnected()
>>> wlan.ifconfig()
Setting up the webREPL
MicroPython incorporates a very convenient web browser interactive prompt called webREPL to allow you to interact with the ESP8266 over the network, as opposed to a serial connection over UART. Let's try it!
>>> import webrepl
>>> webrepl.start()
This will start the webREPL daemon and make the interactive shell available as a websocket:
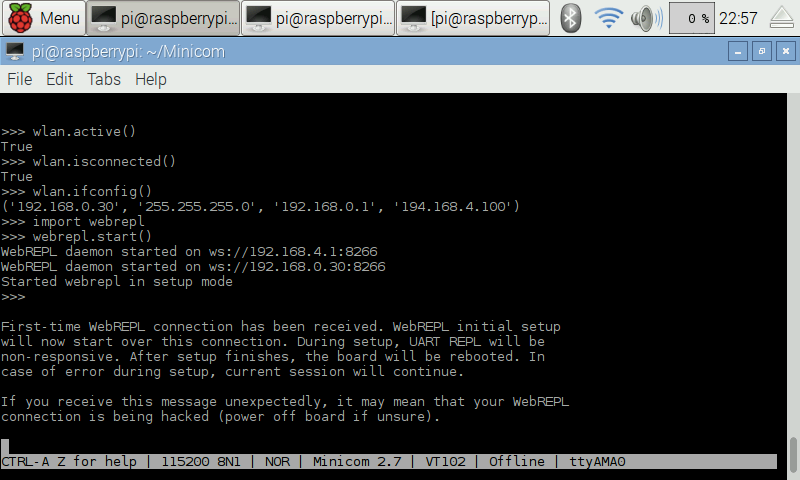
It's possible to install a local client to access the REPL over WebSockets but, for now, let's use the version hosted at http://micropython.org/webrepl/ by pointing our browser to that URL.
Enter the ESP IoT pHAT (station!) IP in the address field, as revealed by the call to the ifconfig function earlier on (in our case ws://192.168.0.30:8266/), then click connect. You will be asked to set up a password, then the board will reboot.

Reconnect to the webREPL, as per the above procedure, and enter your password to start a session. That's it, you're in!
Accessing the ESP IoT I/O
Let's poke around a bit and poll the pHAT's I/O. To do so, it's best if you have some LEDs at hand (an analog sensor too), but don't worry if you don't, we're just going to show you how it's done and you can put all of that into practice later!
>>> from machine import Pin,PWM,ADC
This will import the Pin, PWM and ADC classes using the machine module. We won't be using the PWM class in this brief intro to IO control of the ESP IoT pHAT with MicroPython, but feel free to have a go, noting that PWM functionality is available on all pins except pin 16.
Let's define pin 13 as an output, to which we have wired a LED, and toggle its value by issuing the following commands (tip: you can use pin 2 instead to toggle the onboard LED):
>>> led=Pin(13,Pin.OUT)
>>> led.value(1)
>>> led.value(0)
... of course, being (micro) Python, there's nothing to stop you creating a function that toggles the LED on and off, and call it inside a loop to simulate the ubiquitous 'blink' example. We'll leave that to you to try though as this tutorial is coming to a close.
On the ADC front, taking a reading from the analog pin is very straightforward too (the value returned will be random unless you hook up a sensor to the analog pin, obviously):
>>> adc=ADC(0)
>>> adc.read()

Taking it further
That's the end of this tutorial, but MicroPython has much much more to offer... head over to http://docs.micropython.org/en/latest/esp8266/ to learn more about MicroPython. In particular we recommend you follow the excellent tutorial available there. If we may, we'd also like to throw you a couple of (small) challenges:
- Using the MicroPython (web)REPL, create a function that toggles a LED on and off inside a loop.
- Using the
machine.PWMclass, create a 'breathing' effect on that same LED.
(we'll be uploading example sketches for the above, as well as others, to the espiot-phat GitHub repo in the coming weeks so keep an eye up there if you are stuck).
Search above to find more great tutorials and guides.