Getting Started with Plasma 2040
If you've not played with addressable LED strips yet, you've been missing out. Customisable lighting effects in any or all colours of the rainbow, purchasable by the metre, easily installable around your desk, inside your gaming PC or just draped fabulously around your person. Figuring out what kind to buy, how to power them and how to wire them up can be a little intimidating for beginners though, which is where Plasma 2040 comes in!
About Plasma 2040
Plasma 2040 is an LED strip driver board that uses the shiny new RP2040 chip from Raspberry Pi. We've designed it to be compact, easy to use and straightforward to power. Like all our RP2040 boards, you can use it with C++, MicroPython or CircuitPython - we'll be using our custom build of MicroPython in this tutorial. If you'd rather use CircuitPython that's really easy too - scroll down to the bottom of the tutorial for a quick primer on how to get things started.
In this tutorial, we'll discuss how to connect different kinds of LEDs up to Plasma 2040 and then we'll walk you through building and programming a set of fairy lights which you can hang over your desk and signal green (available) and red (busy) at the push of a button.
2025/4 - This guide has been updated to work with the new seperate Plasma repo.
What you'll need
- A Plasma 2040
- A USB-C cable
- Some addressable LEDs! We'll be using RGB LED wire in this tutorial as it comes with connectors, you get 5m in a packet and it looks really pretty. We stock quite a few kinds though, if you'd rather use something different the next section will tell you what you'll need to do to connect them up.
- A computer to program Plasma 2040 from (the software you'll need, Thonny, is free and available for Raspberry Pi, PC, Mac or Linux).
- Small flathead screwdriver for wrangling the screw terminals.
Connecting up different kinds of LED strips
We stock flexible LED strips in RGB and RGBW varieties, and in WS2812 (three wire) and APA102 (four wire) flavours. The flexible LED strips come with a silicone sleeve over the top, to help protect the LEDs from dust and moisture. We also stock some more exotic types of addressable LEDs, like ones with a built in diffuser. They'll all work with Plasma 2040, though some are more straightforward to connect up than others.
Most of our LEDs come in 1m lengths with connectors on both ends, so they're really easy to chain together and plug into Plasma 2040. These are the strips we sell that come with connectors pre-attached:
and the 144 pixel per meter variants of:
- Flexible RGB LED Strip (NeoPixel/WS2812/SK6812 compatible)
- Flexible RGBW LED Strip (NeoPixel/WS2812/SK6812 compatible)
- Flexible RGB LED Strip (DotStar/APA102/SK9822 compatible)
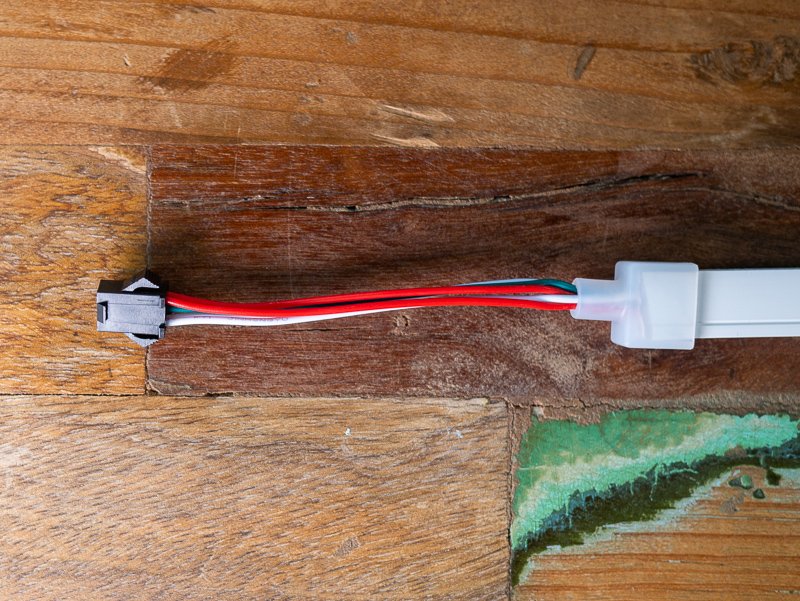
The connector below is the one that needs attaching to Plasma 2040.
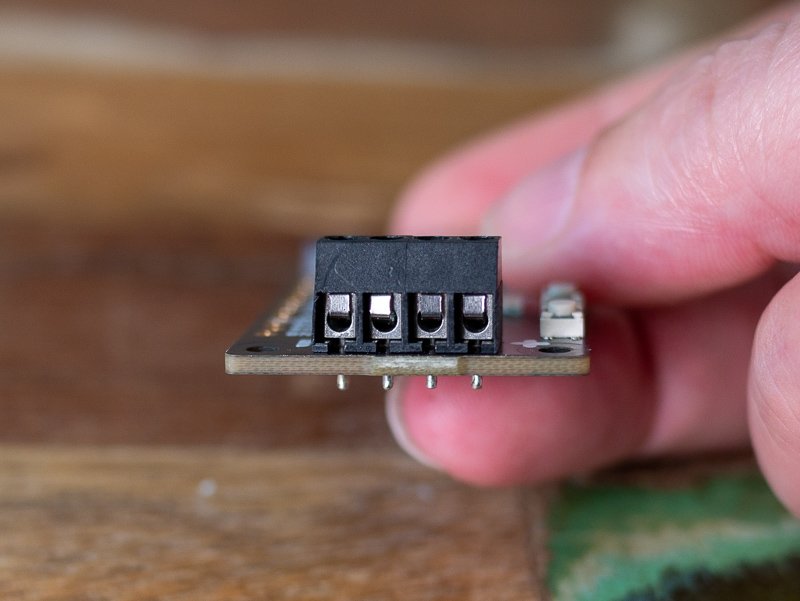
If you take a look at the business end of Plasma 2040, you'll notice it has screw terminals for plugging in your LEDs. This means you need to convert that plug into bare wires somehow!
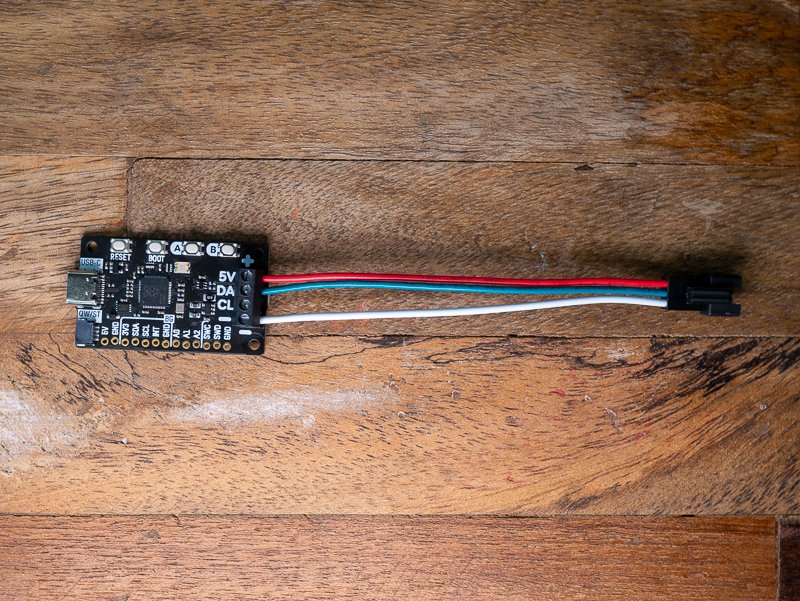
A neat way of doing this is with a 3 wire or 4 wire LED strip connector cable (you'll need the kind with pins). We like these cables as they make a nice solid connection and you can easily plug and unplug the LEDs if you need to, without having to unfasten the screw terminals. If you're using LED wire, it comes with one of these connector cables, you don't need to buy one separately.
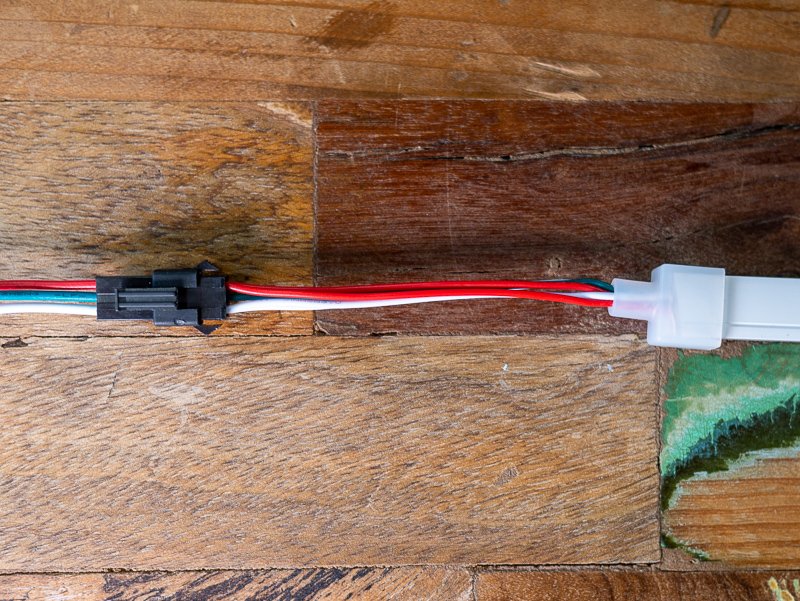
Hooking up the 30 and 60 LEDs per metre flavours of RGB and RGBW Flexible LED Strip is slightly more complicated. If you buy 5m of strip it will come on a reel with nice connectors at both ends. If you buy less than 5m, our post ninjas will slice up one of these reels, so you could end up with just a start connector, just an end connector (which can't be connected to the Plasma), or no connectors at all!
You can solder wires on to the pads at the end of the strip and plug those into Plasma 2040 or, if you'd prefer to avoid soldering, you could use one of these clippy connectors instead (3 wire or 4 wire).
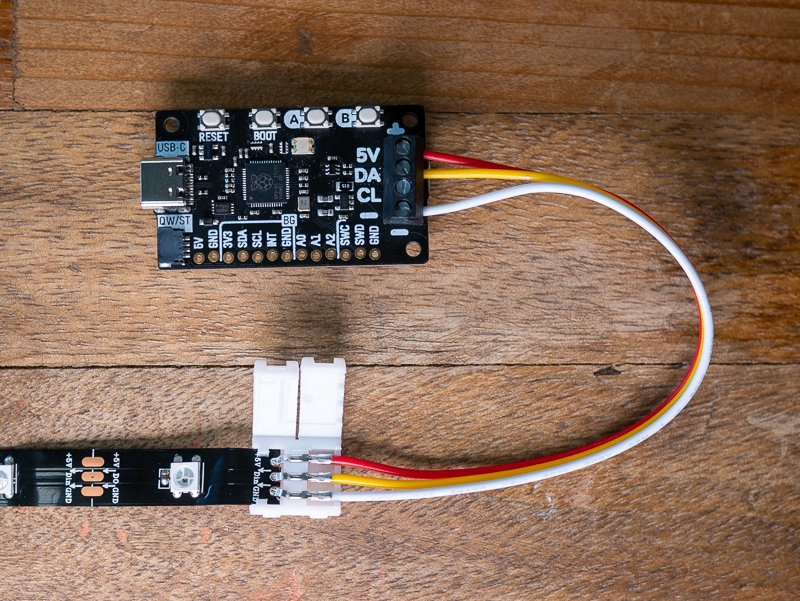
When working with LED strips (especially if you're attaching your own connector), you'll need to make sure to connect your controller to the correct end - if you look at the strip closely there'll be some arrows on the strip to show you in which direction the data should flow (so the arrows should point away from your microcontroller).
From here on in, we'll be showing you the specific steps we took to get our LED wire going - they should be similar for most WS2812/Neopixel LEDs. You can find the parameters you'll need for different types of LEDs (like four wire APA102 LEDs) in the Plasma documentation on Github.
Plugging in the LEDs
If you're using LED wire like us, unfurl it. It can get a bit squished in transit so it's best to spread it out a bit and make sure none of the wires are kinked. The wires are coated in plastic so they don't short against each other, but it's possible there might be tiny breaks in the plastic if they've been really folded up. Nothing bad will happen if the wires end up making contact with each other, but you might notice some unpleasing flickering or glitching.
In the packet with the LED wire, you should have a loose connector with bare wires on one end. We'll be using this to connect the plug on the LED wire to the screw terminals on Plasma 2040.
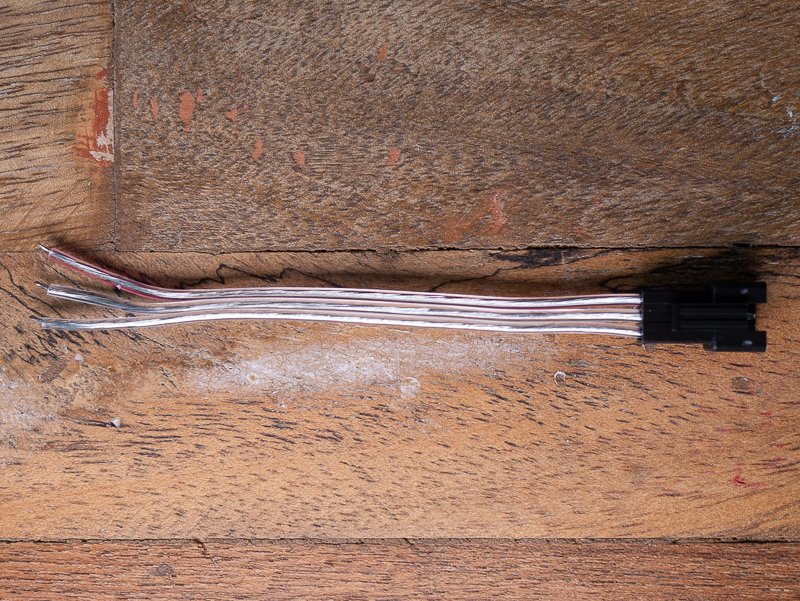
These LEDs are WS2812 addressable LEDs, so they have three wires - 5V, data and ground. With more traditional LED strips you can tell which wire is which (and what end the controller needs connecting to) from the markings on the strip, but with this LED wire the 5v line is the one that's marked in red on the connector, the data line is the one in the middle, and the ground line is the one that's left over.
Loosen the screws on the connector on Plasma 2040 with a flathead screwdriver, poke the wire ends into the connector, and tighten the screws back up. You'll probably find it easier to do one wire at a time. Give the wires a little tug when you're done to make sure they're anchored solidly in the connector. Be sure that the terminal is gripping the metal wire, and not the plastic sleeve (you can strip off a little bit of the plastic sleeve to expose more of the wire if that helps).
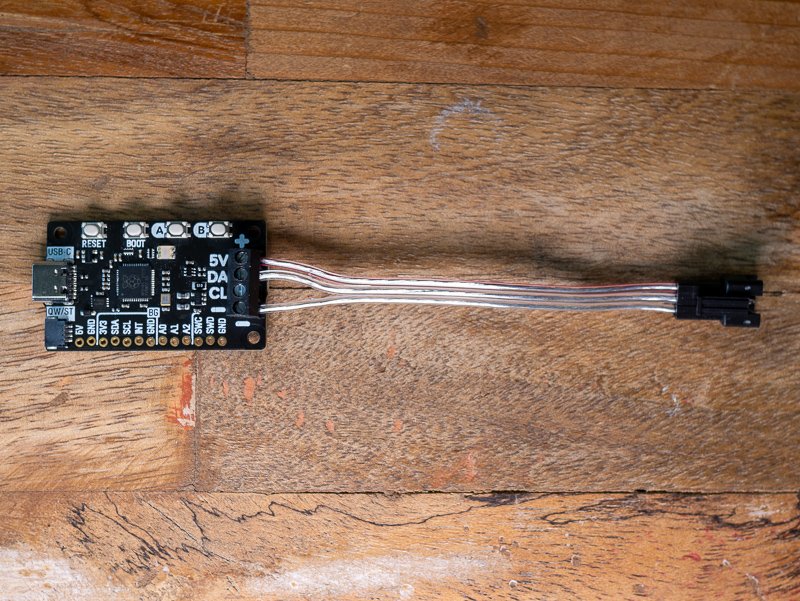
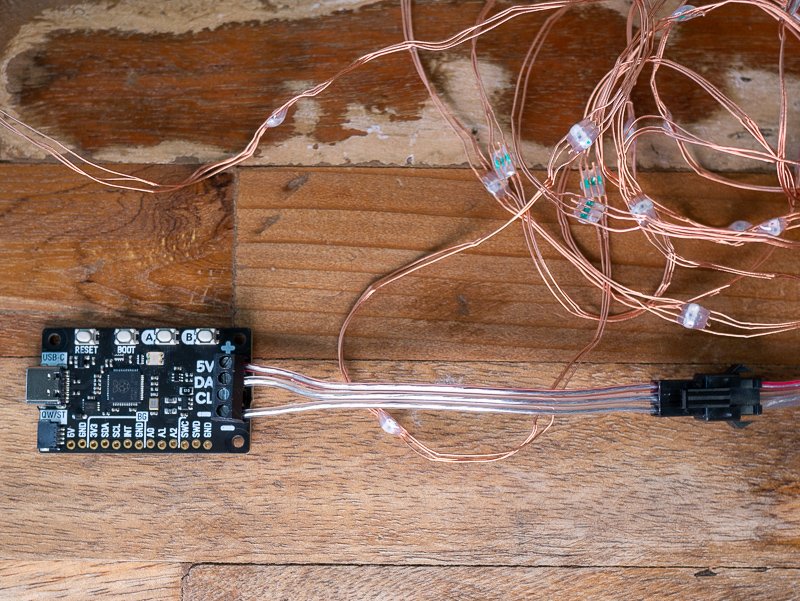
Once that's in place then the fiddly bit is done, you can go ahead and plug in your LEDs and your USB-C cable.
Installing our custom MicroPython build
If you're brand new to Raspberry Pi Pico/RP2040s, you might find the step by step instructions in our Getting Started with Raspberry Pi Pico tutorial useful - it will show you how to install our custom MicroPython build and goes into more detail about how to use Thonny . Here's a quick TLDR!
Download the most recent MicroPython .uf2 from the Releases page of our plasma Github repository. For Plasma 2040, you'll want the 'plasma_2040' file. We'd suggest using the 'with-filesystem' build as this will copy the examples to your device, but note that flashing a 'with-filesystem' build will overwrite Plasma 2040's existing filesystem, so if you've got important code saved to your board be sure to back it up to your computer before continuing.
Connect Plasma to your computer with a USB-C cable, if it's not already.
Hold down the BOOT button of Plasma 2040, and then press, and release, the RESET button. This will put it into bootloader mode, and it should appear as a drive on your computer called RPI-RP2.
Copy the .uf2 file to the RPI-RP2 drive - once you've done that Plasma 2040 will reboot running Pirate brand MicroPython (it won't show up as a drive anymore).
Install Thonny
Open up Thonny. Make sure the interpreter (shown in the box on the bottom right corner) is set to 'MicroPython (Raspberry Pi Pico)'. If everything's working as it should look something like this. The flashing cursor next to the >>> in the 'Shell' box tells you that Plasma 2040 is talking to your computer and is ready to accept instructions!
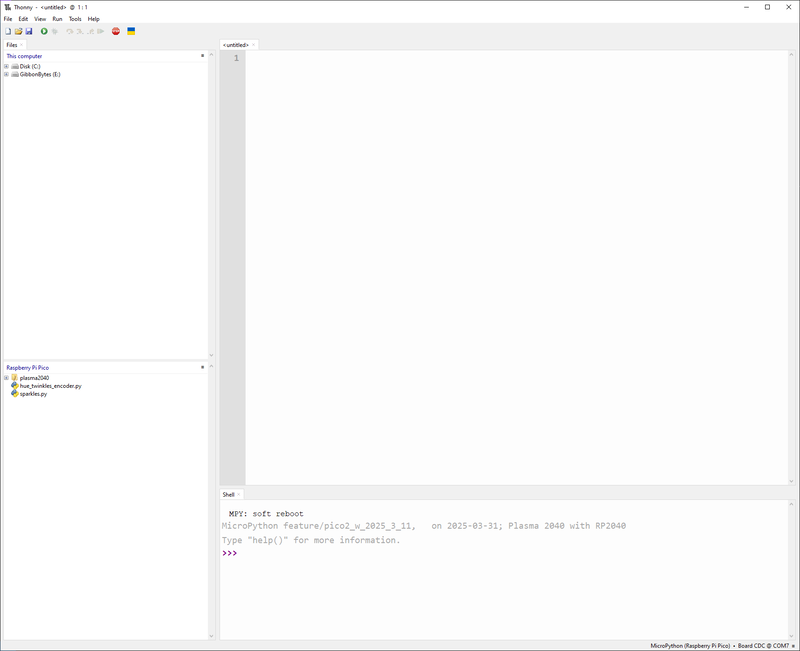
Lighting up the onboard RGB LED
As a test that the board is working properly and you have the correct version of MicroPython installed, you can light up the onboard RGB LED red with the following code - you can enter it line by line in the REPL (that's the bottom 'Shell' box in Thonny) or copy and paste the whole thing into the top box and hit the green run button to save the code to your Plasma 2040. If you choose to save it, you'll be prompted for a filename.
import plasma
from pimoroni import RGBLED

led = RGBLED("LED_R", "LED_G", "LED_B")

led.set_rgb(255, 0, 0)
The three numbers after set_rgb are a RGB (Red Green Blue) colour code, and each number should be between 0-255.
ValueError: unknown named pin "LED_R"
If you get an error that looks like this, you may still be running an old version of the MicroPython firmware. Go back to the 'Installing our custom MicroPython build' section for instructions how to grab the most recent version.
Lighting up the LED strip
Lighting up one LED
Lighting up the LED strip is pretty similar to lighting up the onboard LED. Here's how to light up the first LED of your strip red (you can change the 50 to however many LEDs you have in your strip).
import plasma

NUM_LEDS = 50

led_strip = plasma.WS2812(NUM_LEDS)

led_strip.start()
led_strip.set_rgb(0, 255, 0, 0)
The first number in the set_rgb command is which LED you're giving an instruction to - LED 0 is the first LED in our strip. The following three numbers are the RGB colour code, as before. If you'd rather control your LEDs by specifying a HSV (Hue Saturation Value) colour code you can do that with theset_hsv function (we'll be sticking to RGB in this tutorial though).
Halp, it's not red!
If the first LED is lighting up green or blue, that probably means that your LED strip has a different colour order to the default (GRB). You can fix this by changing the led_strip = line to specify a different colour order, like this:
led_strip = plasma.WS2812(
    NUM_LEDS, color_order=plasma.COLOR_ORDER_RGB
)
Halp, I have RGBW LEDs!
If your LEDs are in (surprise) disco mode or if fewer of them are lighting up than expected, you may have RGBW LEDs. Peer closely at the LED strip - if one half of each LED is yellow, then they have an extra white element, lucky you. Try initialising your led_strip object like this:
led_strip = plasma.WS2812(NUM_LEDS, rgbw=True)
Lighting up all the LEDs
Okay, we can do better than one LED. How about lighting up all the LEDs red? We can do this for adding a for i in range statement, which repeats the set_rgb instruction to light up every LED between 0 and 49.
import plasma

NUM_LEDS = 50

led_strip = plasma.WS2812(NUM_LEDS)

led_strip.start()

for i in range(NUM_LEDS):
    led_strip.set_rgb(i, 255, 0, 0)
Halp, it's too red!
Setting the red channel of the RGB strip to 255 means that the red element of the LEDs is set to maximum red. If you want to tone the brightness down a bit, or if being on full all the time is making your LEDs a little bit toasty, change this to a smaller number. Setting it to 127 instead will reduce the brightness to (about) half.
Rainbow interlude
At this point, you've probably had enough of red LEDs. If you haven't checked out our examples yet and fancy a palette cleanser, now might be a good time to try out some adjustable speed rainbows. rainbow.py should be present on your device if you flashed the 'with-examples' .uf2, but if it's not you can copy and paste the example into the top box in Thonny, and press the green run button. This rainbow example also shows you how you can make use of the nifty current sensing circuitry on Plasma 2040.
Making a busy light
Back to it! To use our new found powers to make a busy light, all we need to do add a bit more code so we can use the buttons to switch between modes. The Button helper functions in our shared pimoroni module make this nice and straightforward.
import plasma
from pimoroni import RGBLED, Button

NUM_LEDS = 50

led = RGBLED("LED_R", "LED_G", "LED_B")
led.set_rgb(0, 0, 0)

button_a = Button("BUTTON_A")
button_b = Button("BUTTON_B")
button_boot = Button("USER_SW")

led_strip = plasma.WS2812(NUM_LEDS)

led_strip.start()

while True:
    if button_a.read():
        for i in range(NUM_LEDS):
            led_strip.set_rgb(i, 255, 0, 0)
        led.set_rgb(255, 0, 0)
    if button_b.read():
        for i in range(NUM_LEDS):
            led_strip.set_rgb(i, 0, 255, 0)
        led.set_rgb(0, 255, 0)
    if button_boot.read():
        for i in range(NUM_LEDS):
            led_strip.set_rgb(i, 0, 0, 0)
        led.set_rgb(0, 0, 0)
We've also brought back the RGBLED function we used earlier, to change the colour of the onboard LED to match the colour of the LED strip. Now when you press A the LEDs should light up red, when you press B they'll light up green, and when you press the boot button they'll turn off. Now all you need to do is hang up your LEDs (or install them in a suitable vessel...)
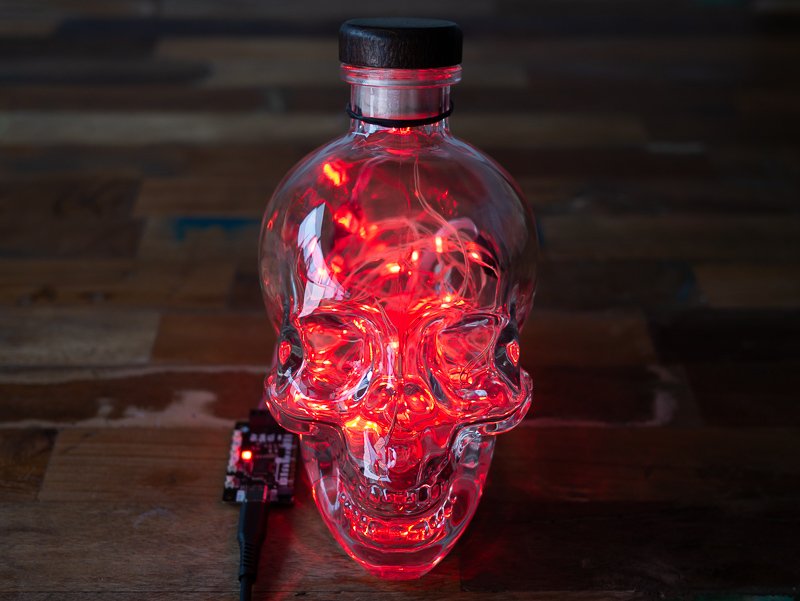
... and your busy light is complete! If you want your program to run whenever your project is powered up, save it to Plasma 2040 as main.py. If you do this you don't need to have your busy light plugged into a computer running Thonny, you can power it from any old USB port. You could power your Plasma 2040 from a USB power bank to make your busy light portable, or even wearable (how about a Big Bad Hat of Just Say No?)
CircuitPython
Want to use CircuitPython on your Plasma 2040 instead of MicroPython? No problem! To install CircuitPython -
- download the Plasma 2040 CircuitPython .uf2 here . You'll also need the CircuitPython driver bundle (be sure to grab the one that matches the version of CircuitPython that you just downloaded)
- Hold down the BOOT button of Plasma 2040, and then press, and release, the RESET button. This will put it into bootloader mode, and it should appear as a drive on your computer called RPI-RP2.
- Copy the CircuitPython .uf2 to the RPI-RP2 drive. After a few seconds, it should reappear as a drive called CIRCUITPY.
- Unzip the driver bundle that you downloaded earlier. You'll need
neopixel.mpy(if you have WS2812 LEDs) oradafruit_dotstar.mpy(if you have APA102 LEDs), as well asadafruit_bus deviceandsimpleio.mpy- you can find them all in thelibfolder. Copy them across to thelibfolder on the CIRCUITPY drive. - With CircuitPython, you always save your code as
code.py, and it will run automatically. You don't need to use Thonny, you can editcode.pywith any text editor.
Here's a version of our busy light code for CircuitPython!
import board
import digitalio
import adafruit_rgbled
import busio
import neopixel

NUM_LEDS = 50

BRIGHTNESS = 1

led_strip = neopixel.NeoPixel(board.DATA, NUM_LEDS, brightness=BRIGHTNESS, auto_write=True)

button_boot = digitalio.DigitalInOut(board.USER_SW)
button_boot.direction = digitalio.Direction.INPUT
button_boot.pull = digitalio.Pull.UP

button_a = digitalio.DigitalInOut(board.SW_A)
button_a.direction = digitalio.Direction.INPUT
button_a.pull = digitalio.Pull.UP

button_b = digitalio.DigitalInOut(board.SW_B)
button_b.direction = digitalio.Direction.INPUT
button_b.pull = digitalio.Pull.UP

led = adafruit_rgbled.RGBLED(board.LED_R, board.LED_G, board.LED_B, invert_pwm = True)

def button_read(button):
    return not button.value

while True:
    if button_read(button_a):
        led_strip.fill((255, 0, 0))
        led.color = (255, 0, 0)
    if button_read(button_b):
        led_strip.fill((0, 255, 0))
        led.color = (0, 255, 0)
    if button_read(button_boot):
        led_strip.fill((0, 0, 0))
        led.color = (0, 0, 0)
There's also neopixel and dotstar examples in the examples folder of the CircuitPython driver bundle you can play with, to get them to work with Plasma 2040 you'll just need to point them at the correct pins -
For WS2812 LEDs:
pixel_pin = board.DATA
or
For APA102 LEDs:
dots = dotstar.DotStar(board.CLK, board.DATA, 30, brightness=0.2)
Next steps
Now that you know how to make LED strips light up, you could experiment with switching between LEDs and colours to make custom patterns and effects, or you could add a sensor breakout and make the lights automatically do stuff based on temperature or light level - check out our MicroPython examples for some ideas!
Search above to find more great tutorials and guides.