 Easy
Easy
Using I2C Sensors With Badgeware
Learn how to connect Badgeware to the world around it with a three-in-one sensor stick.
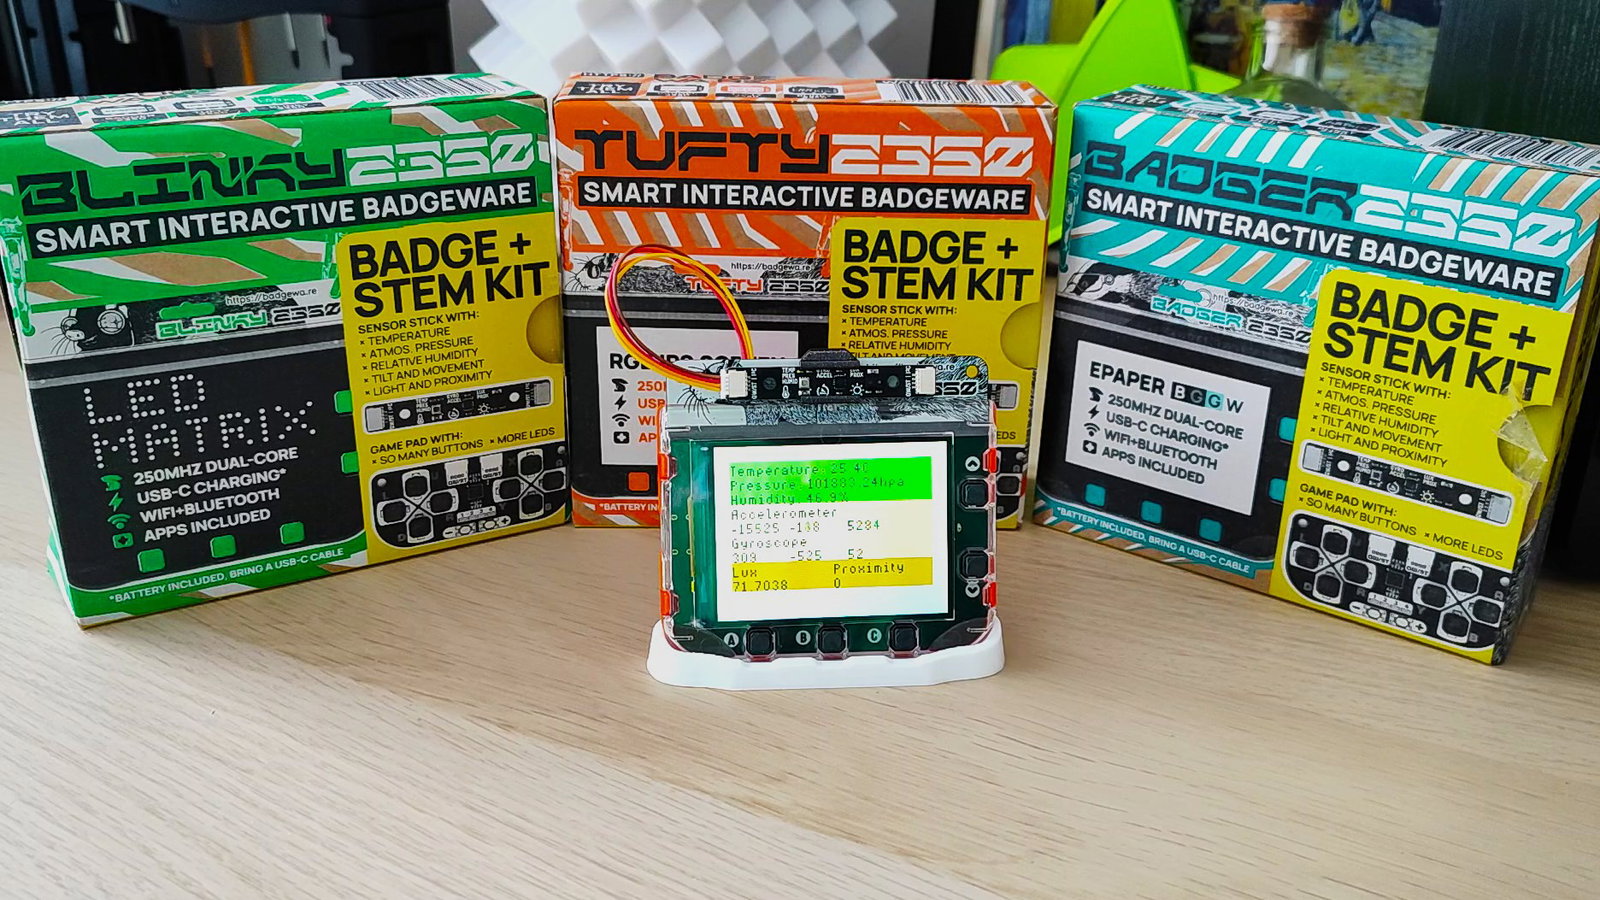
Our range of Badgeware devices are much more than conference badges, and in this tutorial we'll use a Tufty 2350 with a Multi-Sensor Stick to show live sensor data from the world around us.
The Multi-Sensor Stick contains three different sensors in one package - BME280, LTR559, and LSM6DS3. But what does each sensor do?
BME280 measures:
- Temperature
- Humidity
- Air Pressure
LTR-559ALS-01 measures:
- Proximity
- Light
TLSM6DS3TR-C measures:
- Orientation
- Motion
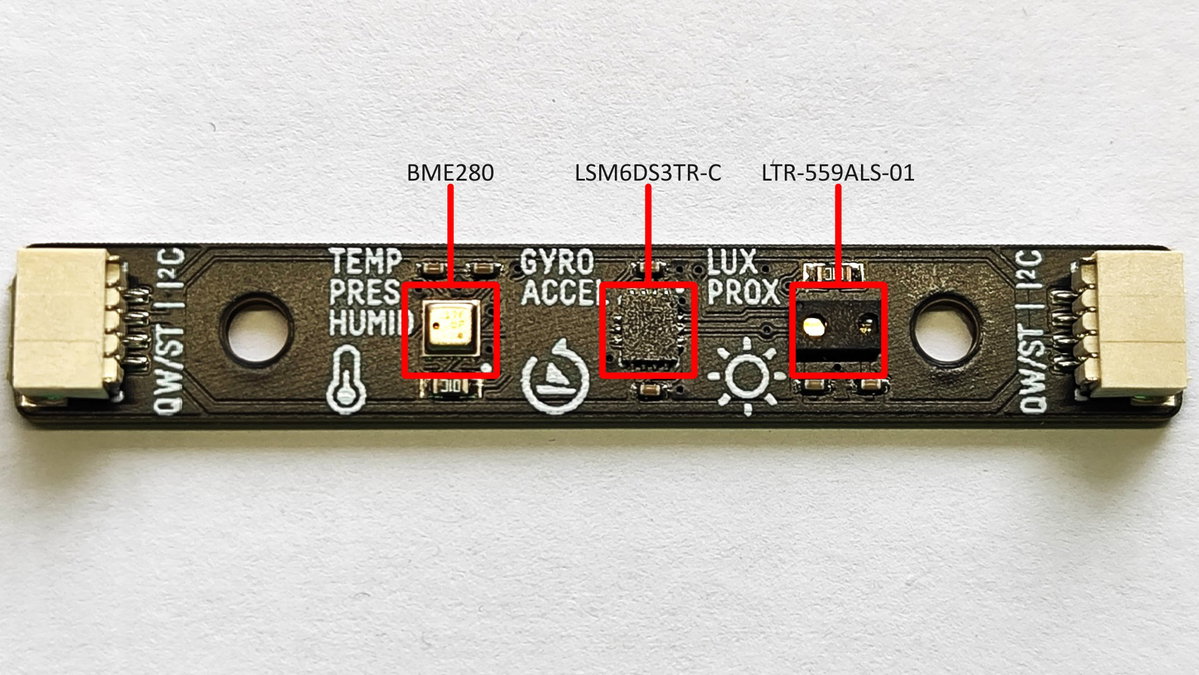
These three sensors, packaged into the Multi-Sensor Stick, all connect to Tufty 2350 via the super-simple Qw/ST connector (find out more about Qw/ST here) and the data they collect is displayed in real-time on Tufty 2350's 2.8 inch IPS display.
So, let's get building!
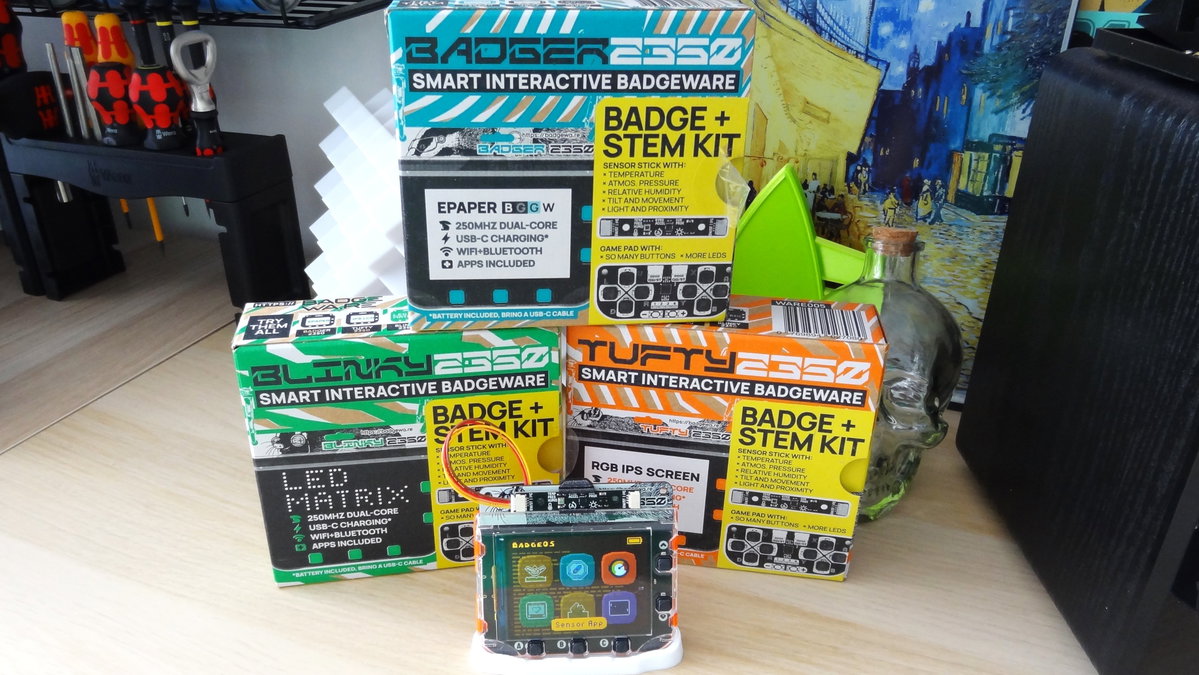
What You'll Need
- Tufty 2350 + STEM Kit
- A computer running Windows, macOS or Linux.
- Thonny or a text editor to write the code.
If you already have Tufty 2350, but not the STEM kit, then you will also need these.
- Multi-Sensor Stick (If you already have a Badgeware board.)
- 4 Pin JST-SH Cable (We recommend the 50mm cable.)
Optionally, you can 3D print a clip to attach the Multi-Sensor Stick to your Badgeware board.
❗️ This guide assumes you're using v3 (or later) firmware on your badge. Before starting this project, please ensure you update your firmware to the latest version.
Building The Project
Connecting up the Multi-Sensor Stick to Tufty 2350 is our first priority, then we will write the code that brings this project together.
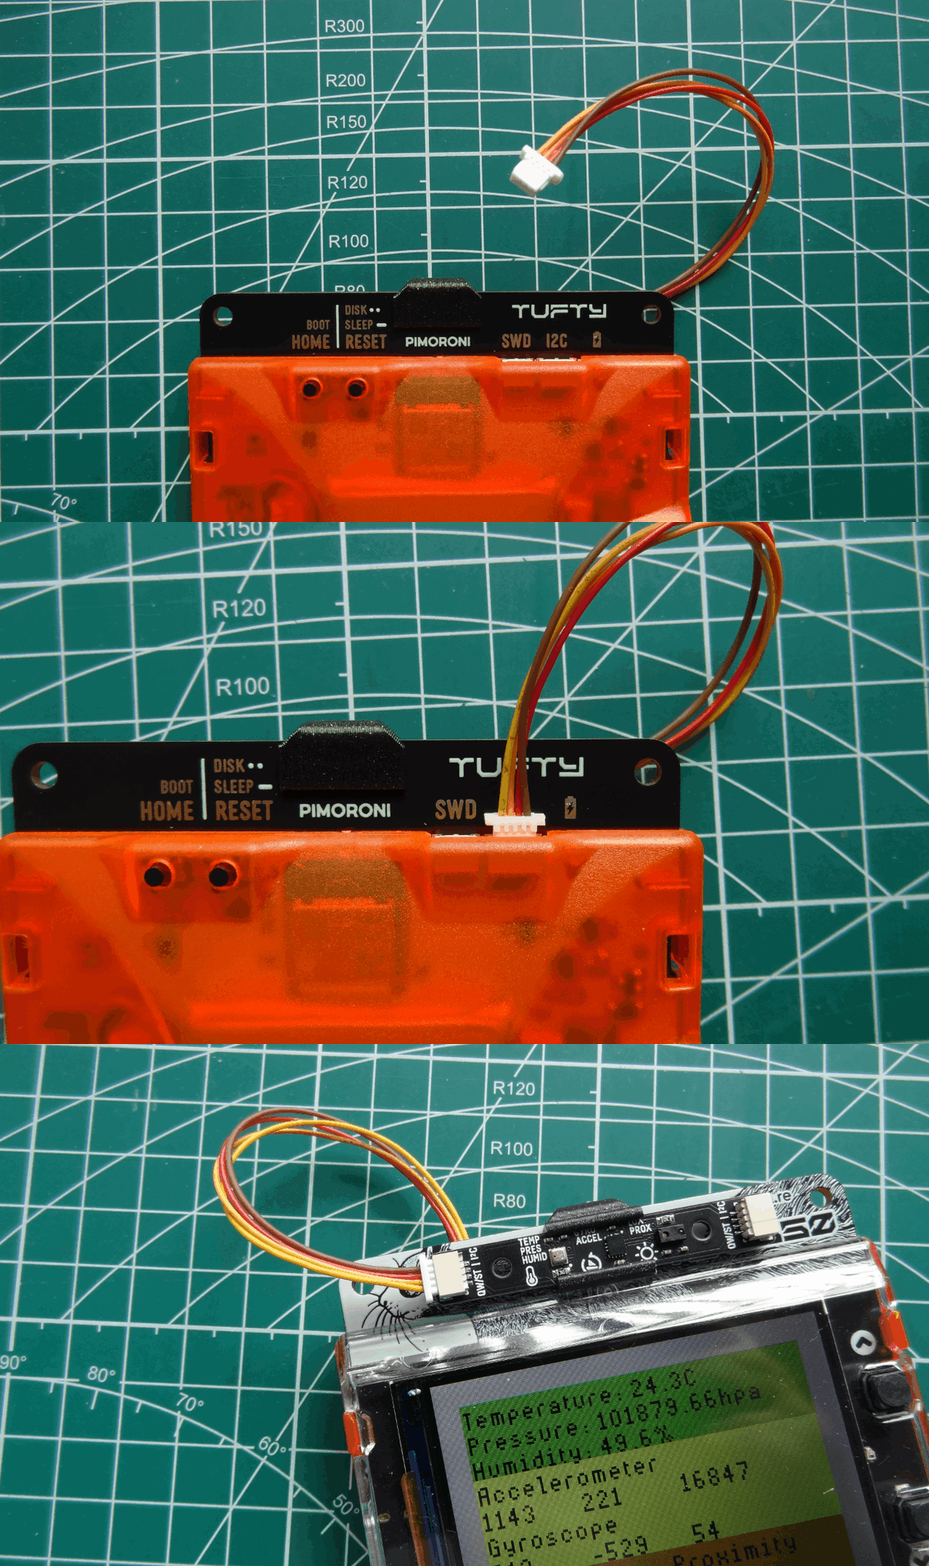
- Connect the Multi-Sensor Stick to Tufty 2350 using the Qw/ST cable. The port is marked I2C on Tufty. This would also be a good time to attach the 3D printed clip.
- Ensure that Tufty 2350 is running the latest firmware.
- Connect Tufty 2350 to your computer using a USB Type C data cable.
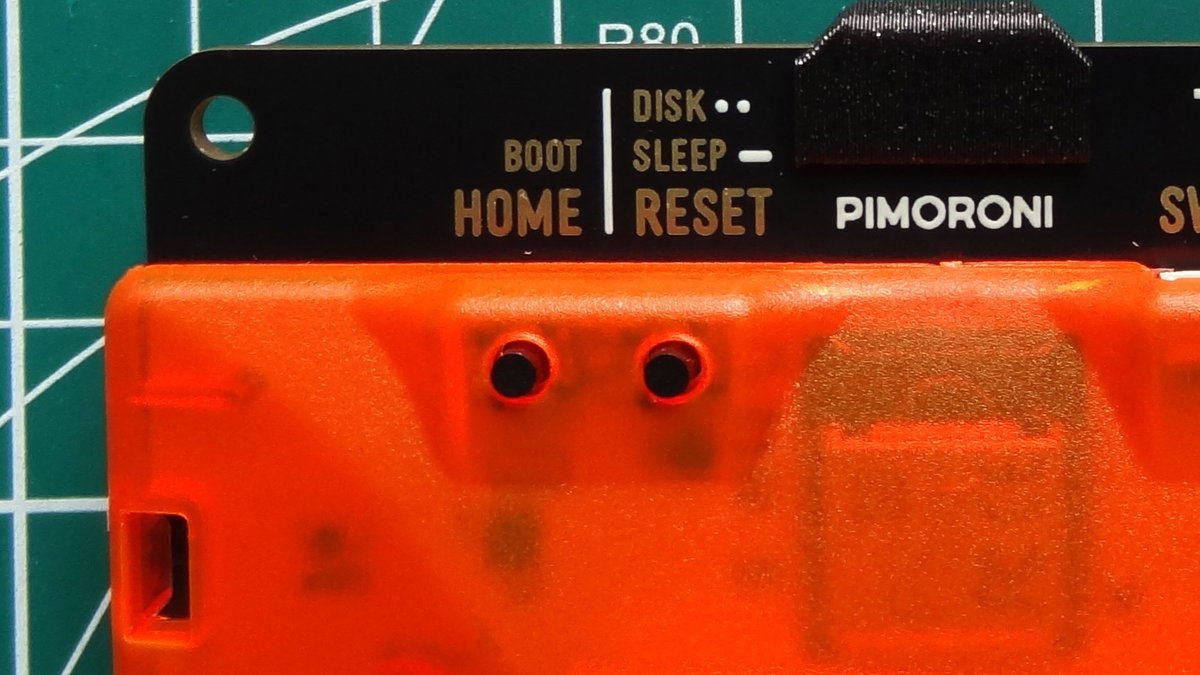
- Double press RESET on Tufty 2350 and a new drive, "Tufty" will appear in the File Manager.
- Open the drive and go to the apps folder.
- Create a new folder called
sensor_app. - Place this file
icon.pnginto thesensor_appfolder.
- Create a folder called
assetsinside thesensor_appfolder. We won't be using it for this project, but it is a good practice to create the folder should we wish to add images to our apps. - Open Thonny (or your preferred text editor).
- Save the blank file as
__init__.pyto thesensor_appfolder on Tufty 2350. - Import a series of modules that will make up the project.
- Time: Used to control the speed at which the app will run and check sensor readings.
- Machine, I2C: The Machine module enables us to use the GPIO pins of the RP2350 and in this case we specifically use I2C (Inter-Integrated Circuit) I2C is a data protocol used to communicate between the sensors and Tufty 2350. The Qw/ST cable connects the sensors and Tufty 2350 over an I2C interface.
- BreakoutBME280: Used to read sensor data from the Multi-Sensor Stick's BME280 temperature and humidity sensor.
- LSM6DS3: Used to read sensor data from the LSM6DS3 accelerometer and orientation sensor.
- BreakoutLTR559: Used to read light and proximity data from the LTR559 sensor.
import time
from machine import I2C
from breakout_bme280 import BreakoutBME280
from lsm6ds3 import LSM6DS3, NORMAL_MODE_104HZ
from breakout_ltr559 import BreakoutLTR559
- Create three objects to interface the code with the temperature / humidity (BME280), accelerometer / gyroscope (LSM6DS3) and light / proximity (LTR559) sensors. All of these sensors are present on the Multi-Sensor Stick, and using I2C we can address each one individually.
bme = BreakoutBME280(I2C())
gyro = LSM6DS3(I2C(), mode=NORMAL_MODE_104HZ)
ltr = BreakoutLTR559(I2C())
- Create a variable,
last_timeand store the current number of "ticks" (milliseconds, ms) since Tufty 2350 was powered on. This will be used as part of a timing mechanism.
last_time = time.ticks_ms()
- Create a variable,
intervaland store a value between 100 and 500. This translates to 100ms, a tenth of a second, to 500ms, half a second. This will ultimately control how fast the updates happen, so we are leaving the duration to your discretion.
interval = 100
- Create temporary variables for temperature, air pressure, humidity, accelerometer (x,y,z), gyroscope (x,y,z), light and proximity. We create these now so that we can use them in the update function later. If they are not created, then the code will error.
temp = 0
press = 0
humid = 0
ax = 0
ay = 0
az = 0
gx = 0
gy = 0
gz = 0
lux = 0
prox = 0
- Set the font to "sins", a 7px tall font that is clear and legible, despite its small size.
screen.font = font.sins
- Create a function called
update. This will run the code contained within every time Tufty 2350 updates the screen.
def update():
- Create a series of global variables (variables that can be used inside and outside the update function) that reference timing and sensor data.
global last_time, interval, temp, press, humid,ax,ay,az,gx,gy,gz,lux,prox
- Store the current time in ticks (ms) inside an object.
current_time = time.ticks_ms()
- Set the screen pen colour to latte (light grey, brown mix) and the use the clear screen function to set the screen to that color. We chose this colour, and the other colours for this app, from the Badgeware colour palette.
    screen.pen = color.latte
    screen.clear()
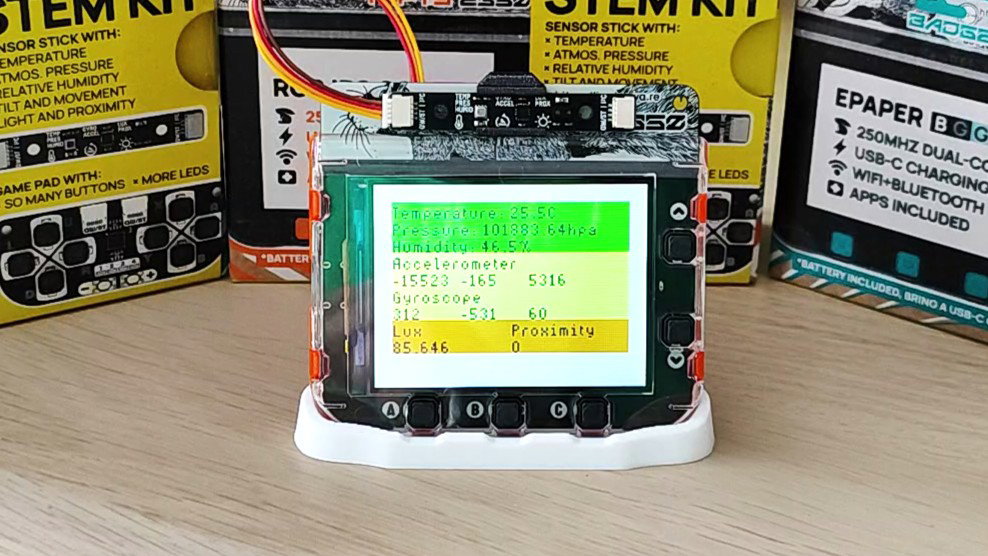
- Set the pen colour to lime, then draw rectangle, start a x 10, y 10. Stretch the rectangle 140 pixels across the screen, and then 30 pixels down the screen. To section the various sensor data, we will use coloured rectangles. This rectangle will form the background for the temperature data.
    screen.pen = color.lime
    rect0 = shape.rectangle(10,10,140,30)
    screen.shape(rect0)
- Create a yellow rectangle underneath the temperature data. This yellow rectangle will be the background for the humidity data.
    screen.pen = color.yellow
    rect1 = shape.rectangle(10,40,140,40)
    screen.shape(rect1)
- Create a final, orange rectangle that will be the background for the accelerometer / gyroscope sensor data.
    screen.pen = color.orange
    rect2 = shape.rectangle(10,80,140,20)
    screen.shape(rect2)
- Reset the pen colour to black. This ensures that black text is written over the coloured rectangles.
screen.pen = color.black
- Write the current temperature, air pressure and humidity values to the display. At this exact moment in the code, there are no values, hence the 0 values earlier. But in 100 - 500ms, and for every 100 - 500ms thereafter there will be real sensor data. We write the data 10 pixels in (x) and then at 10, 20 and 30 pixels down from the top (y). We use
str()to format the numerical data (float values) into text strings.
    screen.text(str(temp), 10,10)
    screen.text(str(press), 10,20)
    screen.text(str(humid), 10,30)
- Create section headings for "Accelerometer" and "Gyroscope" and place them inside the yellow rectangle which is under the temperature data section. Add the accelerometer (
ax,ay,az) and Gyroscope (gz,gy,gz) data inside this section.
    screen.text("Accelerometer",10,40)
    screen.text(str(ax), 10,50)
    screen.text(str(ay), 50,50)
    screen.text(str(az), 90,50)
    screen.text("Gyroscope", 10,60)
    screen.text(str(gx), 10,70)
    screen.text(str(gy), 50,70)
    screen.text(str(gz), 90,70)
- Inside the orange rectangle, add text and data for the LTR559 sensor. Note that the "Lux" and "Proximity" text are on the same line, becoming headers for the data underneath.
    screen.text("Lux", 10,80)
    screen.text(str(lux), 10,90)
    screen.text("Proximity", 80,80)
    screen.text(str(prox), 80,90)
- Using an if conditional test, check if the timer difference between when the app started and the current time is greater than or equal to the interval. If true, then the code within the conditional test will run.
if time.ticks_diff(current_time, last_time) >= interval:
- Take a reading from the BME280 and store the data inside an object called
readings. The returned data is a list that comprises of temperature, pressure and humidity data.
readings = bme.read()
- From
readingsextract the temperature data and store it inside a variable calledtemp. The temperature data is the first item in the list, so we use[0]to access it. You will also notice that we are usinground()to round the returned value to one decimal place.
temp = round(readings[0],1)
- Update the
tempvariable so that we create a sentence to format the temperature data into Celsius. This will be the text that is displayed in the green rectangle.
temp = "Temperature: {}C".format(temp)
- From the
readingsobject, extract the air pressure data and store it in a variable calledpress. Then update the variable to format the data into a sentence for display inside the green rectangle.
        press = readings[1]
        press = "Pressure: {}hpa".format(press)
- Grab the humidity data from the
readingsobjects and round the value to one decimal place before storing it in an object calledhumid. Then place the data in a sentence and save it to thehumidobject.
        humid = round(readings[2],1)
        humid = "Humidity: {}%".format(humid)
- Grab the gyroscope and accelerometer data for all axes and store it inside objects that are named accordingly. A refers to accelerometer, then it is x,y,z. G refers to gyroscope and the x,y,z format is repeated.
ax, ay, az, gx, gy, gz = gyro.get_readings()
- Take a reading from the lux / proximity sensor and save to an object called
ltr_sensorthen breakout the data for lux and proximity and save to variables of the same name.
        ltr_sensor = ltr.get_reading()
        lux = ltr_sensor[BreakoutLTR559.LUX]
        prox = ltr_sensor[BreakoutLTR559.PROXIMITY]
- Update the
last_timevariable with the current time.
last_time = current_time
- Outside of any loops or functions we now called the update function using
run(). This will run the code every time the screen updates. - Save the code into the
sensor_appfolder as__init__.py. - Press RESET on Tufty 2350 and then navigate to the app in the launcher.
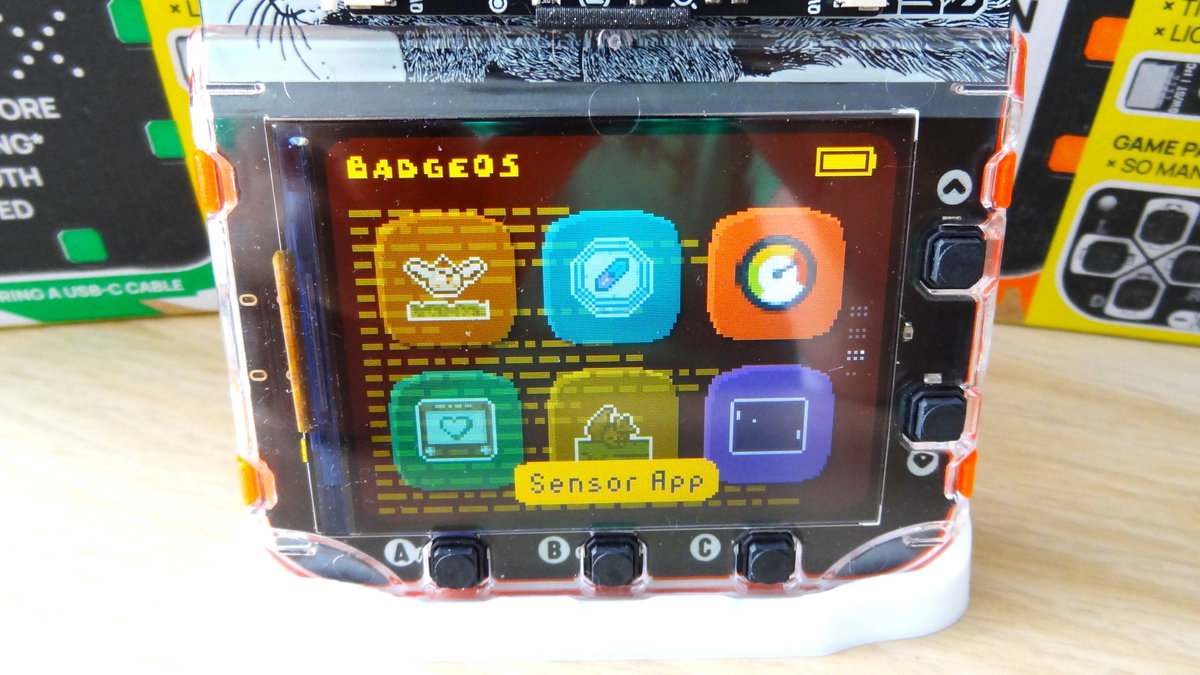
- Press B to launch the app and you will see live sensor data on Tufty 2350's display.
Complete Code Listing
import time
from machine import I2C
from breakout_bme280 import BreakoutBME280
from lsm6ds3 import LSM6DS3, NORMAL_MODE_104HZ
from breakout_ltr559 import BreakoutLTR559

bme = BreakoutBME280(I2C())
gyro = LSM6DS3(I2C(), mode=NORMAL_MODE_104HZ)
ltr = BreakoutLTR559(I2C())

last_time = time.ticks_ms()
interval = 100
temp = 0
press = 0
humid = 0
ax = 0
ay = 0
az = 0
gx = 0
gy = 0
gz = 0
lux = 0
prox = 0
screen.font = font.sins

def update():
    global last_time, interval, temp, press, humid,ax,ay,az,gx,gy,gz,lux,prox
    current_time = time.ticks_ms()
    screen.pen = color.latte
    screen.clear()
    screen.pen = color.lime
    rect0 = shape.rectangle(10,10,140,30)
    screen.shape(rect0)
    screen.pen = color.yellow
    rect1 = shape.rectangle(10,40,140,40)
    screen.shape(rect1)
    screen.pen = color.orange
    rect2 = shape.rectangle(10,80,140,20)
    screen.shape(rect2)
    screen.pen = color.black
    screen.text(str(temp), 10,10)
    screen.text(str(press), 10,20)
    screen.text(str(humid), 10,30)
    screen.text("Accelerometer",10,40)
    screen.text(str(ax), 10,50)
    screen.text(str(ay), 50,50)
    screen.text(str(az), 90,50)
    screen.text("Gyroscope", 10,60)
    screen.text(str(gx), 10,70)
    screen.text(str(gy), 50,70)
    screen.text(str(gz), 90,70)
    screen.text("Lux", 10,80)
    screen.text(str(lux), 10,90)
    screen.text("Proximity", 80,80)
    screen.text(str(prox), 80,90)

    if time.ticks_diff(current_time, last_time) >= interval:
        readings = bme.read()
        temp = round(readings[0],1)
        temp = "Temperature: {}C".format(temp)
        press = readings[1]
        press = "Pressure: {}hpa".format(press)
        humid = round(readings[2],1)
        humid = "Humidity: {}%".format(humid)
        ax, ay, az, gx, gy, gz = gyro.get_readings()
        ltr_sensor = ltr.get_reading()
        lux = ltr_sensor[BreakoutLTR559.LUX]
        prox = ltr_sensor[BreakoutLTR559.PROXIMITY]
        last_time = current_time

run(update)
What Have We Learnt?
In this tutorial we have learnt:
- How to connect a Qw/ST device to Badgeware.
- How to read sensor data.
- How to display text and vector shapes on Tufty 2350's screen.
- How to time updates on Tufty 2350.
If you would like to take your skills further, we have an excellent graphical sensor example from one of our in-house software developers here.