Streaming Spotify to your Pi
This tutorial will guide you through all the steps necessary to stream Spotify to your Pi, using Mopidy, Mopidy-Spotify, and the Iris web interface. The end result will be a streaming Spotify box that you can control remotely from another computer in your house or from your phone (Android or iOS) or tablet.
⚠️ Note that Spotify disabled their libspotify API in May 2022, which means you can't currently stream/play music from Spotify using the mopidy-spotify plug in mentioned below. Follow this Github issue for more info / updates!

We've put together a neat little one-line-installer to make this whole process really easy, but we'll also explain what it does later, because you wouldn't be learning otherwise, huh?
It will work either with the built-in 3.5mm stereo jack on your Pi model B+, 2, or 3, or with our audio boards - pHAT BEAT, pHAT DAC, or Speaker pHAT. It's also perfect for the Pirate Radio Kit, turning it into a neat little streaming audio box.
Note that you'll need a Spotify Premium account for this, although you can use this setup to play local music files, like MP3s, as well.
We recommend using the very latest version of Raspbian Lite, and you'll need an internet connection to install the Mopidy packages later (we'll explain how to do that in Raspbian Lite below). We'd recommend using either the NOOBS installer, which you can find here (ensure that you select Raspbian Stretch Lite when installing), or downloading Stretch Lite from here and then using the Etcher tool to burn the image to your SD card.
Currently, our spotipy installer is best supported by Stretch Lite, and may not work properly in the full version of Raspbian. Because Stretch Lite is... liter (sic) it should also run a bit more snappily than the full Raspbian.
Using the Pi's built-in 3.5mm stereo jack
If you're using the built-in audio on your Pi model B+, 2, or 3, then there's no other preparation needed.
Using pHAT DAC
If you're using our pHAT DAC board, then you need to solder the 2x20 pin female header (that comes with it) to your pHAT DAC (and also solder a 2x20 pin male header to your Pi Zero or Pi Zero W, if you're using one). We have a guide on how to solder headers to pHATs here.
Pop the pHAT DAC onto your Pi's GPIO pins.
Using pHAT BEAT or the Pirate Radio Kit
If you're using the Pirate Radio Kit and haven't already built it, then follow our guide here to learn how to put it all together.
If you're just using pHAT BEAT, then make sure that you've soldered the 2x20 pin female header to it. Again, you can follow our guide to soldering pHATs. Connect a couple of speakers (or just one) to your pHAT BEAT's push fit speaker terminals.
Pop the pHAT BEAT onto your Pi's GPIO pins, if you haven't already.
Using Speaker pHAT
If you're using Speaker pHAT, then follow our guide to soldering it here.
Pop the Speaker pHAT onto your Pi's GPIO pins.
Running the installer
Just to reiterate, you'll need an internet connection to run this installer. Pop the SD card into your Pi, make sure that the audio board that you're using is attached to your Pi (on its GPIO pins) if you're using one, and then plug in the power and boot up your Pi. Because you're using Stretch Lite, your Pi will boot straight to a terminal, but don't be scared!
You'll need to connect to Wi-Fi. To do this, you need to edit a file called
wpa_supplicant.conf. Type the following:
sudo nano /etc/wpa_supplicant/wpa_supplicant.conf
Use the arrow keys to move to the bottom of the file, and add the following, replacing the parts that say "YOURSSID" and "YOURPASSWORD" with the SSID and password for the Wi-Fi network to which you'd like to connect.
country=GB
ctrl_interface=DIR=/var/run/wpa_supplicant GROUP=netdev
update_config=1

network={
ssid="YOURSSID"
psk="YOURPASSWORD"
}
Once you've made those changes, press control and x, then y, and then
enter to save and close the file.
Now, type sudo reboot and press enter to reboot. Your Pi should now be
connected to Wi-Fi.
To run the installer, type the following:
curl https://get.pimoroni.com/spotipy | bash
You'll need you Spotify username and password handy for this part. The installer will ask you to enter your username and password and will use this to configure the Mopidy-Spotify plugin. Note that your username and password will be stored in plain text so it's a good idea, for safety's sake, to have a unique password (i.e. to make sure it isn't the same as any other passwords that you use), and that you don't have any open, insecure ports on your local area network.
You'll also need a client_id and client_secret which you can obtain by following this link, clicking on the green 'Authenticate Mopidy with Spotify' button and logging into your Spotify account.
The installer will prompt you several times, and you should type y for all of
these, with the exception of the device selection. When it prompts you to select
a device, then type the number of the device that you'd like to install. Note
that if you're using the built-in audio through the 3.5mm jack then you should
select option 0 here.
The installer should also ask if you'd like to reboot once the installation is
complete. If it doesn't, then restart by typing sudo reboot again.
What the installer does
If you're not concerned with what the installer does, then stop reading this section now! If you are, then read on! It's good to know exactly what it does in case you want to pull down our installer script and modify it for your own purposes (which you're very welcome to do!)
Our installer installs Mopidy, and a bunch of plugins to add functionality to it. Mopidy is a network music server, that allows you to stream music over your local network or, in this case, from internet music sources like Spotify.
Here, we're using Spotify as our music source, so we're installing the Mopidy-Spotify plugin, which allows you to play songs, albums, playlists, and your own saved music on Spotify.
The Mopidy-ALSAMixer plugin allows you to control the system volume level straight from Mopidy, and will also allow us to hook it into our physical buttons on pHAT BEAT (if you're using it).
The physical buttons on pHAT-BEAT are hooked up straight to the GPIO on your Pi. There's a handy Mopidy plugin called Mopidy-TTSGPIO that lets you assign functions to buttons connected to GPIO pins; functions like play/pause, forward, back, volume up and down, and shutdown. Fortunately, the buttons on pHAT BEAT and the front panel on Pirate Radio are labelled up with those exact functions!
As well as allowing the use of GPIO-linked buttons, this plugin also allows text-to-speech to announce track and playlist names, and to confirm button presses, amongst other things, although we don't enable this as part of the installer script.
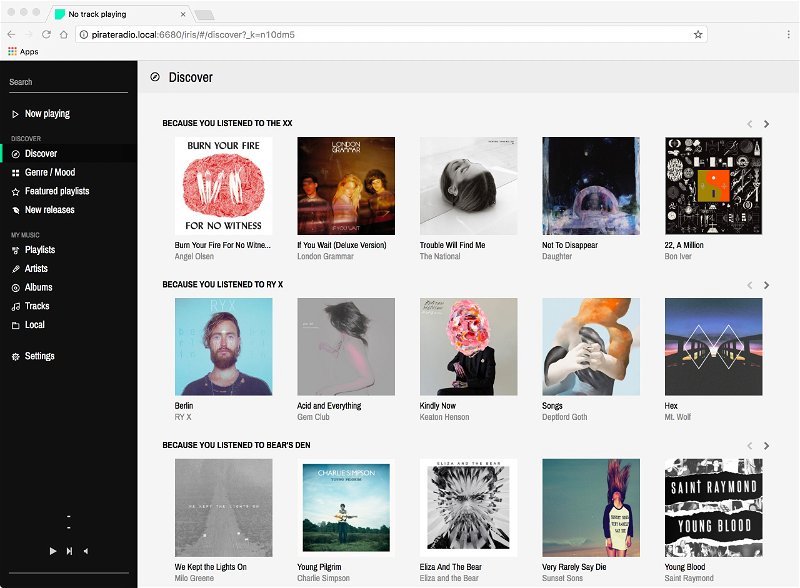
The Iris web front-end provides a really slick-looking interface to control your Pi running Mopidy. It caters specifically for Spotify, so it's set up with menu options for playlists and latest releases, etc. If you're not using Spotify and instead are using local music, then it might be best to look into one of the other Mopidy web front-ends.

Our installer will also install and configure the software for your chosen music output device, be it pHAT DAC, pHAT BEAT, Speaker pHAT, or just the Pi's built-in audio.
As we mentioned previously, the installer adds your Spotify credentials to the
Mopidy configuration file (/etc/mopidy/mopidy.conf). It also enables the
appropriate plugins mentioned earlier, sets up the correct functions for the
buttons on pHAT BEAT (if you're using it), and makes the Pi's IP address
visible on your local area network, so that you can control it remotely on your
PC/Mac/phone/tablet via the web front-end.
Lastly, it runs Mopidy as a system service, meaning that it will fire everything up automatically when your Pi boots.
Booting for the first time, and using Mopidy
As we said, now that everything is installed and set up, Mopidy should fire itself up when your Pi boots. If your Pi rebooted after the installer ran, then Mopidy may well be running already! It takes a couple of minutes to fire everything up, and maybe a little longer on a Pi Zero or Pi Zero W, so once you've plugged the power into your Pi, or rebooted it, then wait for a few minutes before following the steps below.
You'll need to know your Pi's IP address to access the web front-end remotely.
If you have a display and keyboard attached to your Pi (we'll assume you do,
since you ran the installer), then type ifconfig in the terminal to find your
IP address. If this is the only Raspberry Pi on your network, and you haven't
changed the hostname of your Pi, then you will be able to use
raspberrypi.local instead of the IP address.
Open a browser window on your PC/Mac/phone/tablet and enter the following URL:
http://192.168.0.2:6680/iris/
where 192.168.0.2 is the IP address of your Pi, or if you're going to use
raspberrypi.local then enter:
http://raspberrypi.local:6680/iris/
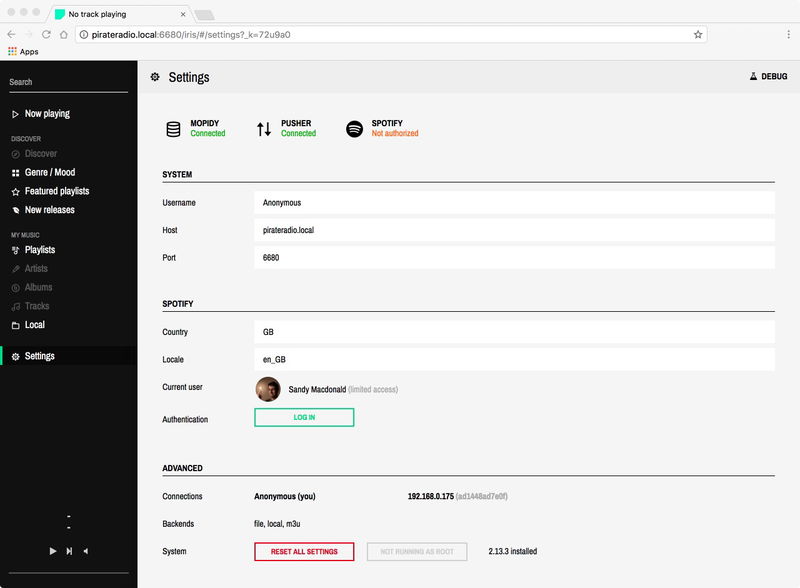
Your browser should have loaded up the Iris web interface. It's fairly self- explanatory to navigate, but one important thing you'll have to do is to go to the settings page and log in to Spotify, to authorise it, if it's the first time you're using it.

Click "log in", and it should pop up a new window to authorise Spotify. If it doesn't, then you might need to switch off any pop-up blockers that might be active. Now that you've authorised Spotify, you should have access to your playlists, and saved albums and artists, featured Spotify playlists, and more.
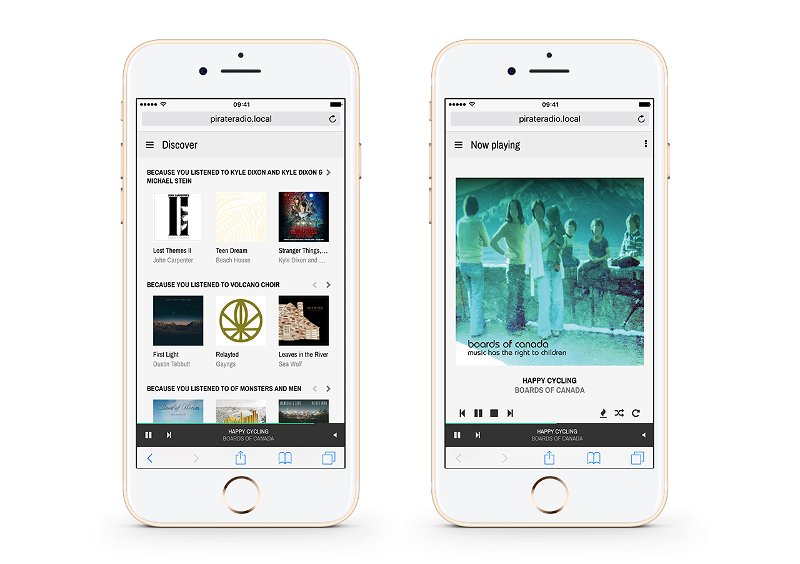
Because Iris is responsive, it looks really good on mobile as well, resizing and changing context to work on smaller displays. And because it's just a regular web front-end it will work equally well in iOS or Android.

With the Mopidy-TTSGPIO installed and active, you should be able to use the buttons along the side of pHAT BEAT to control your music. Try them!
Taking it further
Why not try some of the Mopidy web front-ends, or some of the other plugins to use services like Google Play Music, SoundCloud, TuneIn radio, and YouTube. Or try to add an OLED display to show track and artist information? You could try to make your Pi music player Twitter or Slack controlled, turning it into a collaborative music player!
Search above to find more great tutorials and guides.