Setting up the Software on your Picade
This tutorial will guide you through how to set up the software side of your Picade. For build instructions you will need to go here, or have a look at John Edgar Park's excellent build series. If you have a Picade HAT or Picade HAT parts kit (NOT the Picade kit), you'll need to have a little look at the bottom of this page for specifics.
Old tutorial awooga! This tutorial is not for our most recent Picade edition - check out the Picade shop page for a link to the most up to date instructions.
If you're a Raspberry Pi user, we're currently recommending RetroPie as the operating system of choice to run on your Picade.
There are excellent instructions on how to install and configure RetroPie on the RetroPie website.
...HOWEVER...
If you are a complete noob at this, we aim to give a bit more detail, so read on.
The good news is that you can do this step prior to building the Picade, so if you wanted to say, set up an SD card to give with a Picade to someone, you can.
You will need:
- an SD card (8GB minimum, but 16GB recommended)
- a computer with an SD card reader
- a connection to the internet
Step 1 - Get the software
Go to the RetroPie downloads page and you'll see two big red buttons. The one on the right says Raspberry Pi 2/3 and is the version you want for a Raspberry Pi 3. Click on it and a file ending in .gz will start downloading.
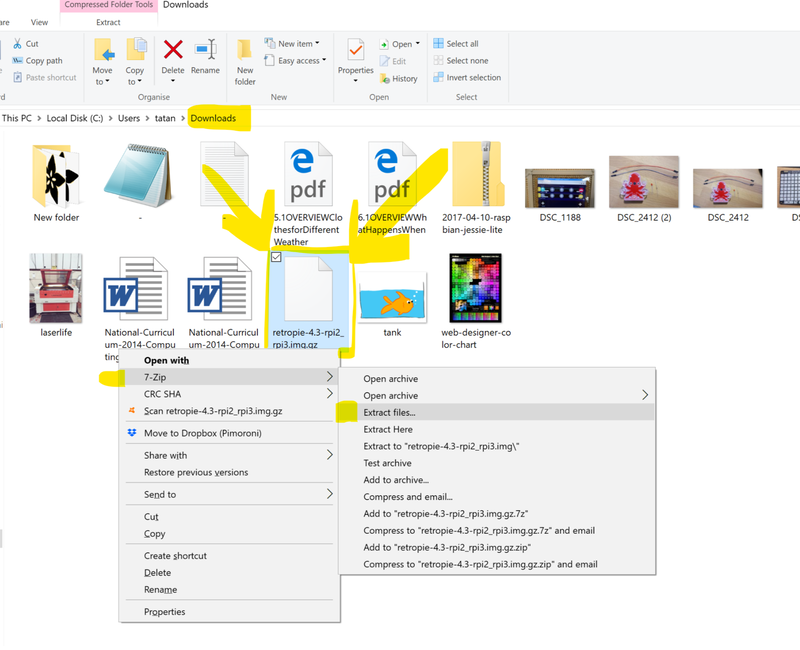
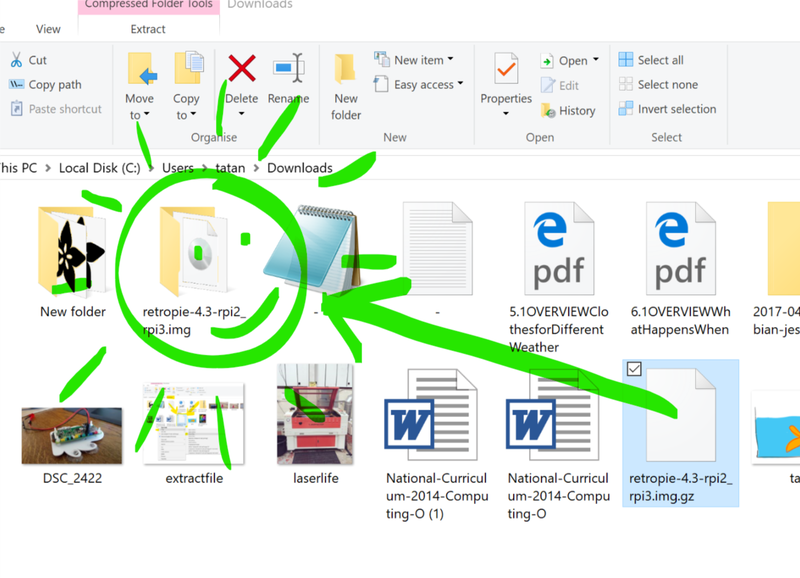
You need to extract the .gz file into a .img file. We used 7-zip, which is a free utility for Windows/Mac/Linux. You can get it here if you don't already have unzipping software.
Once you've extracted it, you'll see another file called retropie-whateverversionyouhave-rpi3.img. This is the one we're going to put onto the SD card.
Step 2 - Get the software onto the SD card
Put your blank SD card into your card reader (you might have one built in to your computer, you might have to use an external USB one). Have a look in your filesystem to see what letter it appears as (this is SUPER IMPORTANT). On mine it appears as drive D.
Now, the slightly tricky bit is that you don't copy the img (image) like you do by dragging and dropping, you need to image it, which means making it a readable thing for the Pi to boot from.
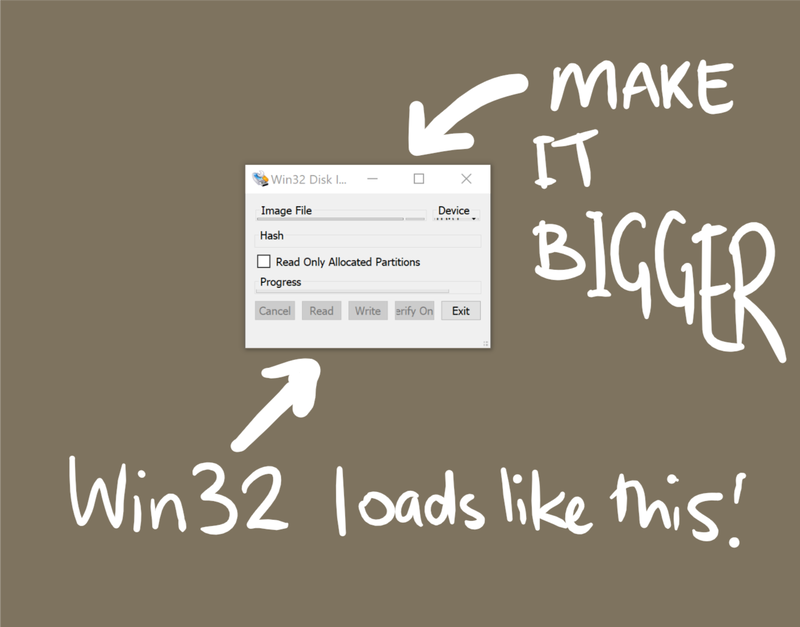
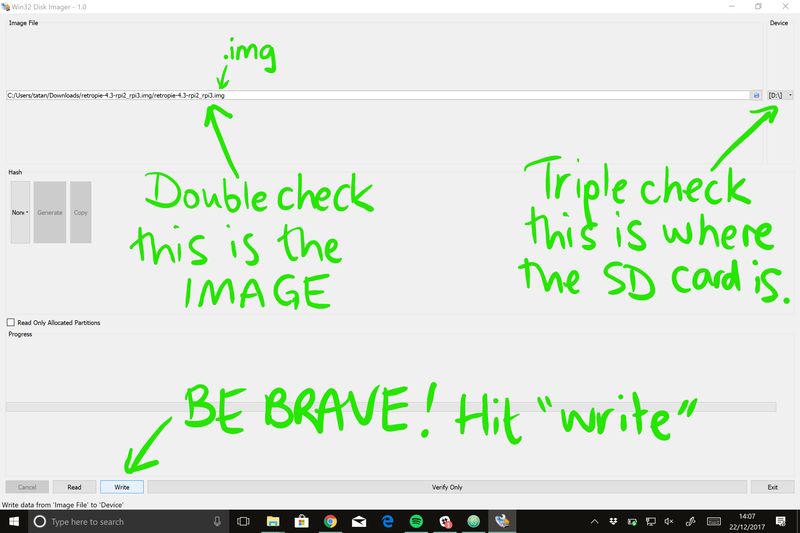
You need another utility to do this; we used Win32 Disk Imager which is free and does the job. Etcher is also excellent, free, and cross-platform!
When it first loads up, it looks pretty tiny. This may be a trick it plays on me and me alone, but make it bigger so you can see what you're doing.
Once you've made it bigger, follow the steps in the next photo. It is SUPER IMPORTANT that you have the right drive letter picked for the SD card. Don't guess. Check!
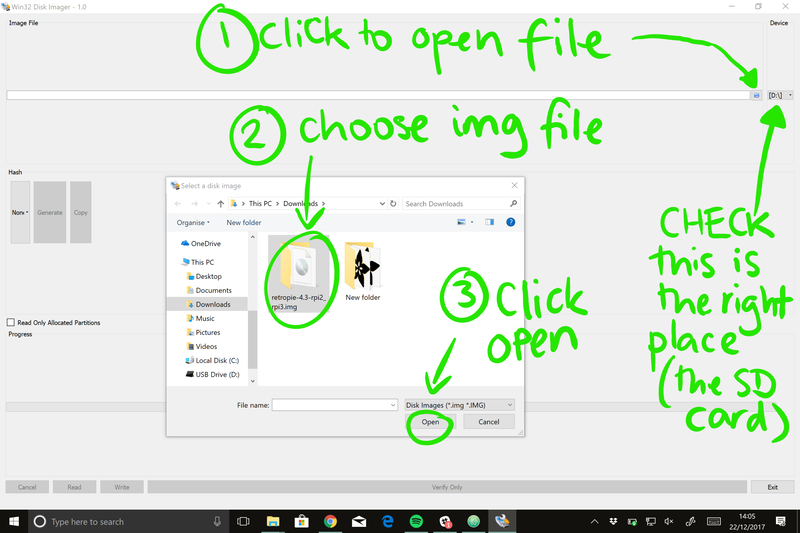
Once you've chosen the image file, double check it's the image, and not the .gz one by mistake. Triple check the SD card location. Then hit WRITE!
Then click "YES" because we would like it to write the image. Now go and make a cuppa, because this bit takes a little while.
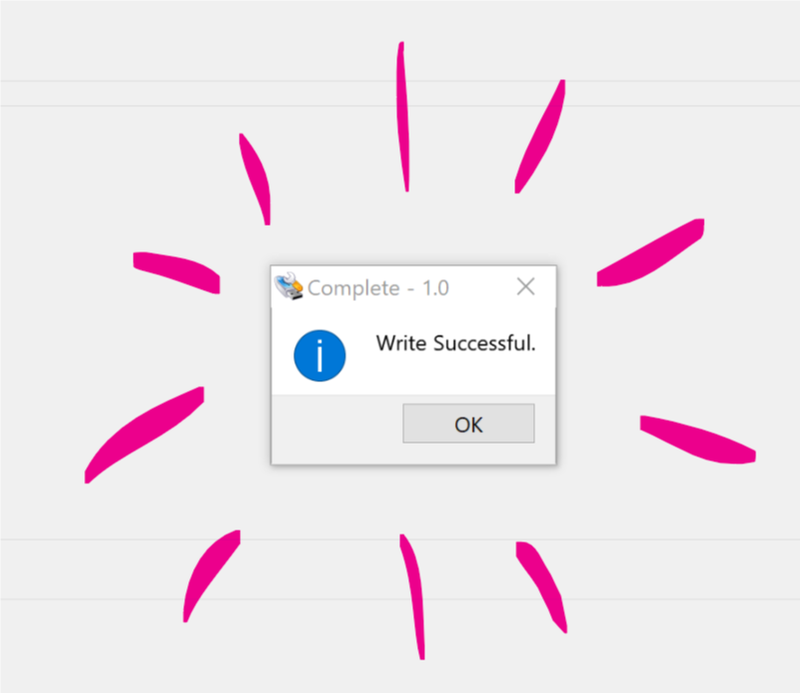
If all goes well, you should get this joyful little box pop up.
Step 3 - final tweaks to make it work properly
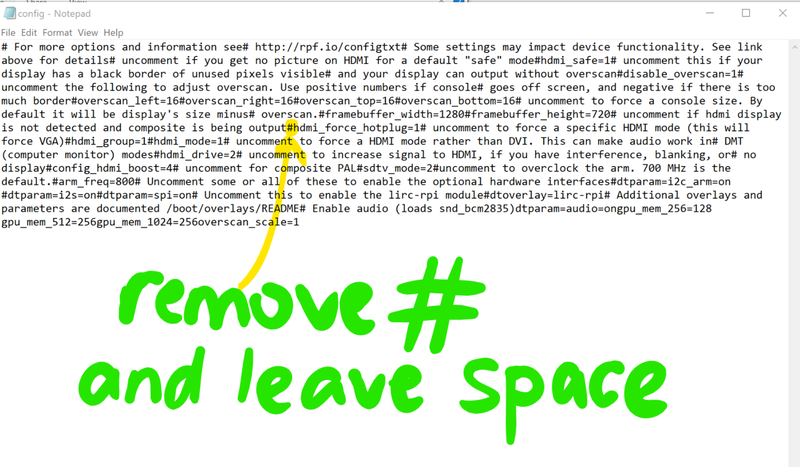
You have to edit a tiny bit on the image that you put onto the SD card. Have a look in your filesystem and you should see a bit called boot. In there, you'll find a file called config that you need to open.

You need to uncomment (remove the # before) hdmi_force_hotplug=1. Since the display is powered from the Pi, it won't be properly detected at startup, so this is required to make it work.
All you need to do is delete the #, add a space, then save the file.
The card should now be ready to put into your Pi 3, and if all goes well you should see the normal boot process, plus the RetroPie screen. If you want to add your Pi to a Wi-Fi network, you can do this through the RetroPie interface, and many other things.
Happy Picading! :-)
Search above to find more great tutorials and guides.