Making your Xmas Critters
This tutorial will show you how to make a Xmas Critter using the kits we're giving away over this festive period. The materials in the kit are for one critter, so pick your favourite out of the three and let's get started!
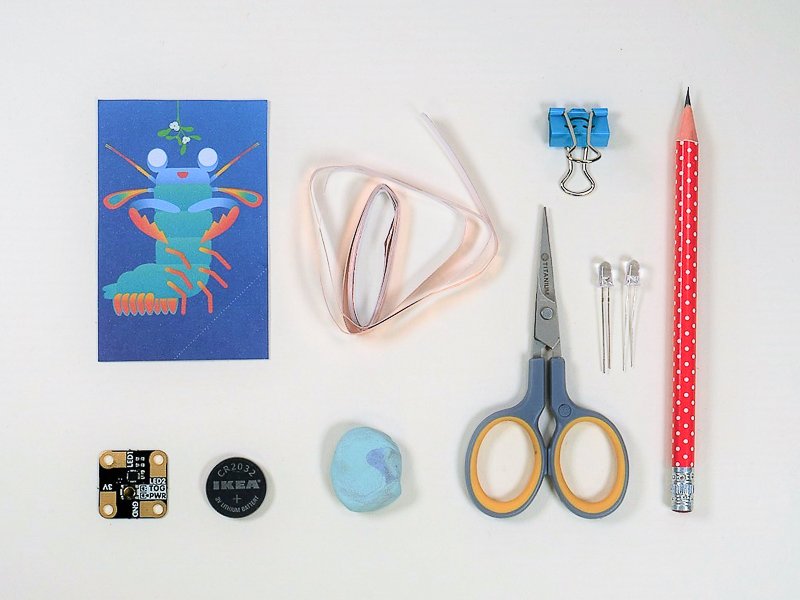
First, check that you have all of the parts you need.
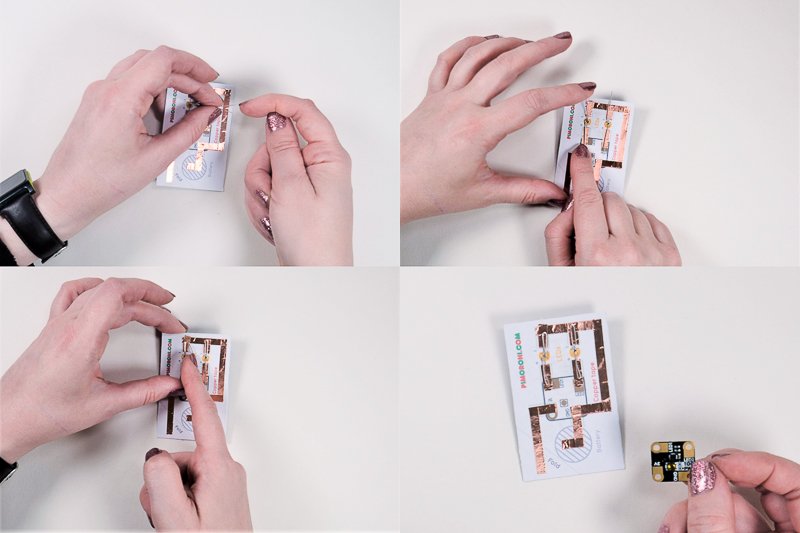
We'll start with the copper tape and the card base. Peel off a little bit of the backing on the tape, and press the end down on one of the red lines. As you press it down along the lines, peel back more of the backing as you go. This makes sure that the tape doesn't curl up and stick to itself!
Start taping
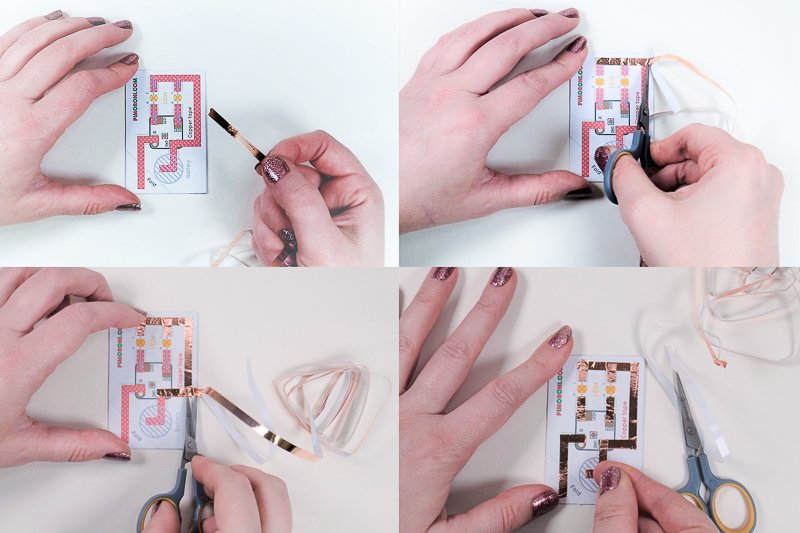
At each corner, you can bend the tape (messy) or you can tear it off and start a new piece. If you tear it, make sure that you overlap the tape so that the electricity can flow through it smoothly.
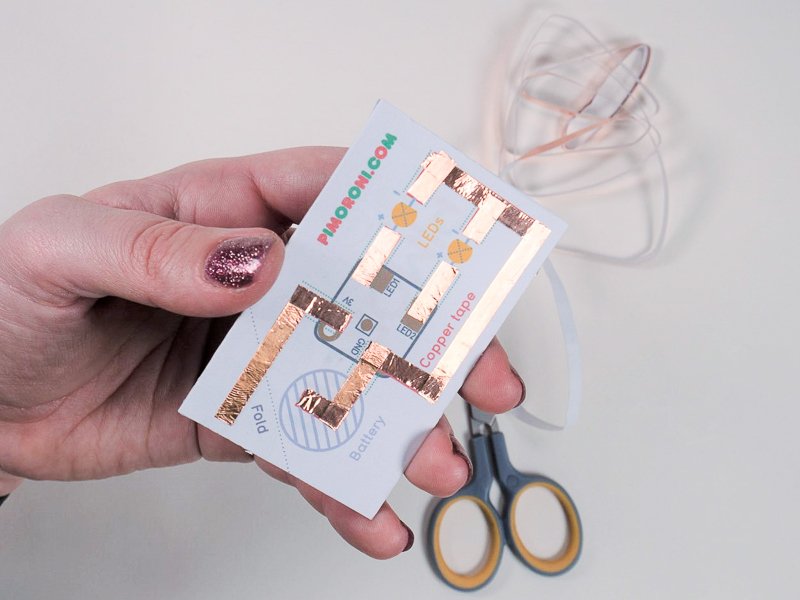
Once you have taped all of the red parts, check it against the photo below to make sure you've covered all the parts you need to. If you can still see any red markings, add more copper tape, because we're going to need all the ends to make contact with the other parts of the circuit. It's a good idea to rub down any joins with the back of your nail, or something flat if you don't want to use your nails!
Adding the LEDs for eyes
Turn the card over and look for the eyes - this is where we're going to put the lights. You need a pencil and some Blu Tack. Put the Blu Tack behind the critter's eyes, and use the pencil to poke a little hole in the middle of each eye. The wires on the LED are going to go through these holes, so it doesn't need to be too big.
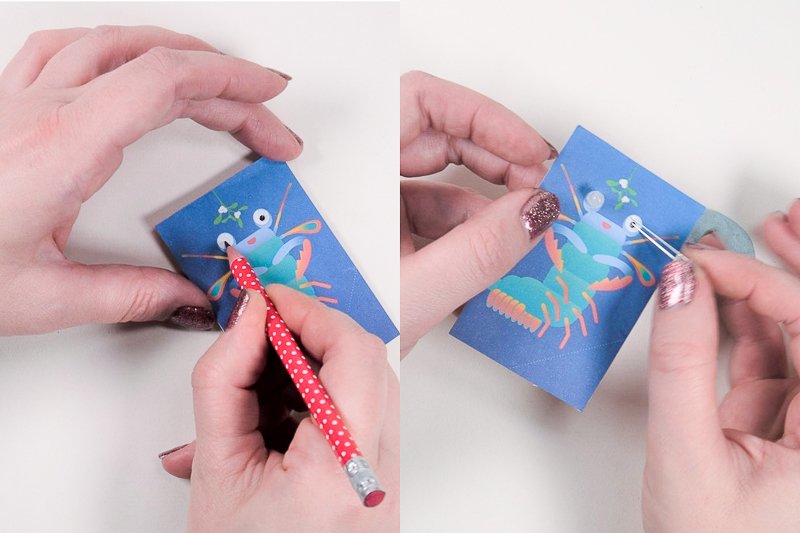
Now, poke the legs of the LED through from the critter side and turn the card back over.
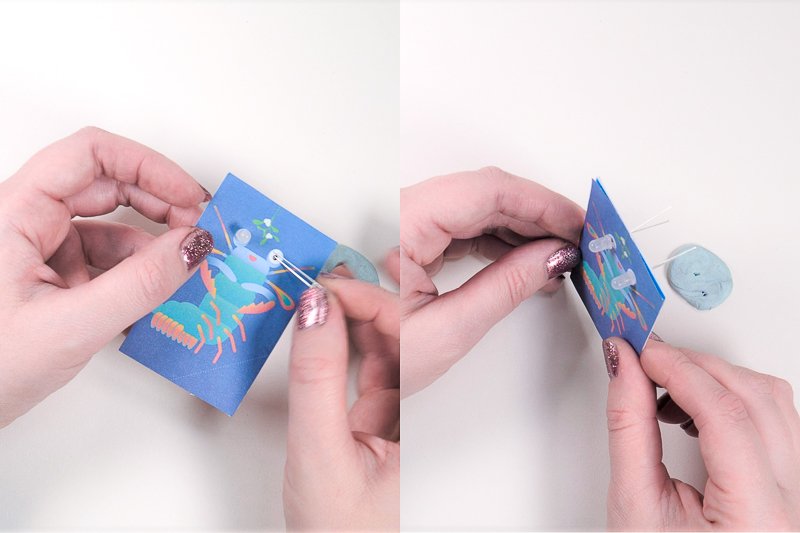
Look carefully at the legs of the LED. One leg is longer than the other, and this one should bend up towards the top bit of tape. The shorter one should bend down towards where the little circuit board is going. There's also a flat edge on one side of the LED that can help to get the LED the right way round; this should go at the top edge as shown on the card too.
You will see that the legs are a bit long and hang over the edges, so carefully fold the legs to fit, or alternatively snip them off with some wire cutters.
Add another strip of top along the top line to hold the LEDs down securely.
The blinky board
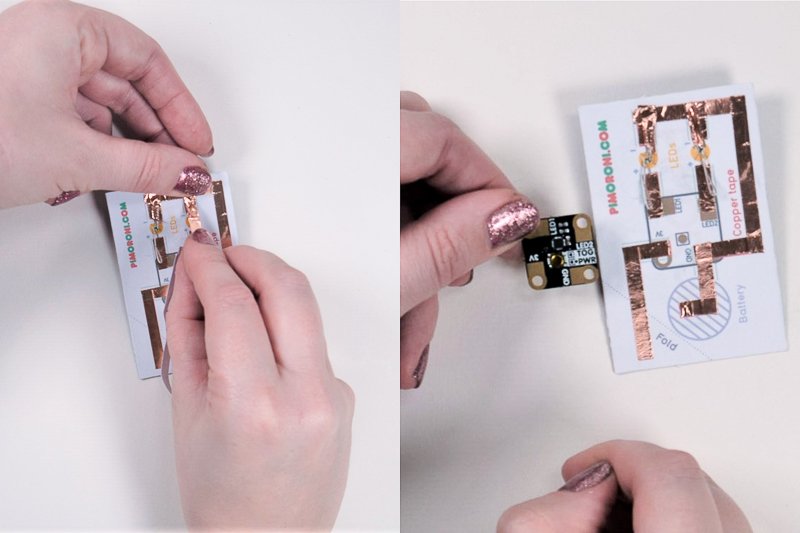
Place the blinky board down on the marking for it, making sure that the labels match. LED1 and LED2 should be at the top, with 3V and GND at the bottom. Use more copper tape over each gold contact pad on the board, making sure it joins up to the lines you made earlier. The joins from the pads labelled with LED should hold down the bottom LED legs too.
Adding the battery
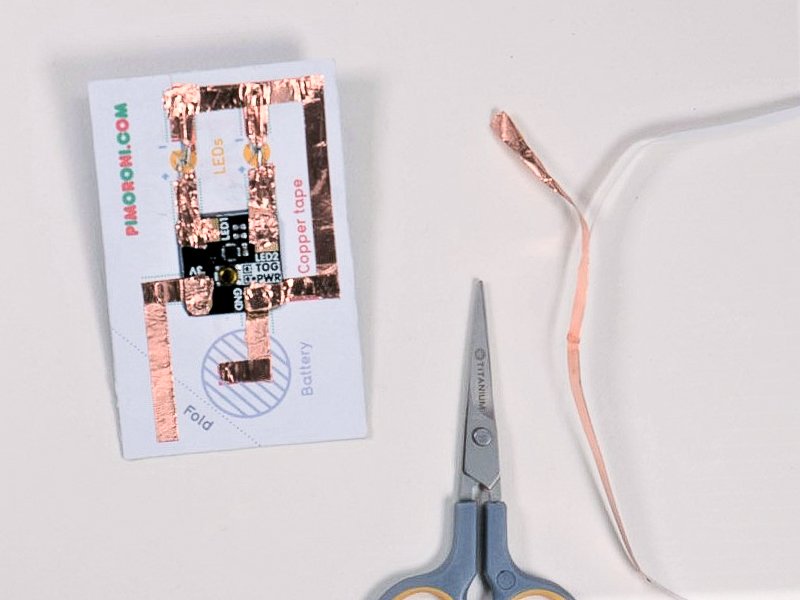
Now look for the fold lines on the bottom corner. You need to fold the corner towards you. This will be the switch for the battery. Unfold it again and put the battery with the dimpled side down, and the smooth side with the + marking on the top. Fold the corner back over it, and hold it shut with the clip.
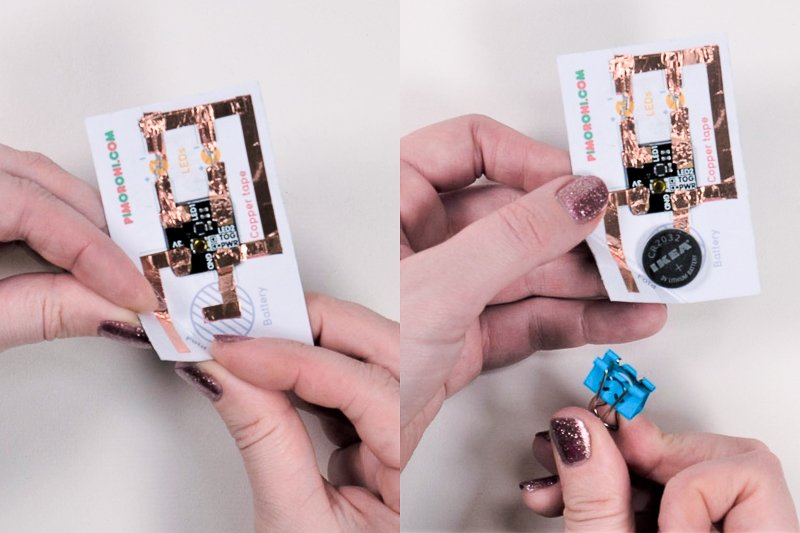
Pressing the little gold button in the middle of the circuit board cycles through the eight different light patterns. Each time you press it, it will change the pattern, until you get back to the start. If you press and hold the gold button, it'll put the board and LEDs to sleep. A short press will wake it back up.
Troubleshooting
If your lights aren't lighting up or are a bit flickery, here are a few things to try.
- Add additional pieces of tape to the LED legs and the four pads on the blinky board.
- Smooth down the joins on the tape.
- Check that the LEDs are the right way up. If you look from the critter side, you should see two little flat bits at the top of the LEDs. This is the right way up. If the flat bits are on the bottom, you'll need to turn the LED round.
- Make sure that you haven't missed any connections with the copper tape. Check the picture below.

- Check that you don't have any shorts, for example, the tape conecting the LED legs shouldn't touch across the legs, and the same goes for the bits of tape on the blinky board pads.
- Depending on how you've bent the legs, they can spring up and come loose from the tape. You can use extra copper tape or some normal sticky tape (make sure it's non-conductive) to hold them down more securely.
Alternatives
If you don't want to use a coin cell battery, you can power these with a 3V battery pack. They have two wires usually, a red (postive) and a black (negative/ground) one.
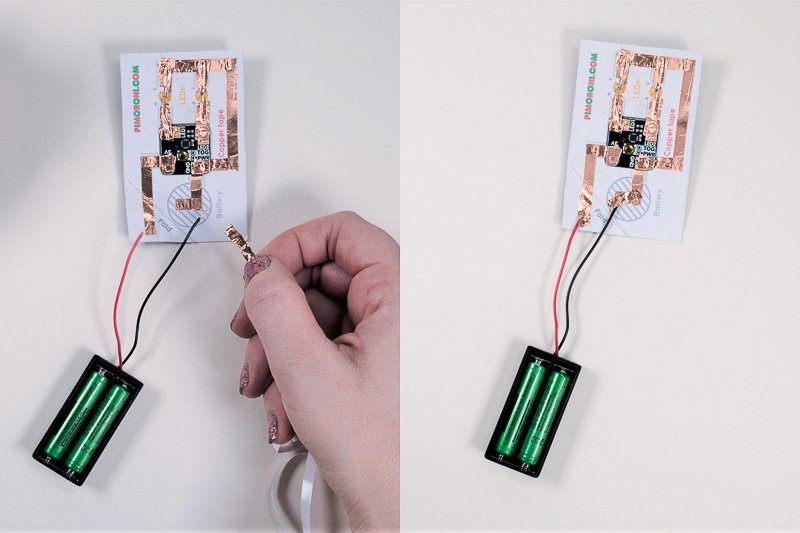
If you tape the black wire to the strip that leads to the GND (ground) pad, and the red wire to the strip that leads to the 3V pad, you should be able to power the critter just like you can with the coin cell battery.
Make sure that you use 2x AA batteries, or 2x AAA batteries, and no more than that, or you may damage the circuit board.
Search above to find more great tutorials and guides.