 Easy
Easy
Easy Lighting Effects for Tiny FX
Learn how to use the PicoFX MicroPython module to add lighting effects to Tiny FX builds.
We've already covered Getting Started With Tiny FX, and in that introductory guide we covered a basic example of a blinking (flashing) LED. In this part we will explore picofx, a dedicated module (software library) that makes controlling single-colour and RGB LEDs extremely simple.
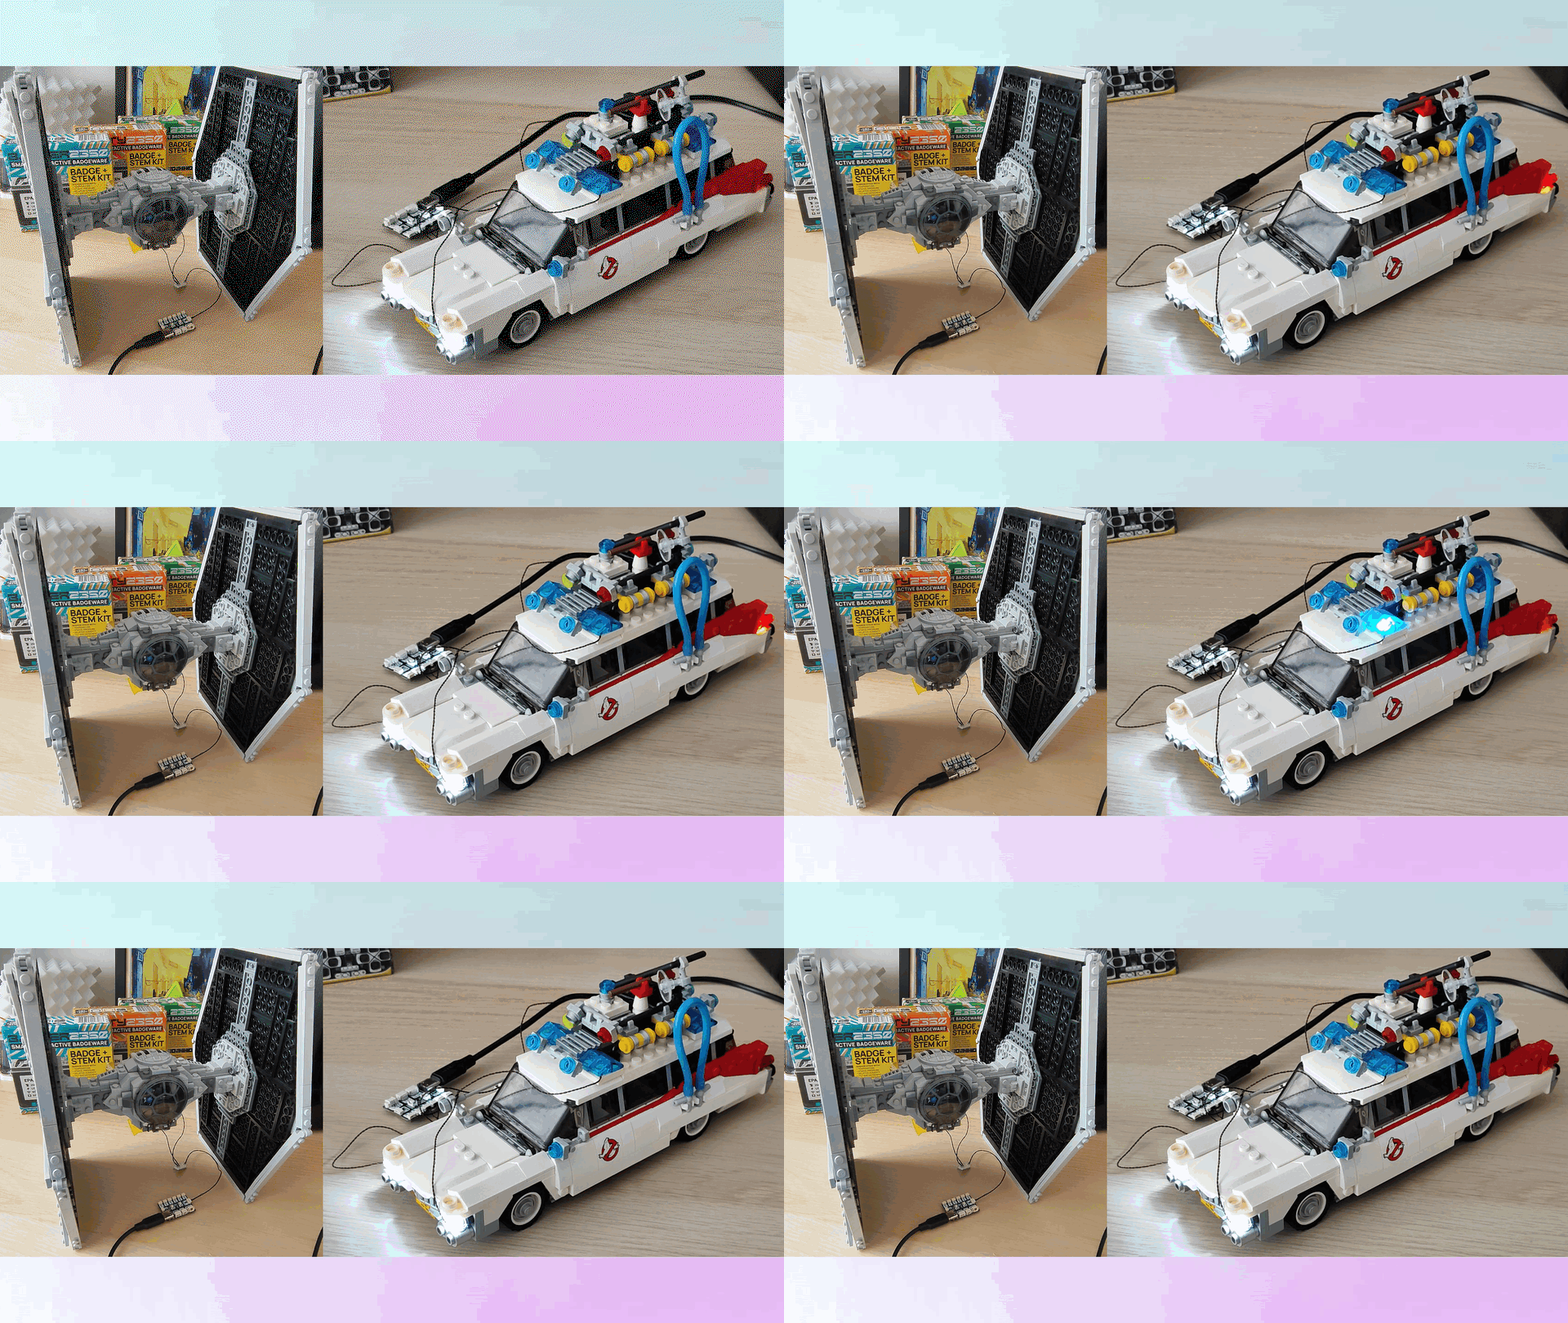
Our first project will use the single colour LEDs to create the lights for a model emergency vehicle: Ghostbusters ECTO 1. The second project will use the RGB LEDs to simulate laser blasts from a Star Wars Tie Fighter.
What You'll Need
- Tiny FX or Tiny FX W Starter Kit.
- 6 x LED "Dots" (Included in Starter Kits).
- RGB LED Kit (Included in Starter Kits).
- Optional: Mono LED expansion Board.
- Optional: 1 x 2 Pin cable.
- A computer running Microsoft Windows, macOS or Linux.
- Thonny installed on your computer.
Let's get started with picofx and learn what we can do with it.
Connecting The Dots
"Dots" are the name for the small single colour LEDs that connect to the numbered outputs. The connections between the dots and Tiny FX are called JST-SUR and they are very tiny so take care when using them.
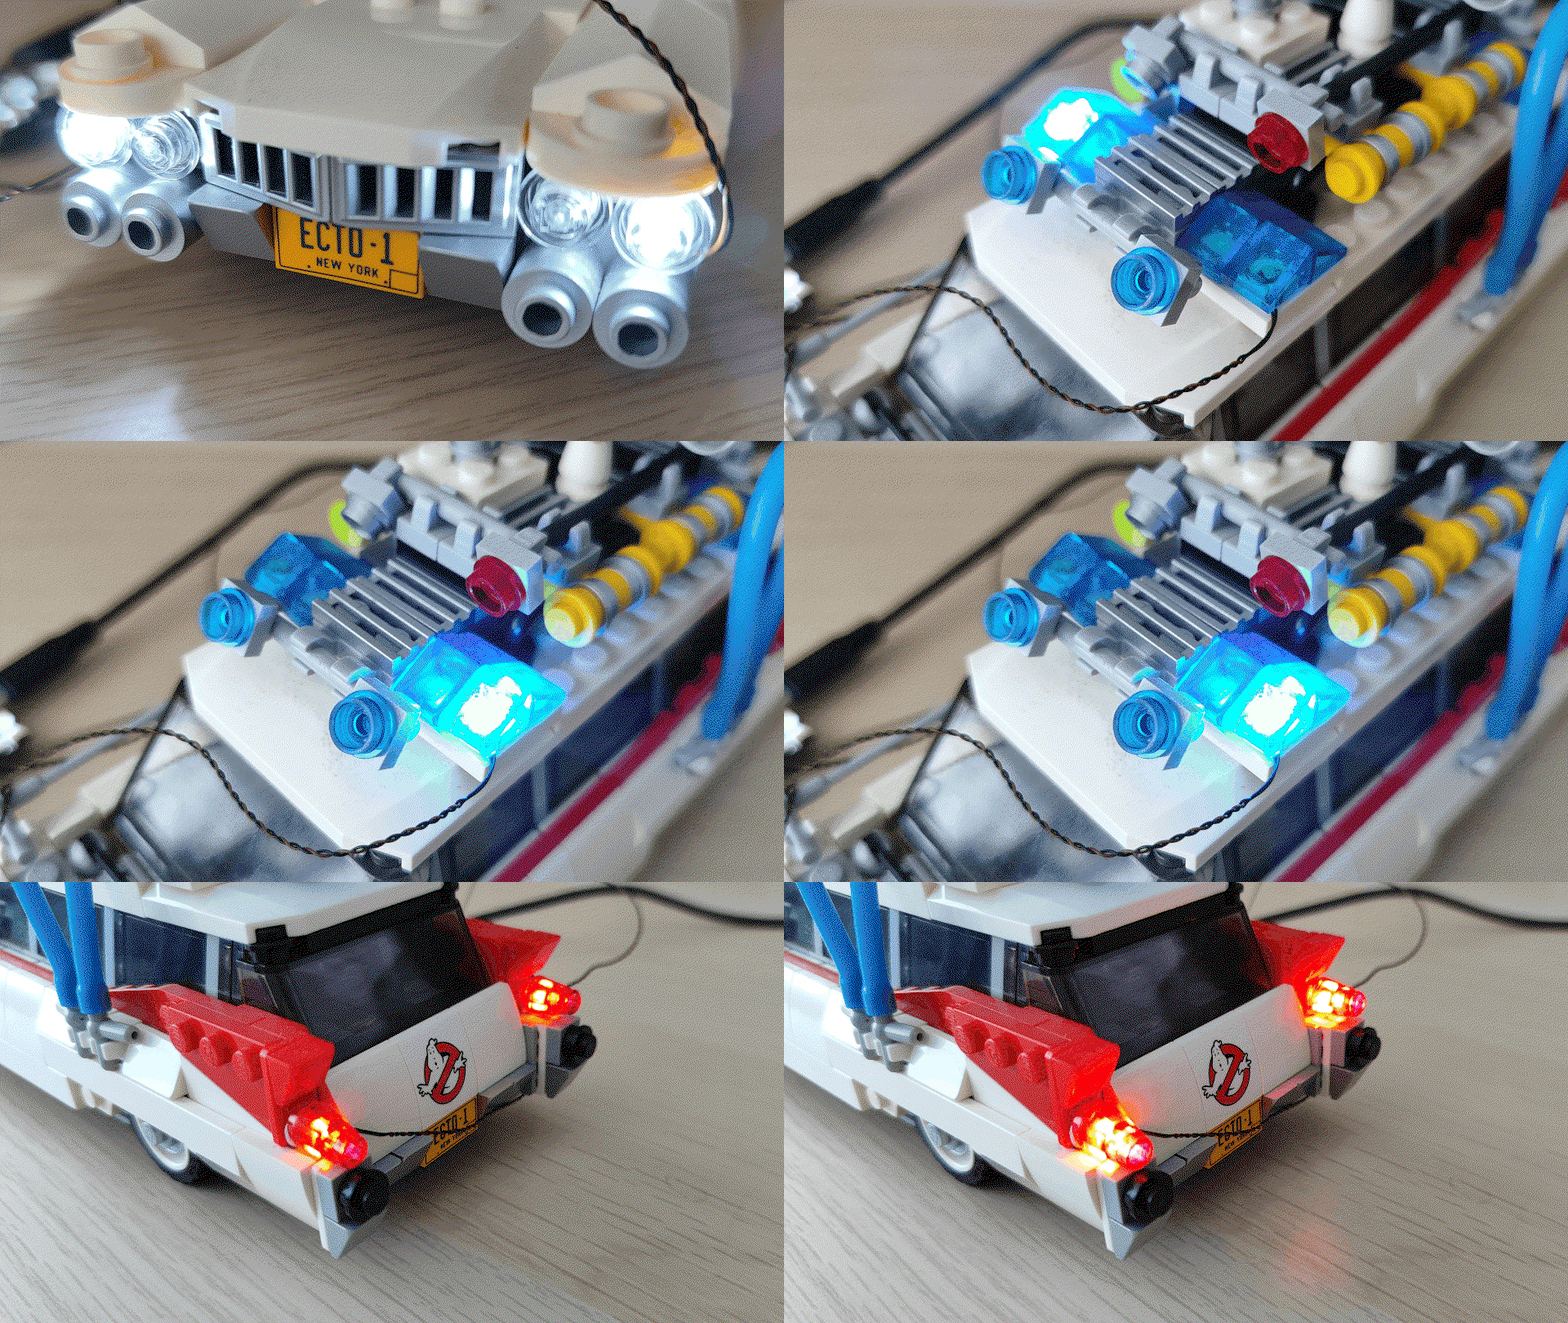
We shall connect six of these dots to our Tiny FX and use them as the lights for an emergency vehicle. In this case, ECTO 1 from the 1984 Ghostbusters movie. The dots will provide us with headlights, emergency lights, and hazard lights.
Before we can write any code, we need to wire everything up.
- Unplug Tiny FX from your computer / power source. You don't strictly have to do this, but it is good practice.
- Take a single dot and connect it to port 1 on Tiny FX. We suggest using tweezers to carefully insert the dot into the port. It can only go in one way.
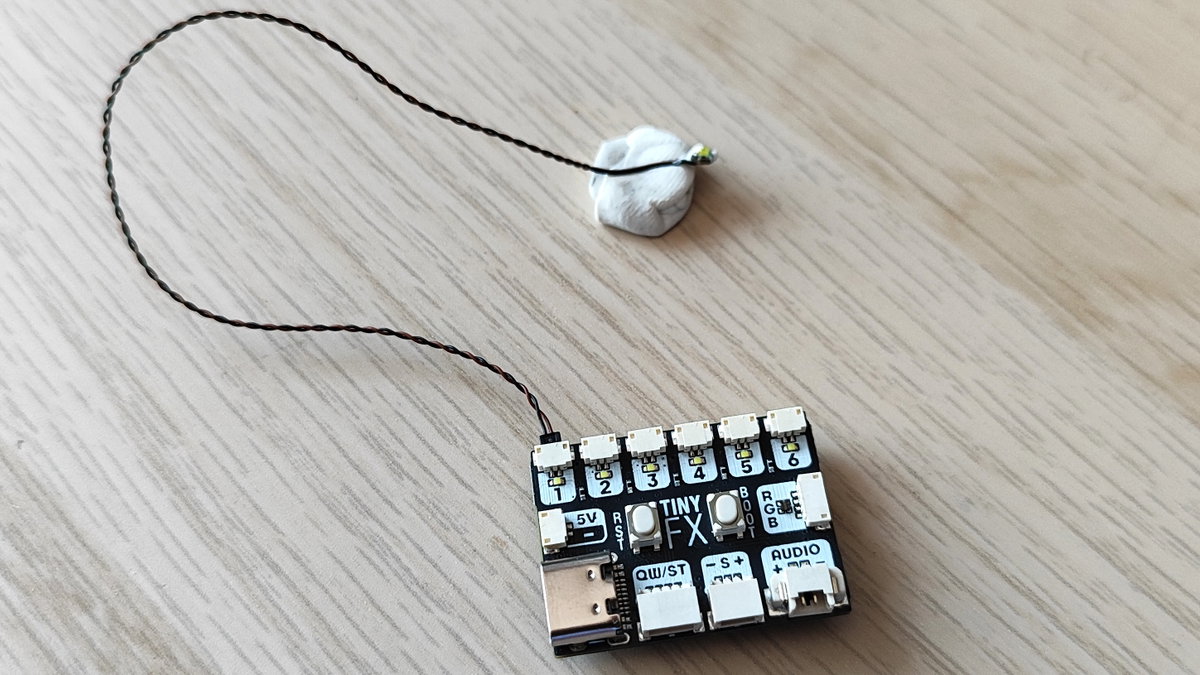
- Repeat this process five more times. We will be using all of the dots for this project.
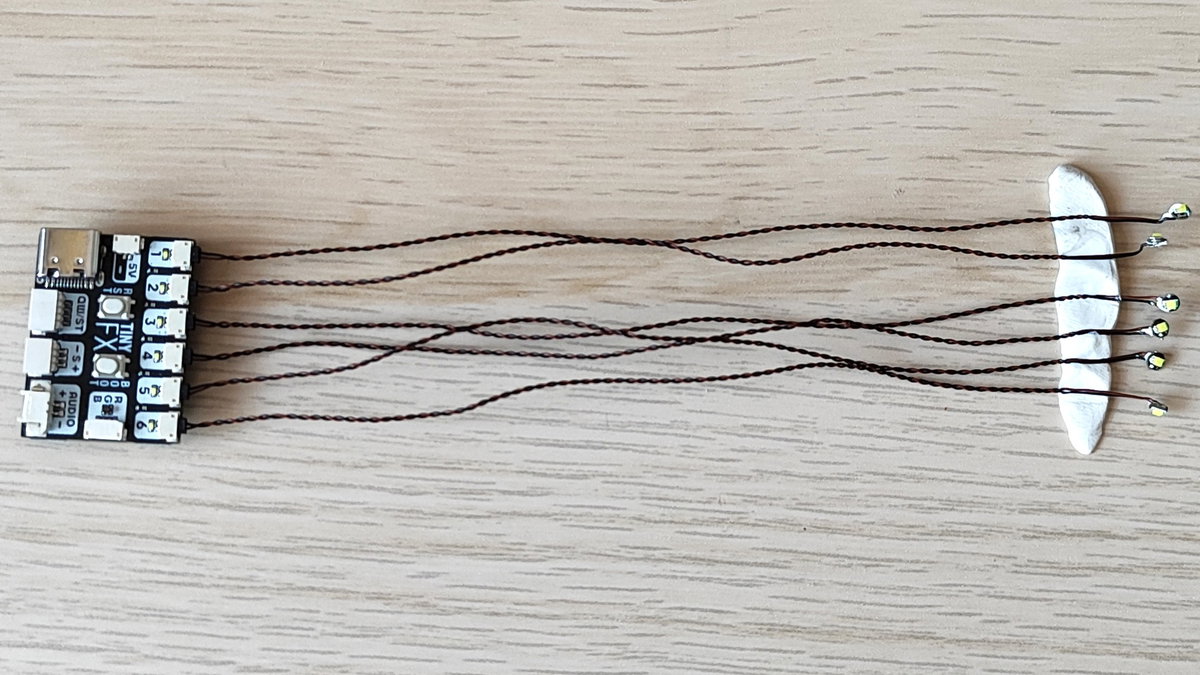
- Optional Step: Remove connection from output 6 and use extension cable and board to breakout additional LED output connections This could be useful if you need extra flexibility to hide your wires. Remember that we can only set an output to do one effect, no matter how many dots are connected to the expansion board.
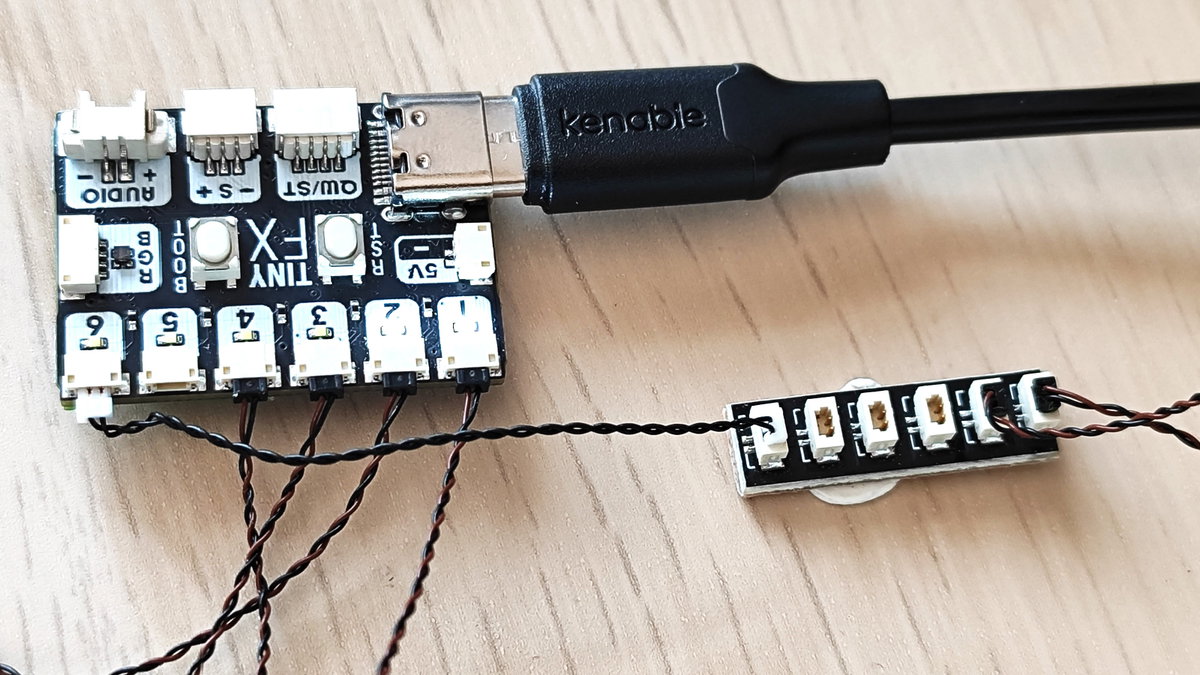
- Route the lights around your model, doing your best to hide the wires. We didn't hide the wires for our build, chiefly to illustrate that they are indeed connected, and because our model of ECTO 1 is fragile.

- Using a good quality USB Type C cable, connect Tiny FX to your computer and open Thonny. We assume that you have already gone through the steps in part one to set up Thonny.
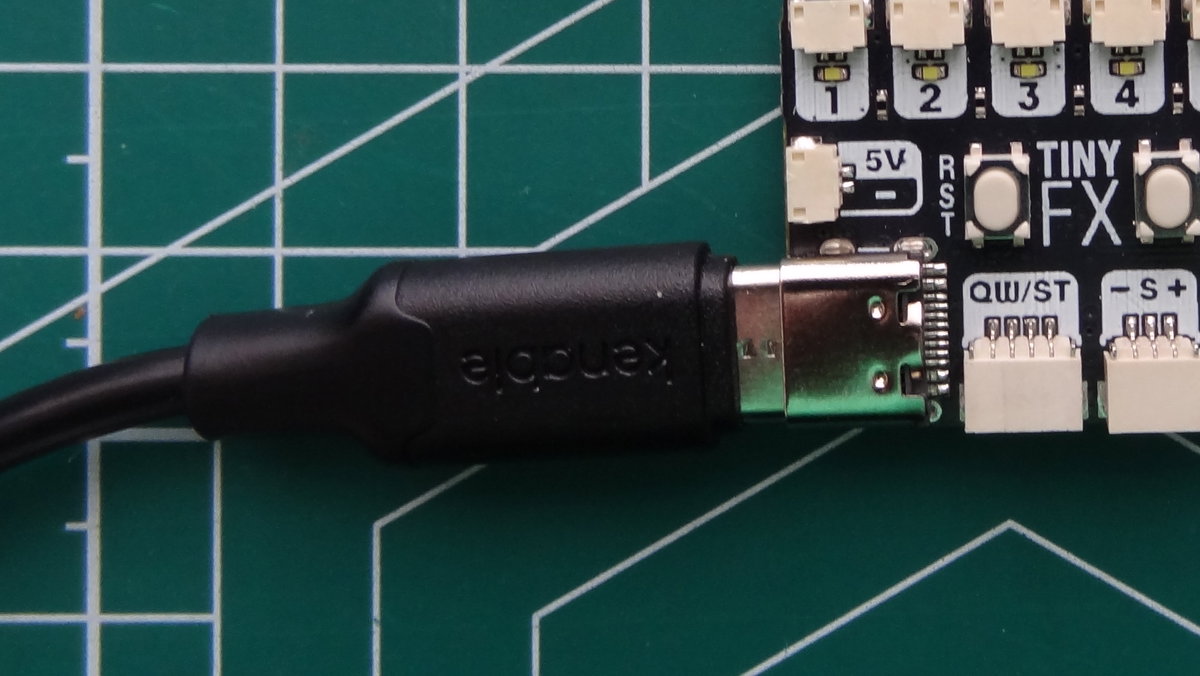
With the hardware connected, we now move on to the software. We will be using multiple LED effects from the picofx module.
For the single colour (mono) "dot" LEDs we can use any of these effects on single or multiple LEDs at once.
- Static
- Blink
- Flash
- Flicker
- Pulse
- Random
For this project we will be using the following:
- Static: for when we just need a constant light source, like our headlights.
- Flash: for turning LEDs on/off to create a flashing animation for the emergency lights.
- Pulse: To calmly fade the LEDs on/off so that they act as hazard lights.
If you just want the code, then all of the code for this project can be found here. If you want to understand what the code is doing, refer to each individual step.
Let's get started!
Click on
File >> Newto create a new blank file.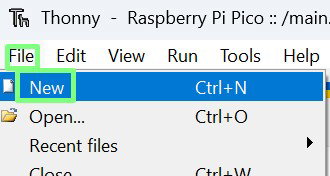
In the new file, import three modules (libraries) of pre-written code.
tiny_fx: Enables our code to interact with the Tiny FX board.picofx: Enables access to special Tiny FX functionality, in this case the single-colour LEDMonoPlayer.picofx.mono: Contains effects for single-colour LEDs, in this instance we import the static, flashing and pulsing LED effects.
from tiny_fx import TinyFX
from picofx import MonoPlayer
from picofx.mono import StaticFX, FlashFX, PulseFX
Create a variable (a named object that holds information) called
tinyfor easier use of thetinyfxmodule.tiny = TinyFX()Use another variable,
playerto create an easy way to use the effects insideMonoPlayerwith Tiny FX's outputs.player = MonoPlayer(tiny.outputs)Using
player.effectsset the first and second LED dots to simply turn on, then set three and four to flash with a half second delay between them. Finally set outputs five and six to pulse like hazard lights- The static LED
brightnesslevel is set between 0 and 1. So a value of 0.5 would be half brightness. - The
FlashFXflashing LEDs have a flashing speed of1.0for one second. Setting this to2.0would make the LEDs flash every 0.5 seconds. Thewindow, is the percentage of time in which the flashes are performed. Thephasecontrols when in the flash cycle the effect is performed, anddutyto control how long the flash is on for. - The
PulseFXpulsing LEDs have aspeedof one second, and thephasecontrols when they start pulsing, in this case at the start of the effect.
player.effects = [
    StaticFX(brightness=1), # Headlight 1
    StaticFX(brightness=1), # Headlight 2
    FlashFX(speed=1.0, # Flashing "blue" light 1
            flashes=1,
            window=0.2,
            phase=0.0,
            duty=0.5),
    FlashFX(speed=1.0, # Flashing "blue" light 2
            flashes=1,
            window=0.2,
            phase=0.5,
            duty=0.5),
    PulseFX(speed=1.0, # Hazard Light 1
            phase=0.0),
    PulseFX(speed=1.0, # Hazard Light 2
            phase=0.0),
]
- The static LED
Inside a
trystatement, start the effects player. This line instructs Tiny FX to control the LEDs when the code is run. Thetryis exactly what it says. It will try to run the code that is inside of it. If the code cannot be run, or it naturally ends, then later a correspondingfinallyis run which will ensure that Tiny FX is left in a good state before the code ends. Python uses indentation to identify code that belongs inside atry, a loop or function.try: player.start()Use a
whileloop to check that the player has been started, and theBOOTbutton has not been pressed. The effects player auto-starts the effects, and thewhileloop will constantly run as we are usingpassto tell the code to just carry on. The code can be stopped at any time by pressing theBOOTbutton.while player.is_running() and not tiny.boot_pressed(): pass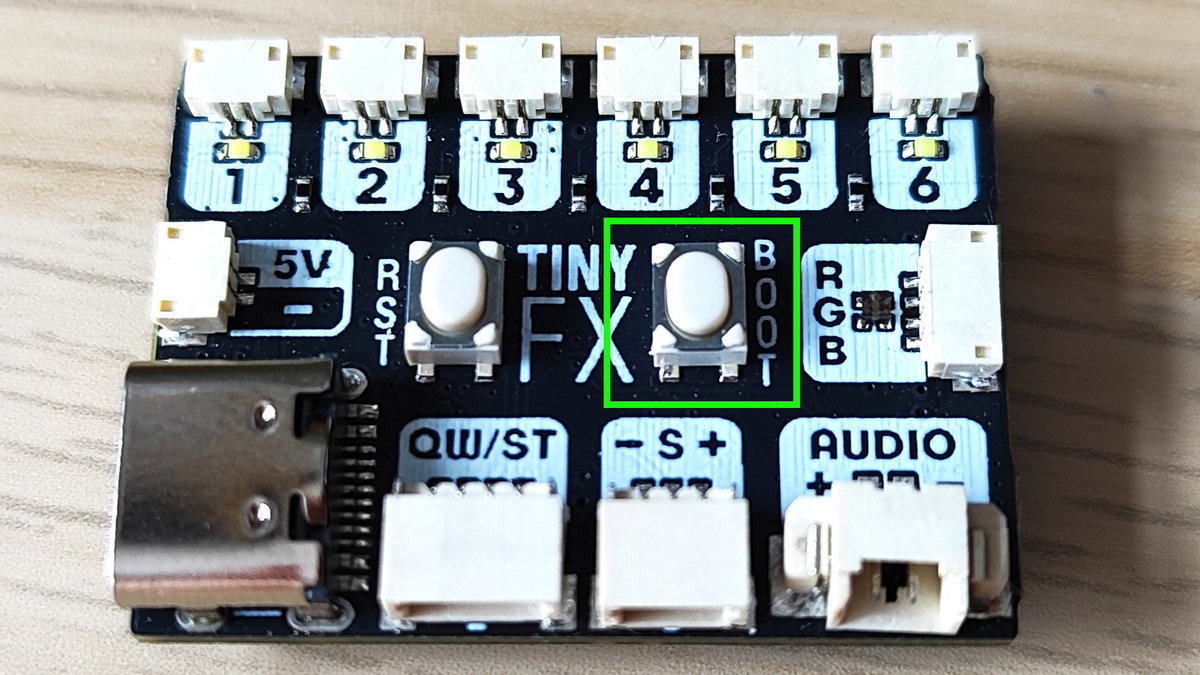
In a
finallysection, tell the effects player to stop, and shutdown Tiny FX. Thefinallyis the end of thetrythat we created earlier. Python calls this atry-finally statement. If the player is running and the user pressesBOOTthenfinallyis activated, as a means to clean up the code. It turns off the LEDs and cleanly shuts down Tiny FX in a controlled manner.finally: player.stop() tiny.shutdown()Check that your code looks like this:
from tiny_fx import TinyFX from picofx import MonoPlayer from picofx.mono import StaticFX, FlashFX, PulseFX # Variables tiny = TinyFX() player = MonoPlayer(tiny.outputs) player.effects = [ StaticFX(1), # Headlight 1 StaticFX(1), # Headlight 2 FlashFX(speed=1.0, # Flashing "blue" light 1 flashes=1, window=0.2, phase=0.0, duty=0.5), FlashFX(speed=1.0, # Flashing "blue" light 2 flashes=1, window=0.2, phase=0.5, duty=0.5), PulseFX(speed=1.0, # Hazard Light 1 phase=0.0), PulseFX(speed=1.0, # Hazard Light 2 phase=0.0), ] try: player.start() while player.is_running() and not tiny.boot_pressed(): pass finally: player.stop() tiny.shutdown()Click on
RUNto test that the code works. Click on STOP when you are happy that everything is working.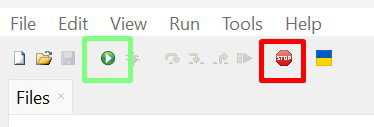
Save the code to Tiny FX as
emergency.py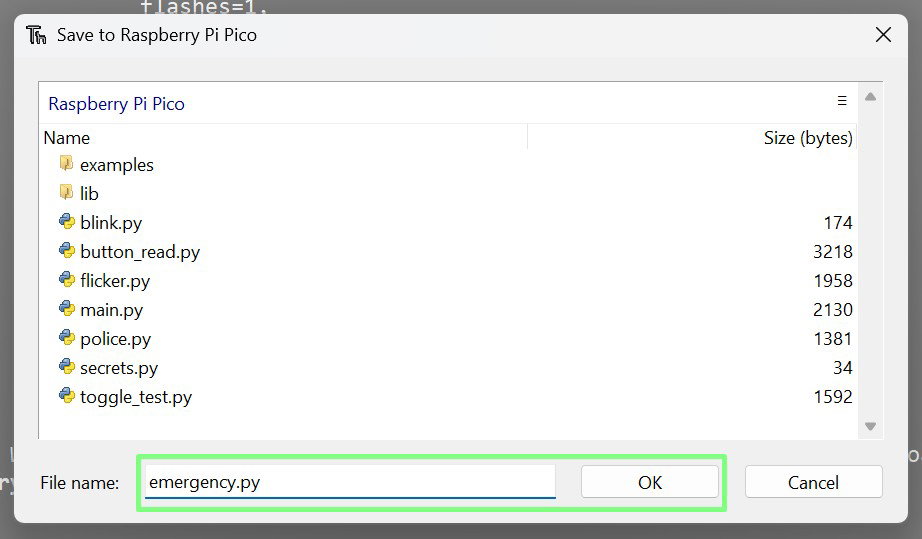
We have successfully created lighting for a model emergency vehicle. Now, we move on to create laser blasts for an Imperial Tie Fighter from Star Wars.
Using the RGB LED
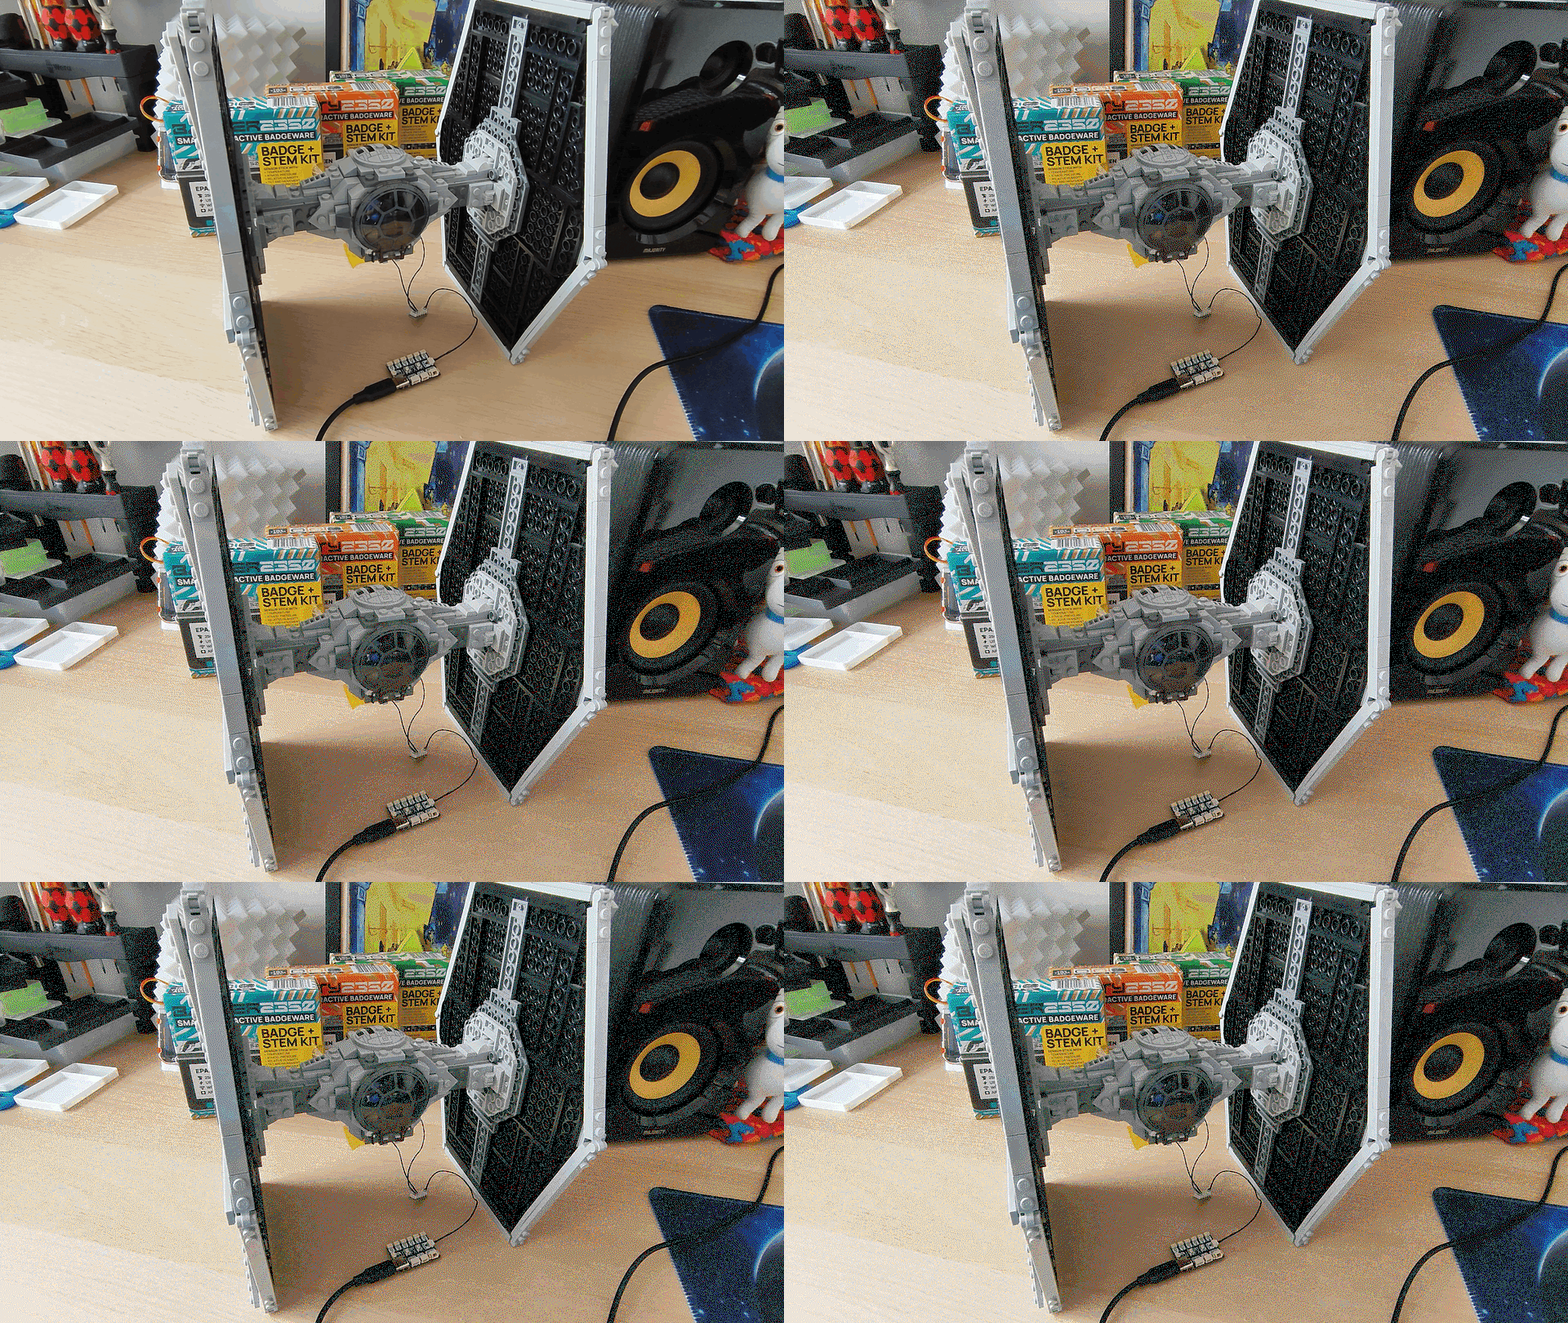
At the opposite end of Tiny FX's USB C port. there is a special RGB (Red, Green, Blue) port that is used with RGB LEDs. These LEDs use a mix of Red, Green and Blue light to mix the desired colour.
Using an expansion board we can connect up to five RGB LEDs to Tiny FX, and via software we can set all the RGB LEDs to a specific colour.
Note, these are not "addressable" LEDs. Addressable LEDs, like NeoPixels (WS2812) or Dotstar (APA102) are not compatible with Tiny FX, but they do work with Plasma 2350 W.
Using the same picofx module as before we now have access to RGB LED functionality for:
- Static RGB
- Static HSV
- Blink
- Rainbow
- Random
- Hue Step
We're going to use two RGB LEDs and Blink to light up the laser cannons on a Star Wars Imperial Tie Fighter. It will fire three bursts of laser fire, before pausing. The code will autorun when Tiny FX is powered up.
Connect the four-pin RGB extension cable into Tiny FX's RGB port.
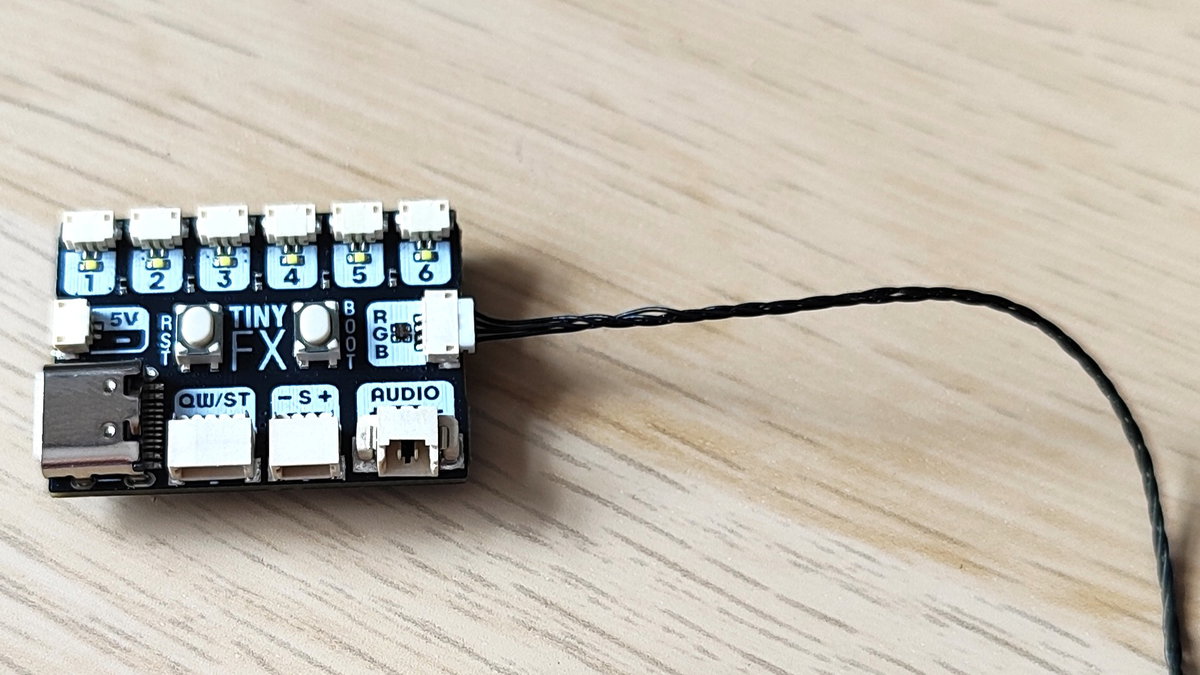
Connect the other end into the six port expansion board. Tiny FX now has access to multiple RGB ports.
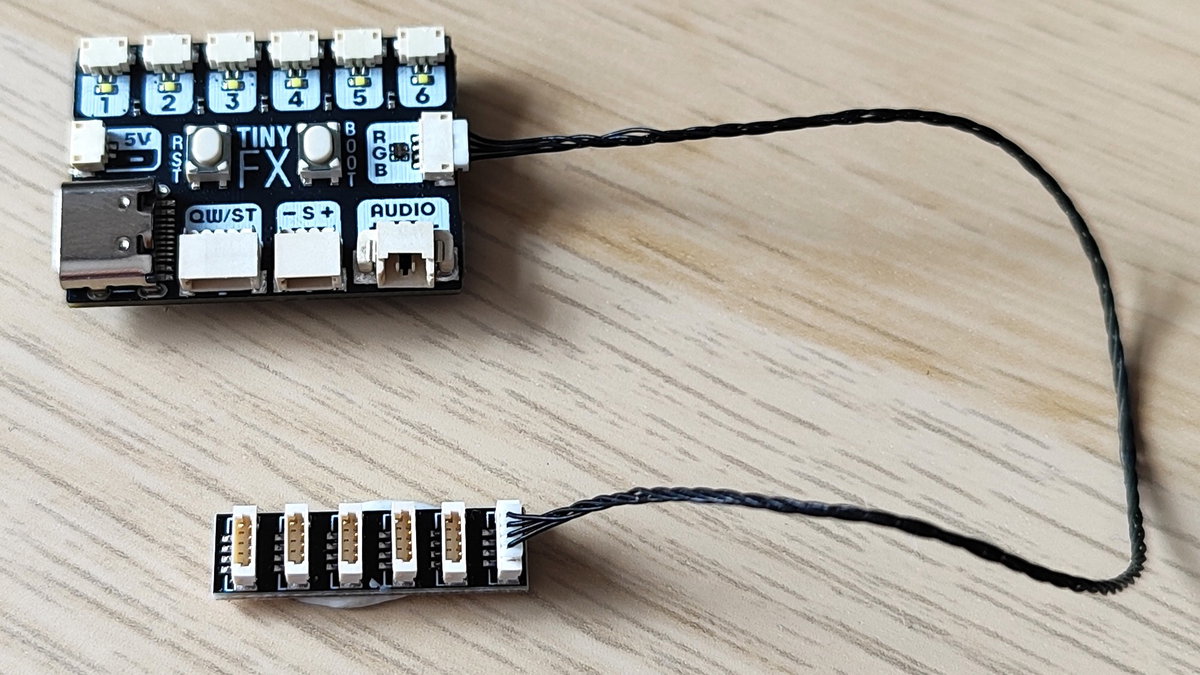
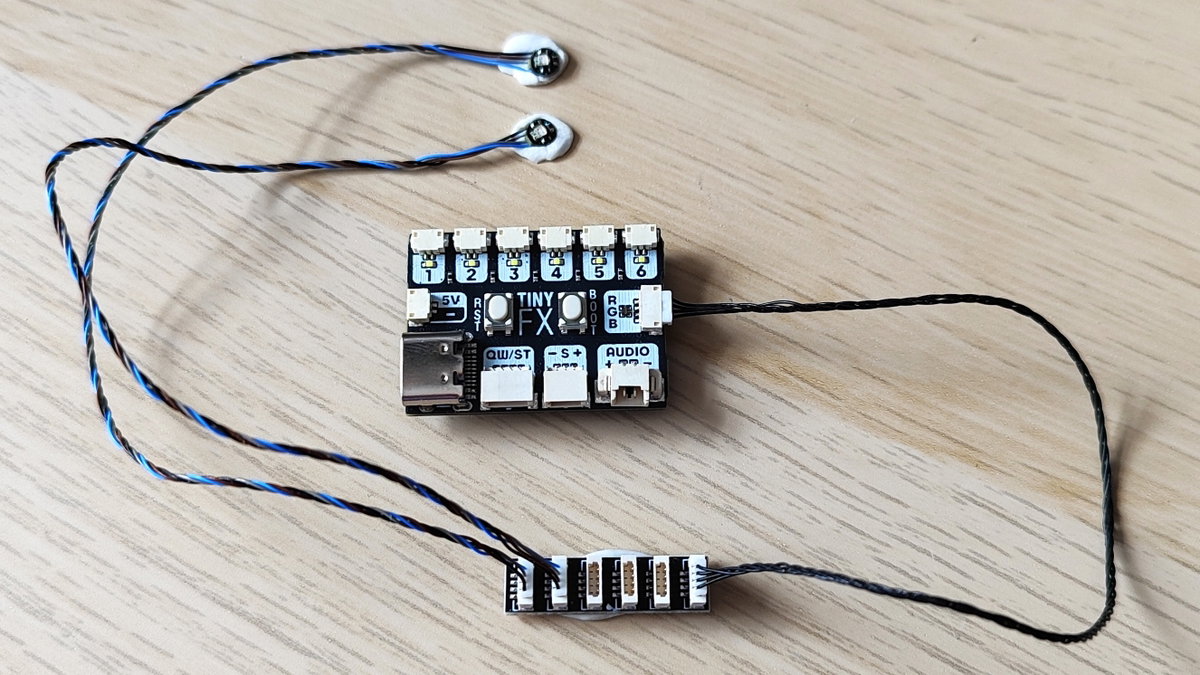
Insert two of the RGB LEDs into any of the spare expansion ports. This can be tricky so take time and use tweezers. Don't force the connector into the port, it should go in with very little effort.
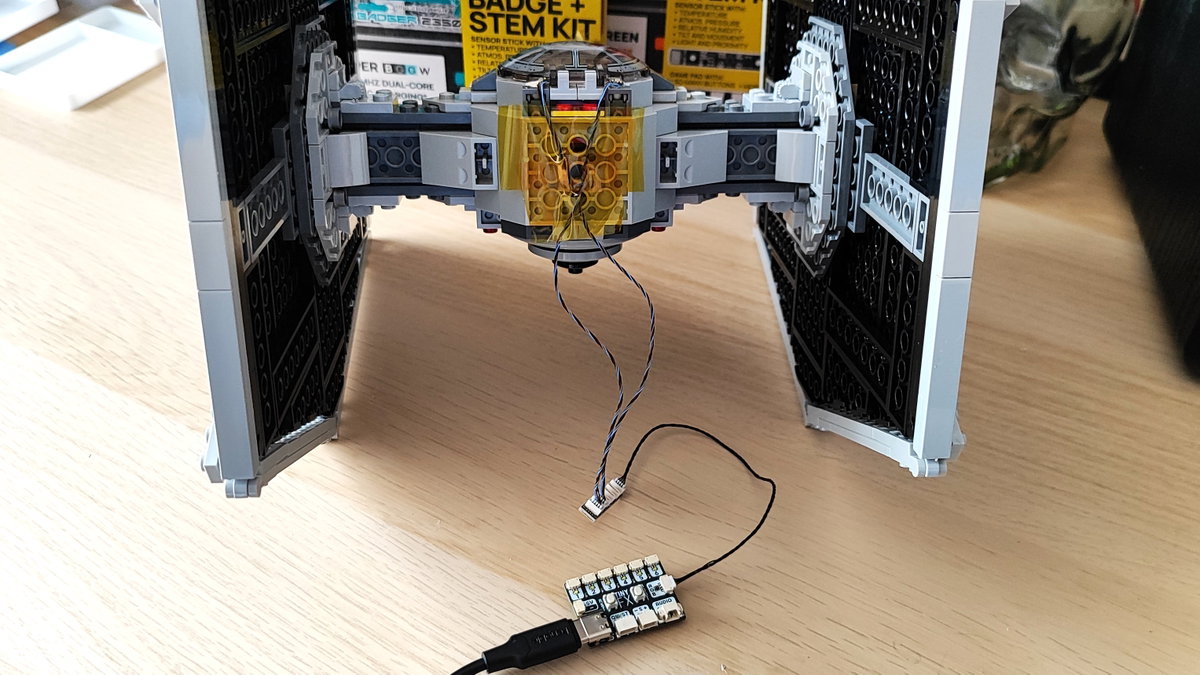
Now is a good time to attach the hardware to your model. Remember to leave access to the USB C port and enough cable length to reach your computer.
In Thonny click on
File >> Newto create a new blank file. If you just want the code, then all of the code for this project can be found here. If you want to understand what the code is doing, refer to each individual step.Import three modules (libraries) of pre-written code.
tiny_fx: Enables our code to interact with the Tiny FX board.picofx: Enables access to special Tiny FX functionality, in this case the multi-colour LEDColourPlayer.picofx.colour: Imports RGB LED colours that we can use withRGBBlinkFX.
from tiny_fx import TinyFX from picofx import ColourPlayer from picofx.colour import BLACK, GREEN, WHITE, RGBBlinkFXCreate a sequence of colours to display on the RGB LEDs. Essentially we are creating a list of colours that Tiny FX will show on the RGB LEDs. The sequence will use the white and green colours to light up the RGB LEDs as if the Tie Fighter is attacking another ship. Black will turn off the RGB LEDs. There are three groups of "WHITE, GREEN, WHITE, BLACK" which are used for rapid fire. Then there are 13 "BLACK" which will keep the RGB LEDs off after firing.
COLOURS = [WHITE, GREEN, WHITE, BLACK] * 3 + [BLACK] * 13Create a variable (a named object that holds information) called
tinyso that we can easily use thetinyfxmodule.tiny = TinyFX()Use another variable,
playerto create a means to use the effects insideColourPlayerwith Tiny FX's RGB output.player = ColourPlayer(tiny.rgb)Using
player.effectstell Tiny FX that we are using the RGB LEDs, and that it should use the colours stored inCOLOURSand that the delay between each colour change is 0.1 seconds.player.effects = RGBBlinkFX(colour=COLOURS, speed=1/0.1)Inside a
trystatement, start the effects player. This line instructs Tiny FX to control the LEDs when the code is run. Thetryis exactly what it says. It will try to run the code that is inside of it. If the code cannot be run, or it naturally ends, then later a correspondingfinallyis run which will ensure that Tiny FX is left in a good state before the code ends. Python uses indentation to identify code that belongs inside atry, a loop or function.try: player.start()Use a
whileloop to check that the player has been started, and theBOOTbutton has not been pressed. The effects player auto-starts the effects, and thewhileloop will constantly run as we are usingpassto tell the code to just carry on. The code can be stopped at any time by pressing theBOOTbutton.while player.is_running() and not tiny.boot_pressed(): passIn a
finallystatement, tell the effects player to stop, and shutdown Tiny FX.finallyis the end of thetrythat we created earlier. If the player is running and the user pressesBOOTthenfinallyis activated, turning off the LED and shutting down Tiny FX.finally: player.stop() tiny.shutdown()Check that your code looks like this.
from tiny_fx import TinyFX from picofx import ColourPlayer from picofx.colour import BLACK, GREEN, WHITE, RGBBlinkFX COLOURS = [WHITE, GREEN, WHITE, BLACK] * 3 + [BLACK] * 13 tiny = TinyFX() player = ColourPlayer(tiny.rgb) player.effects = RGBBlinkFX(colour=COLOURS, speed=1/0.1) try: player.start() # Start the effects running # Loop until the effect stops or the "Boot" button is pressed while player.is_running() and not tiny.boot_pressed(): pass # Stop any running effects and turn off all the outputs finally: player.stop() tiny.shutdown()Click on
RUNto test that the code works. You should see the RGB LEDs blink three times before a short pause.Click on
File >> Saveand save the file asmain.pyto your Tiny FX (which Thonny calls Raspberry Pi Pico). In Part One we learnt that saving our code asmain.pywill tell Tiny FX to run the code when powered up.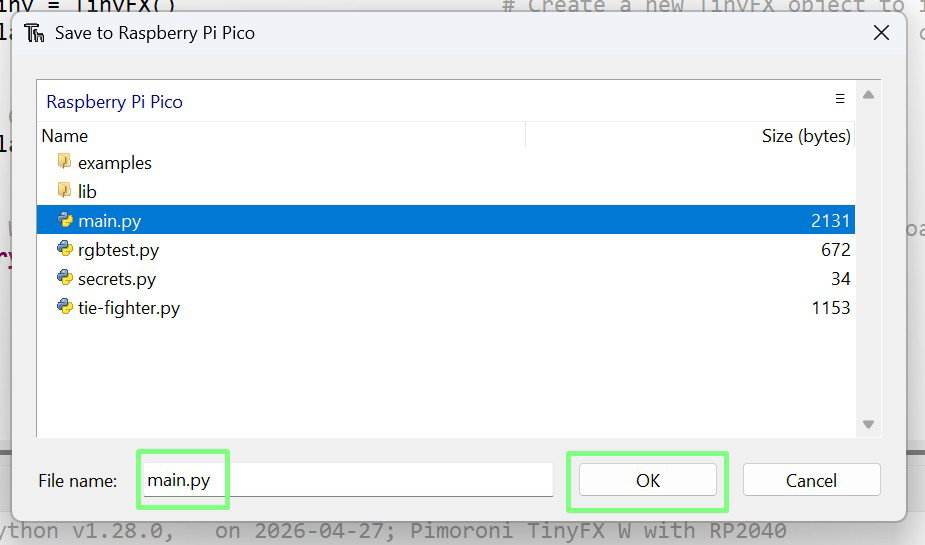
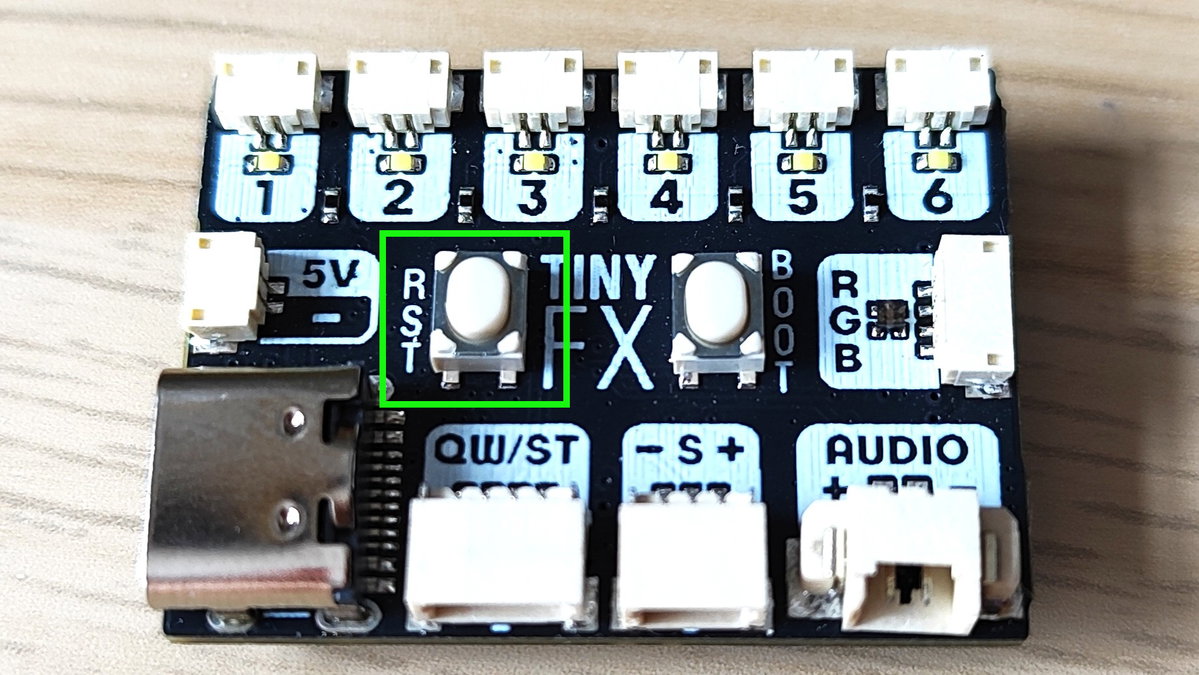
Press RST (Reset) on Tiny FX and the light show should automatically begin.
What Have We Learnt?
- How to use single-colour LEDs with Tiny FX.
- How to use RGB LEDs with Tiny FX.
- How to use the expansion board with multiple RGB LEDs.
- How to run code automatically using
main.py.
Complete Code Listing
emergency.py
from tiny_fx import TinyFX
from picofx import MonoPlayer
from picofx.mono import StaticFX, FlashFX, PulseFX
# Variables
tiny = TinyFX()
player = MonoPlayer(tiny.outputs)
player.effects = [
StaticFX(1), # Headlight 1
StaticFX(1), # Headlight 2
FlashFX(speed=1.0, # Flashing "blue" light 1
flashes=1,
window=0.2,
phase=0.0,
duty=0.5),
FlashFX(speed=1.0, # Flashing "blue" light 2
flashes=1,
window=0.2,
phase=0.5,
duty=0.5),
PulseFX(speed=1.0, # Hazard Light 1
phase=0.0),
PulseFX(speed=1.0, # Hazard Light 2
phase=0.0),
]
try:
    player.start()
    while player.is_running() and not tiny.boot_pressed():
        pass
finally:
    player.stop()
    tiny.shutdown()
main.py (RGB LED for Tie Fighter)
from tiny_fx import TinyFX
from picofx import ColourPlayer
from picofx.colour import BLACK, GREEN, WHITE, RGBBlinkFX
COLOURS = [WHITE, GREEN, WHITE, BLACK] * 3 + [BLACK] * 13
tiny = TinyFX()
player = ColourPlayer(tiny.rgb)
player.effects = RGBBlinkFX(colour=COLOURS, speed=1/0.1)
try:
player.start() # Start the effects running
# Loop until the effect stops or the "Boot" button is pressed
    while player.is_running() and not tiny.boot_pressed():
        pass
# Stop any running effects and turn off all the outputs
finally:
    player.stop()
    tiny.shutdown()